
Stripping up the side to the chine.
Tools:
- Adjustable Temperature Professional Heavy Duty Hot Glue Gun - http://amzn.to/2nSK3OW 3M #2060
- Masking Tape: http://amzn.to/2CeLOdF
Music: Jeremiah's Song - Dan Lebowitz
[Music]
hi welcome back of the shop yesterday
we put some accident strips along the
water line and define the transition
from the top side of the boat to the
bottom side of the boat and I got one
strip on of the bottom wood but
technically I'm not really on the bottom
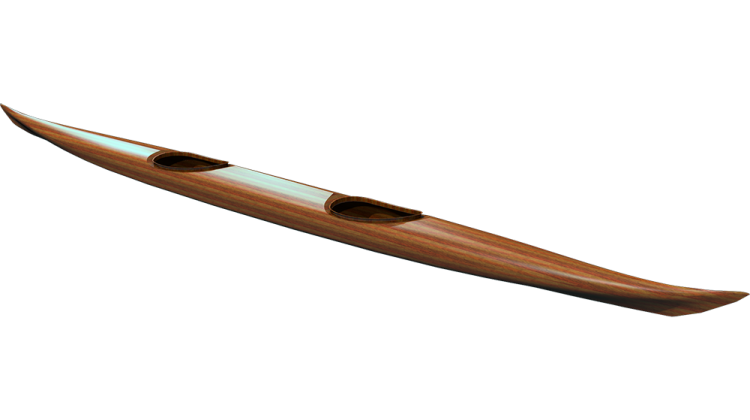
yet the micro bootlegger sport has a
chine which is a transition from the
side of the boat to the bottom of the
boat and it's a hard chine where it's a
fairly sharp angle and it's not really
possible to strip around that
continuously so you need to strip up
past it and then trim it off again just
like we did at the water line so mark
that line and trim it off I found they
forgot to put the marks for where that
shine line is going to be on the forms
so don't have a guide to go by as far as
marking the line on the outside of the
strips when it comes time to trim that
off so I made a little jig to draw that
diagonal line onto the forms so that's
going to be the first step of the
process after drawing that mark I will
continue stripping up the sides again
until we're past that line here's the
chine of the boat so we have the side
coming up and then we start on the
bottom and as you see it's a fairly
sharp angle right here and if we try to
strip around it it's just unless we're
really lucky and it lands right in the
right place it's not going to work and
the height from here to here on each
form changes slightly and as we get up
here the chine starts to soften and as
we go forward it gets much much softer
it's a little bit sharper back here and
then it softens again back at the end so
since that's changing in height the best
procedure is to just strip on past that
and then come back and cut it off
when we were marking the water lines I
had this little jig that I could put
down here and show where the water line
was by transferring this line on the
forms to the outside of the strip and
then we made that mark cut it off and
installed our accent strips right there
I forgot to put any line here so what I
ended up doing is making this little jig
this registers against the aluminum on
the bottom and this edge here against
the far side of the slot so if I put
that in there down against the strong
back and up against that slot now I have
a way to mark alarm so I can establish
that line on the forms and that's right
there
and when I come to do the stripping I
can lay this jig against that and use
that to transfer that line to the
outside of the strips wherever these
strips mele so I need to go through and
do that on all the forms both sides it's
easier to do it now than it is to do it
later once they get the strips on there
you know that will start interfere with
this jig so I'm going to go ahead and do
that to all the forms
you
and securest thing that this diagonal
line does not intersect that point right
there it's seen that I'm trying to make
a line that's going to intersect where
this is so when I go and trim the strip
it ends up being right even with that
little corner right there what we aren't
taking into account is the fact that the
strips have thickness and so if we put
the strips here well will end up
happening is this diagonal line will end
up being where these two strips meet at
the outer edge what I can do to help
illustrate that is I'm just going to cut
the corner off these scrap strips all
right so now I've put a real bevel on
those strips so now if I place them here
you see that line ends up intersecting
at the outer edge of the strips of the
boat so that's why the line does not
intersect at that point if we look at
this swarm from the other side we'll see
another thing that sort of illustrates
what's going on there and if we look at
it from this side you see this corner
right here just is peeking out under the
jig in this diagonal line I've created
does not intersect that point we're
trying to make a line that intersects
where these meet out here if you look at
my little clamping groove here you see
it's not on that diagonal line either
the this line and this line are parallel
to this line and this line so you end up
with this offset down there now if you
look at that the line that those create
and connect them all together and this
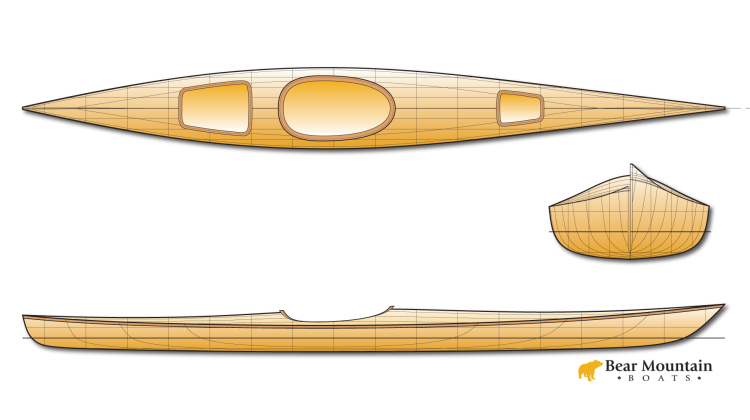
is a line I sometimes I often have on my
forms if you buy the planes for this
boat it would have this little diagonal
line right there drawn on it it would be
a little short hash mark there plus it
would have this long diagonal shown on
it and again those two lines actually
intersect right out here on the outer
surface of the boat so those lines meet
out at this corner what this line here
is useful for is obviously these strip
aren't gonna meet well like this without
a bevel you end up with an open groove
you could just bevel one side and get it
quite a bit tighter fit but what happens
is then one side overhangs the other and
when you go to playing that smooth you
get a thin spot in the boat this
diagonal line here is kind of a miter
between this surface and that surface
it's the same way you might have two
pieces of wood to make a picture frame
so the corners meet evenly we could do
the same thing here and cut from this
point out to this point and make a miter
it wouldn't be a 45 degrees it would be
a bisection of this angle whatever this
greater angle is this is half of that on
either side so there's times I say will
bisect the angle and that's what's going
on right there
it's a sanity check we can see if we can
get our eyeball right on the plane of
these lines so they all line up and look
like they create one continuous line so
if I stick this stick right along that
reference diagonal line it should end up
that this diagonal right here is right
on that line and this one right here
this one right here and this one right
here so we ought to be able to eyeball
down the whole length of YZ and find
this diagonal this diagonal is something
I design into the boat it's integral to
the planes now it's time to add the next
strip so the first thing to do is get
the top edge of this beveled correctly
to accept the next strip on the stack
[Music]
we've got stripped my number seven here
of the bottom material and we're just
going to be adding on this side remember
with the book matching of the bottom
material we took every other strip and
put it on either side of the centerline
and so all the odd stuff is on this side
and all the even strips are on that side
and now we have these reference lines
here that'll help us line the grain up
so if I just slide this down until those
line up
we know that the grain is going to be in
the line I want to go down with this dry
fit make sure I have a tight fit I'm
satisfied with the fit I can take the
strip off and glue it up
[Music]
feeling the tape up can sometimes be a
hassle usually just can rub your thumb
across it or if you have a little flag
sticking up on the back peel it up from
the back you need to dig into it a
little bit and rub your thumb across it
there's a little flag sticking up as we
continue stripping up the sides to the
chines
we don't need to strip beyond the chine
and here this would be one more strip
and then we're a little bit past the
chine we want to go passive chime but we
don't need to keep on going past so we
want to go a little bit past and so here
we'd need two more strips here of one
strips probably going to do it here
we're well past down here we probably
don't need to do anything you if you see
that line here we're looking for where
that plane intersects the edge of the
strips and we want to make sure we're
fully past that line but we don't need
to go well beyond it just make sure that
line is covered and so then when we come
back and trim to this line we don't have
any gaps along the way some of these
strips we can cut a little bit shorter
as we put them up we don't need to go
all the way down to the ends if we're
eventually gonna just saw that off
anyway so we'll be a little bit
reasonable on how we cut these off just
to make sure we've fully covered that
line but aren't going unreasonably far
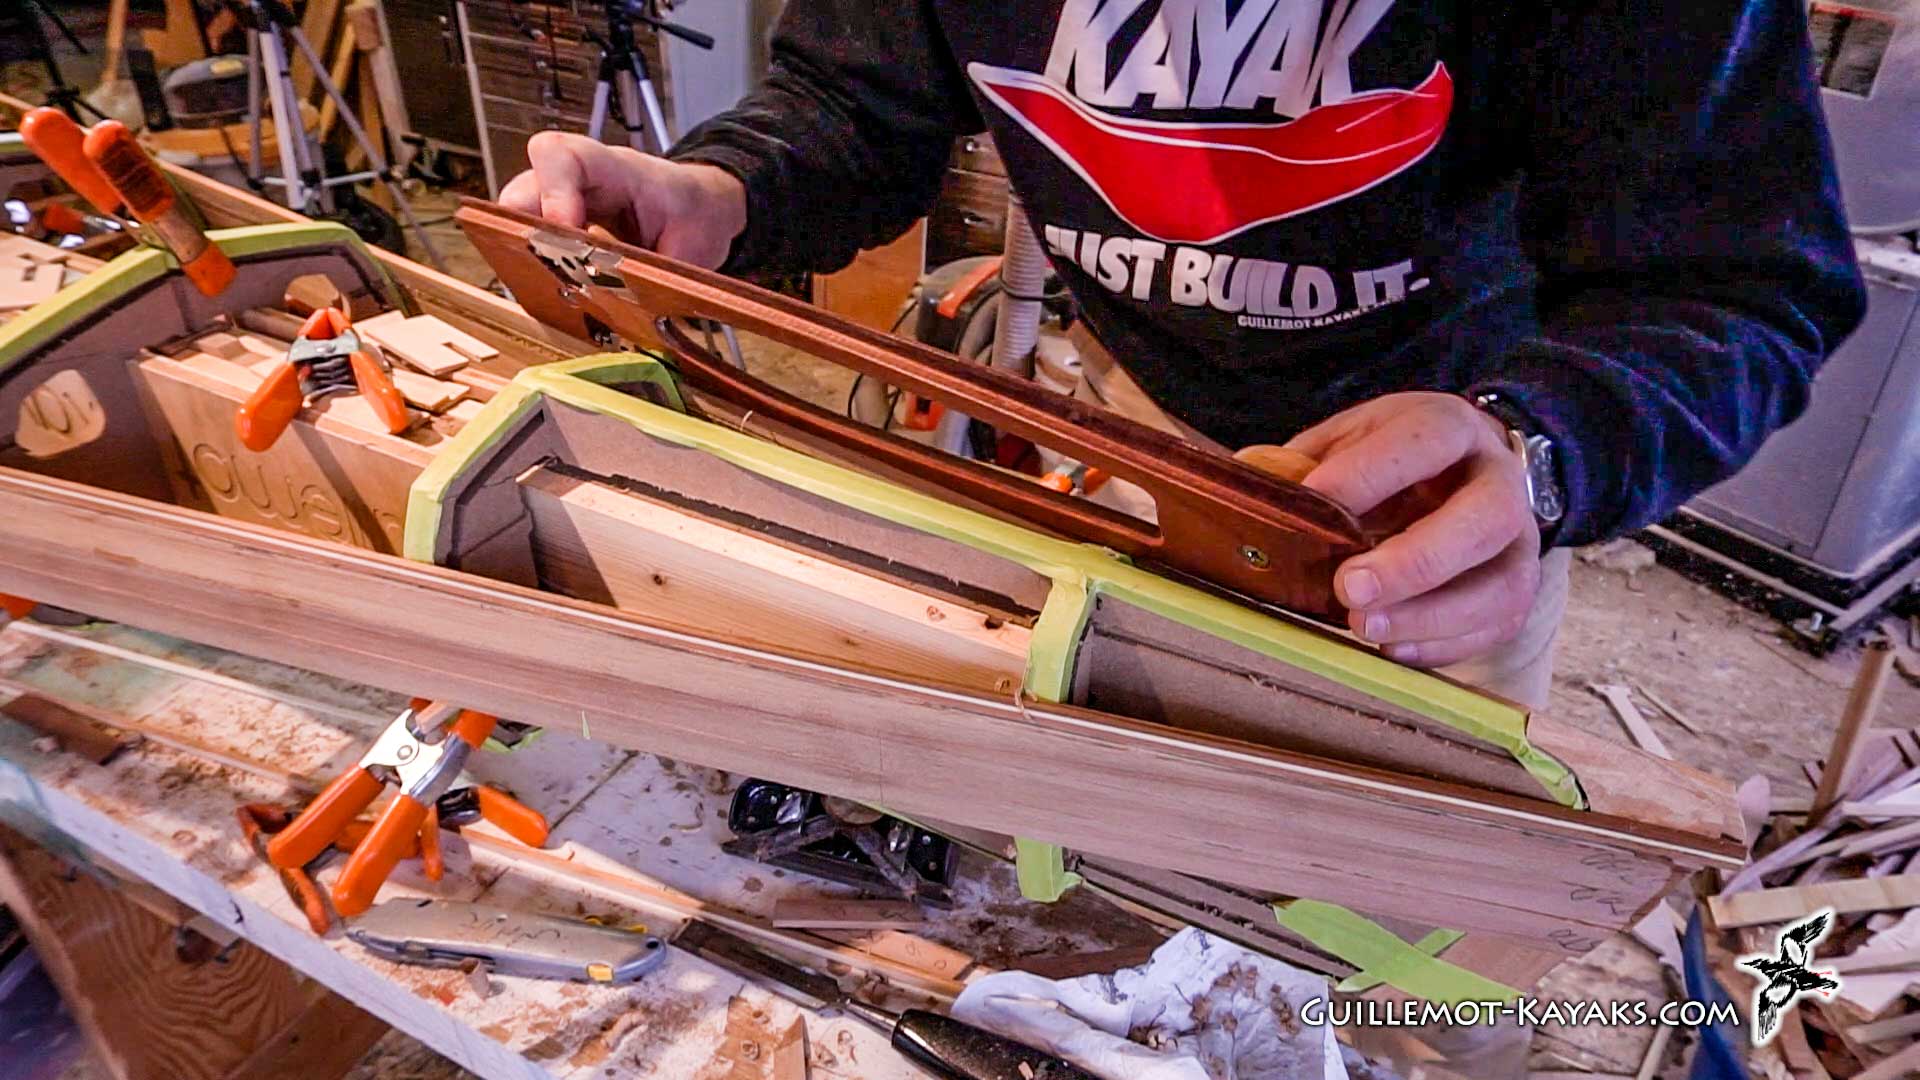
past that line so I'm now ready to do
the beveling on the top of this strip
and related to the fact that we're not
going past the chine here unreasonably
we don't need to try and wrap it around
the corner here even though the forms
are already starting to fold over if I
tried to wrap this strip around I'm not
actually getting the shape I want the
only part of this strip that's going to
be used is the stuff down here just up
to the chine so we don't need to try and
wrap it over
and particularly back here we don't need
to wrap it over so in the process of
doing our beveling here we're not going
to try and lay the Robo bevel down like
this past that we're going to use this
angle defined here at the top and just
continue that and so basically there's
not much beveling required here at all
and none out here this will be cut off
so we're just trying to get a tight fit
in this region down beyond here we'll
start to follow these forms again
[Music]
[Applause]
[Music]
until this point my schedules had
something like lunch just whatever right
after I've put on a strip
it's just worked out that way but at
this point I just put on this strip and
I want to put another strip on here
often I can put one strip on here then
put another strip on the other side and
by the time I come back to this side the
glues already dried but at this point
I'm just stripping one side because I'm
trying to get past the center line and
then when I'm done stripping this side
I'll cut that center line and then strip
in from the other side so I'm only going
one strip at a time on this side and so
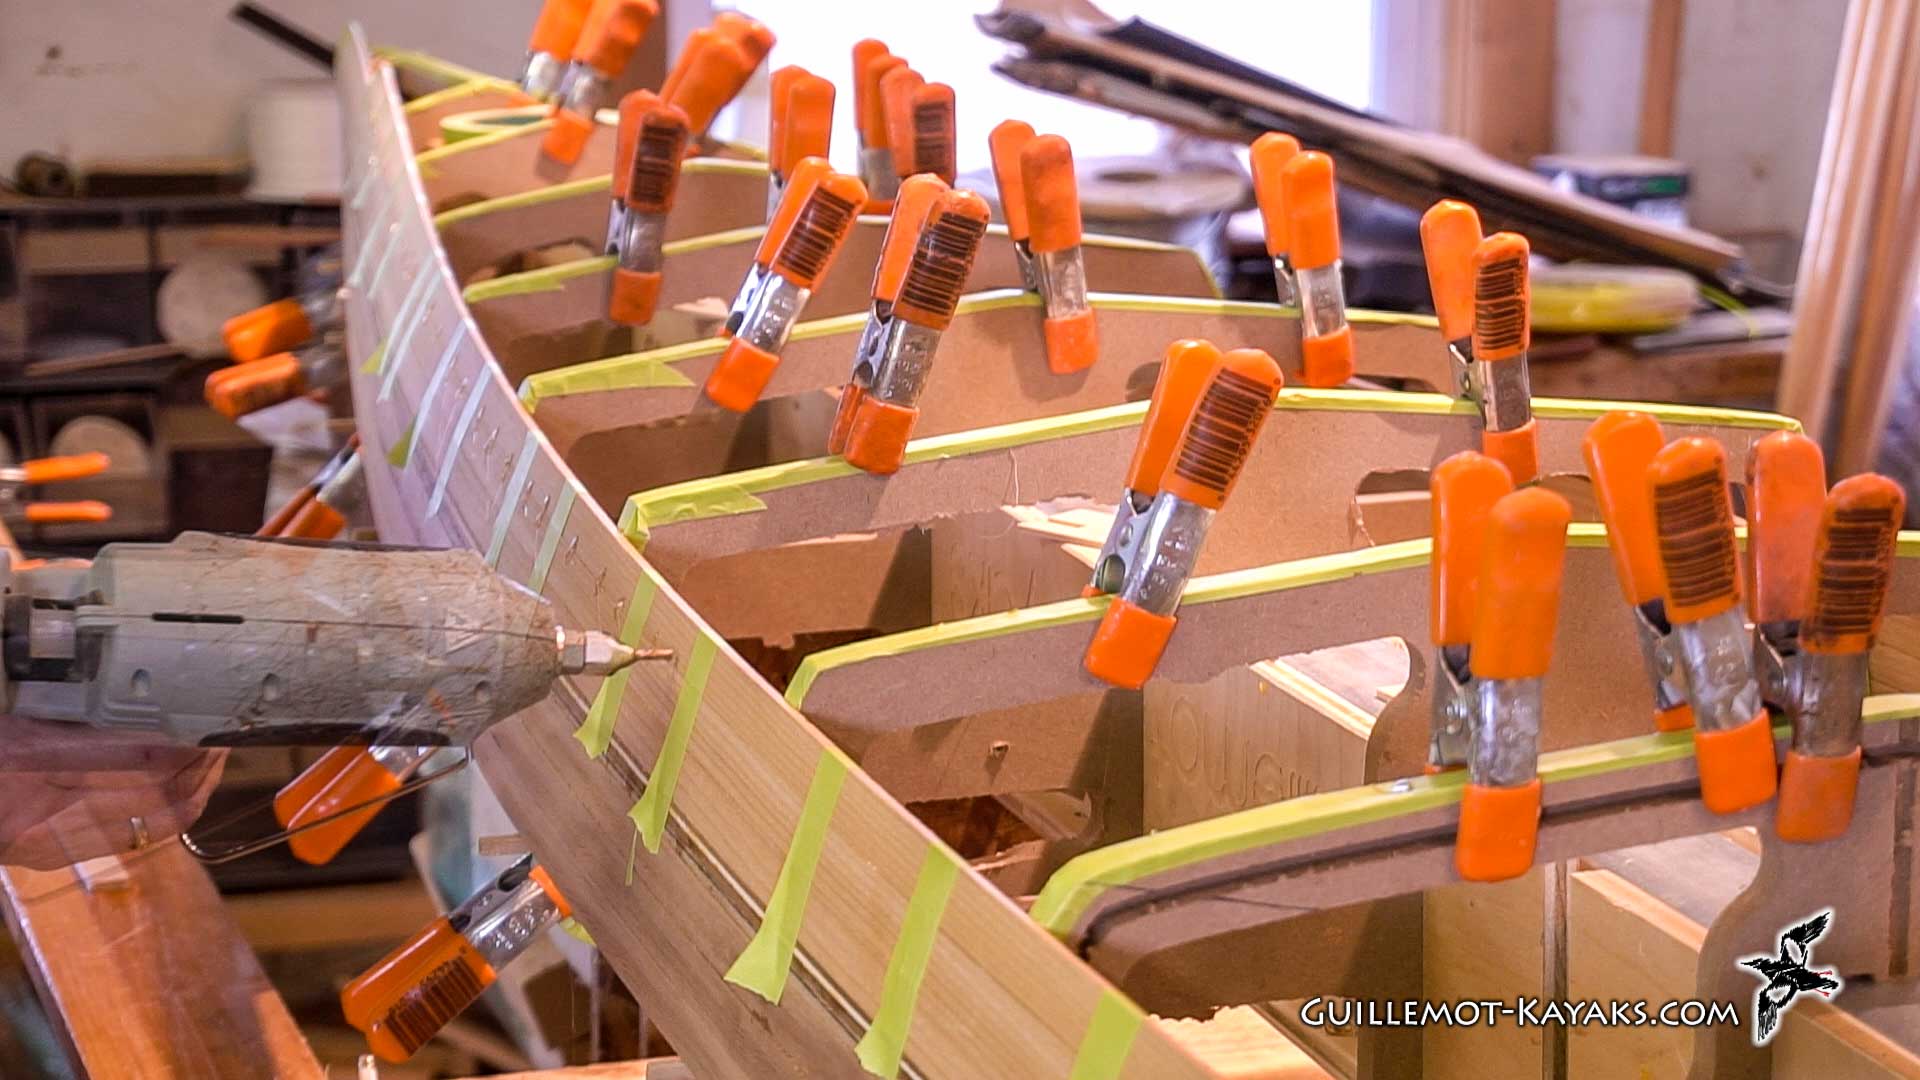
I'd like to be able to put another strip
on right now but I can't because I've
got all these clamps on and all those
tapes in the way so what I can do now is
I can substitute hot melt glue for the
clamps and put some little hot melt
stitches in between and well it's all
tight let that hot melt glue cool
and get hard and so it'll continue to
hold it in place and after it's hard
then I can peel off the tape first I'll
just pop a clamp off inject a little hot
melt glue behind it press it down and
move down the line taking one clamp off
at a time after that I'll come back with
the stitches of hot melt glue and then
once I've done with that then I'll come
back and peel off the tape just pry it
up a little bit
inject the tip under there just a small
dot like an eighth of an inch squeeze it
tight and since the forms are beveled to
match the taper of the boat this ends up
with a very tight fit there and so it
cools off quickly and has a good bond
there
when it's cooled completely I'll come
back and trim off that squeeze out
I'm not going to glue it to this front
form it'll just make it hard make the
forms harder to get out now I'll just
come back and put a quick little bead of
glue across that joint between the
strips right now this has no holding
power but with the tape they're clamping
it tight while I'm going it doesn't the
this doesn't need to do anything until
it's cooled off and then it'll serve to
help hold those strips tightly together
while the glue dries one reason I use
yellow carpenters glue so tacks up
really quickly in a tight seam like this
and you know the ten minutes has taken
me to do this it's really got a lot of
strength already but this will give me a
little bit of the laddered security once
they cool off so I can take that tape
off and if the yellow glue is not quite
ready to hold this whole take care of it
well that's cooling off I'll come and
get the squeeze out off the forms
[Music]
so I'm debating putting in one more
strip if you take this reference line
out here get my gauge on it just to have
a very small amount above that line
should be enough this one is like right
on the line with the bevel beveled in a
bit it'd probably be fine I probably
don't need to add any more here you know
it looks like it's right where it needs
to be
likewise with this form it's right on
the line beyond a little farther down
here starting to gain some ground here
so this one up here it's just right
where it needs to be here we've got more
than enough so I guess my my conclusion
is here I'm probably safe you know I
could just to be sure
add one more strip and most of that
would be cut away it's kind of a waste
of material it's one whole strip that
would be cut away because in order to
keep my pattern going I need to take the
next strip off the stack and that will
go here and then almost all of that gets
cut away and I can't use the rest of the
strip so I think I'm probably best off
just going with what I have here marking
this out marking that shear line
recutting and going from there and I
think should work out great
so with that conclusion on this side
with no need to add any more strips I
think I'm going to call it a day I got
three strips on today it's not super
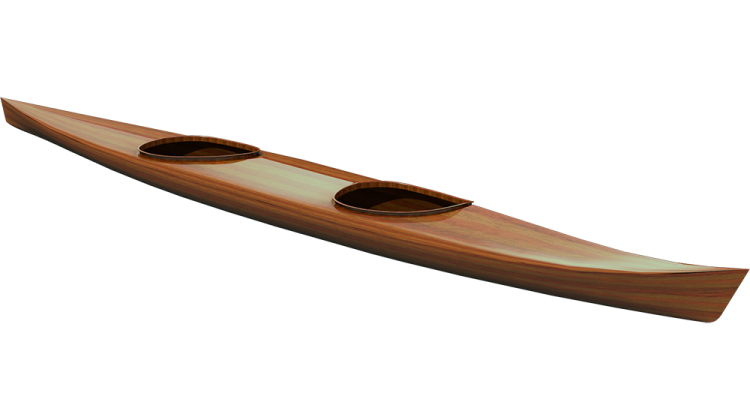
successful but they look good they're
nice and tight and the matchings coming
out really nice I think it's going to
look great their accents really starting
to show now you can see the contrast
between the two pieces of wood and I
think it's gonna look really awesome so
with that in mind the next episode is
gonna be trimming this off at the chine
line and then stripping up from there to
the center line once we're done with
that then we start working on the other
side if you're enjoying the series and
think your friends would appreciate it
please share it with your friend
share it on Facebook share it on reddit
whatever you like to do if you haven't
already liked this video hit like if you
haven't already subscribed hit subscribe
if you're impatient and want to see
what's coming next go over to patreon
and give me a little support and you'll
get access to all the videos a couple
days before the general public until the
next episode thanks for watching and
happy paddling
hi welcome back of the shop yesterday
we put some accident strips along the
water line and define the transition
from the top side of the boat to the
bottom side of the boat and I got one
strip on of the bottom wood but
technically I'm not really on the bottom
yet the micro bootlegger sport has a
chine which is a transition from the
side of the boat to the bottom of the
boat and it's a hard chine where it's a
fairly sharp angle and it's not really
possible to strip around that
continuously so you need to strip up
past it and then trim it off again just
like we did at the water line so mark
that line and trim it off I found they
forgot to put the marks for where that
shine line is going to be on the forms
so don't have a guide to go by as far as
marking the line on the outside of the
strips when it comes time to trim that
off so I made a little jig to draw that
diagonal line onto the forms so that's
going to be the first step of the
process after drawing that mark I will
continue stripping up the sides again
until we're past that line here's the
chine of the boat so we have the side
coming up and then we start on the
bottom and as you see it's a fairly
sharp angle right here and if we try to
strip around it it's just unless we're
really lucky and it lands right in the
right place it's not going to work and
the height from here to here on each
form changes slightly and as we get up
here the chine starts to soften and as
we go forward it gets much much softer
it's a little bit sharper back here and
then it softens again back at the end so
since that's changing in height the best
procedure is to just strip on past that
and then come back and cut it off
when we were marking the water lines I
had this little jig that I could put
down here and show where the water line
was by transferring this line on the
forms to the outside of the strip and
then we made that mark cut it off and
installed our accent strips right there
I forgot to put any line here so what I
ended up doing is making this little jig
this registers against the aluminum on
the bottom and this edge here against
the far side of the slot so if I put
that in there down against the strong
back and up against that slot now I have
a way to mark alarm so I can establish
that line on the forms and that's right
there
and when I come to do the stripping I
can lay this jig against that and use
that to transfer that line to the
outside of the strips wherever these
strips mele so I need to go through and
do that on all the forms both sides it's
easier to do it now than it is to do it
later once they get the strips on there
you know that will start interfere with
this jig so I'm going to go ahead and do
that to all the forms
you
and securest thing that this diagonal
line does not intersect that point right
there it's seen that I'm trying to make
a line that's going to intersect where
this is so when I go and trim the strip
it ends up being right even with that
little corner right there what we aren't
taking into account is the fact that the
strips have thickness and so if we put
the strips here well will end up
happening is this diagonal line will end
up being where these two strips meet at
the outer edge what I can do to help
illustrate that is I'm just going to cut
the corner off these scrap strips all
right so now I've put a real bevel on
those strips so now if I place them here
you see that line ends up intersecting
at the outer edge of the strips of the
boat so that's why the line does not
intersect at that point if we look at
this swarm from the other side we'll see
another thing that sort of illustrates
what's going on there and if we look at
it from this side you see this corner
right here just is peeking out under the
jig in this diagonal line I've created
does not intersect that point we're
trying to make a line that intersects
where these meet out here if you look at
my little clamping groove here you see
it's not on that diagonal line either
the this line and this line are parallel
to this line and this line so you end up
with this offset down there now if you
look at that the line that those create
and connect them all together and this
is a line I sometimes I often have on my
forms if you buy the planes for this
boat it would have this little diagonal
line right there drawn on it it would be
a little short hash mark there plus it
would have this long diagonal shown on
it and again those two lines actually
intersect right out here on the outer
surface of the boat so those lines meet
out at this corner what this line here
is useful for is obviously these strip
aren't gonna meet well like this without
a bevel you end up with an open groove
you could just bevel one side and get it
quite a bit tighter fit but what happens
is then one side overhangs the other and
when you go to playing that smooth you
get a thin spot in the boat this
diagonal line here is kind of a miter
between this surface and that surface
it's the same way you might have two
pieces of wood to make a picture frame
so the corners meet evenly we could do
the same thing here and cut from this
point out to this point and make a miter
it wouldn't be a 45 degrees it would be
a bisection of this angle whatever this
greater angle is this is half of that on
either side so there's times I say will
bisect the angle and that's what's going
on right there
it's a sanity check we can see if we can
get our eyeball right on the plane of
these lines so they all line up and look
like they create one continuous line so
if I stick this stick right along that
reference diagonal line it should end up
that this diagonal right here is right
on that line and this one right here
this one right here and this one right
here so we ought to be able to eyeball
down the whole length of YZ and find
this diagonal this diagonal is something
I design into the boat it's integral to
the planes now it's time to add the next
strip so the first thing to do is get
the top edge of this beveled correctly
to accept the next strip on the stack
[Music]
we've got stripped my number seven here
of the bottom material and we're just
going to be adding on this side remember
with the book matching of the bottom
material we took every other strip and
put it on either side of the centerline
and so all the odd stuff is on this side
and all the even strips are on that side
and now we have these reference lines
here that'll help us line the grain up
so if I just slide this down until those
line up
we know that the grain is going to be in
the line I want to go down with this dry
fit make sure I have a tight fit I'm
satisfied with the fit I can take the
strip off and glue it up
[Music]
feeling the tape up can sometimes be a
hassle usually just can rub your thumb
across it or if you have a little flag
sticking up on the back peel it up from
the back you need to dig into it a
little bit and rub your thumb across it
there's a little flag sticking up as we
continue stripping up the sides to the
chines
we don't need to strip beyond the chine
and here this would be one more strip
and then we're a little bit past the
chine we want to go passive chime but we
don't need to keep on going past so we
want to go a little bit past and so here
we'd need two more strips here of one
strips probably going to do it here
we're well past down here we probably
don't need to do anything you if you see
that line here we're looking for where
that plane intersects the edge of the
strips and we want to make sure we're
fully past that line but we don't need
to go well beyond it just make sure that
line is covered and so then when we come
back and trim to this line we don't have
any gaps along the way some of these
strips we can cut a little bit shorter
as we put them up we don't need to go
all the way down to the ends if we're
eventually gonna just saw that off
anyway so we'll be a little bit
reasonable on how we cut these off just
to make sure we've fully covered that
line but aren't going unreasonably far
past that line so I'm now ready to do
the beveling on the top of this strip
and related to the fact that we're not
going past the chine here unreasonably
we don't need to try and wrap it around
the corner here even though the forms
are already starting to fold over if I
tried to wrap this strip around I'm not
actually getting the shape I want the
only part of this strip that's going to
be used is the stuff down here just up
to the chine so we don't need to try and
wrap it over
and particularly back here we don't need
to wrap it over so in the process of
doing our beveling here we're not going
to try and lay the Robo bevel down like
this past that we're going to use this
angle defined here at the top and just
continue that and so basically there's
not much beveling required here at all
and none out here this will be cut off
so we're just trying to get a tight fit
in this region down beyond here we'll
start to follow these forms again
[Music]
[Applause]
[Music]
until this point my schedules had
something like lunch just whatever right
after I've put on a strip
it's just worked out that way but at
this point I just put on this strip and
I want to put another strip on here
often I can put one strip on here then
put another strip on the other side and
by the time I come back to this side the
glues already dried but at this point
I'm just stripping one side because I'm
trying to get past the center line and
then when I'm done stripping this side
I'll cut that center line and then strip
in from the other side so I'm only going
one strip at a time on this side and so
I'd like to be able to put another strip
on right now but I can't because I've
got all these clamps on and all those
tapes in the way so what I can do now is
I can substitute hot melt glue for the
clamps and put some little hot melt
stitches in between and well it's all
tight let that hot melt glue cool
and get hard and so it'll continue to
hold it in place and after it's hard
then I can peel off the tape first I'll
just pop a clamp off inject a little hot
melt glue behind it press it down and
move down the line taking one clamp off
at a time after that I'll come back with
the stitches of hot melt glue and then
once I've done with that then I'll come
back and peel off the tape just pry it
up a little bit
inject the tip under there just a small
dot like an eighth of an inch squeeze it
tight and since the forms are beveled to
match the taper of the boat this ends up
with a very tight fit there and so it
cools off quickly and has a good bond
there
when it's cooled completely I'll come
back and trim off that squeeze out
I'm not going to glue it to this front
form it'll just make it hard make the
forms harder to get out now I'll just
come back and put a quick little bead of
glue across that joint between the
strips right now this has no holding
power but with the tape they're clamping
it tight while I'm going it doesn't the
this doesn't need to do anything until
it's cooled off and then it'll serve to
help hold those strips tightly together
while the glue dries one reason I use
yellow carpenters glue so tacks up
really quickly in a tight seam like this
and you know the ten minutes has taken
me to do this it's really got a lot of
strength already but this will give me a
little bit of the laddered security once
they cool off so I can take that tape
off and if the yellow glue is not quite
ready to hold this whole take care of it
well that's cooling off I'll come and
get the squeeze out off the forms
[Music]
so I'm debating putting in one more
strip if you take this reference line
out here get my gauge on it just to have
a very small amount above that line
should be enough this one is like right
on the line with the bevel beveled in a
bit it'd probably be fine I probably
don't need to add any more here you know
it looks like it's right where it needs
to be
likewise with this form it's right on
the line beyond a little farther down
here starting to gain some ground here
so this one up here it's just right
where it needs to be here we've got more
than enough so I guess my my conclusion
is here I'm probably safe you know I
could just to be sure
add one more strip and most of that
would be cut away it's kind of a waste
of material it's one whole strip that
would be cut away because in order to
keep my pattern going I need to take the
next strip off the stack and that will
go here and then almost all of that gets
cut away and I can't use the rest of the
strip so I think I'm probably best off
just going with what I have here marking
this out marking that shear line
recutting and going from there and I
think should work out great
so with that conclusion on this side
with no need to add any more strips I
think I'm going to call it a day I got
three strips on today it's not super
successful but they look good they're
nice and tight and the matchings coming
out really nice I think it's going to
look great their accents really starting
to show now you can see the contrast
between the two pieces of wood and I
think it's gonna look really awesome so
with that in mind the next episode is
gonna be trimming this off at the chine
line and then stripping up from there to
the center line once we're done with
that then we start working on the other
side if you're enjoying the series and
think your friends would appreciate it
please share it with your friend
share it on Facebook share it on reddit
whatever you like to do if you haven't
already liked this video hit like if you
haven't already subscribed hit subscribe
if you're impatient and want to see
what's coming next go over to patreon
and give me a little support and you'll
get access to all the videos a couple
days before the general public until the
next episode thanks for watching and
happy paddling