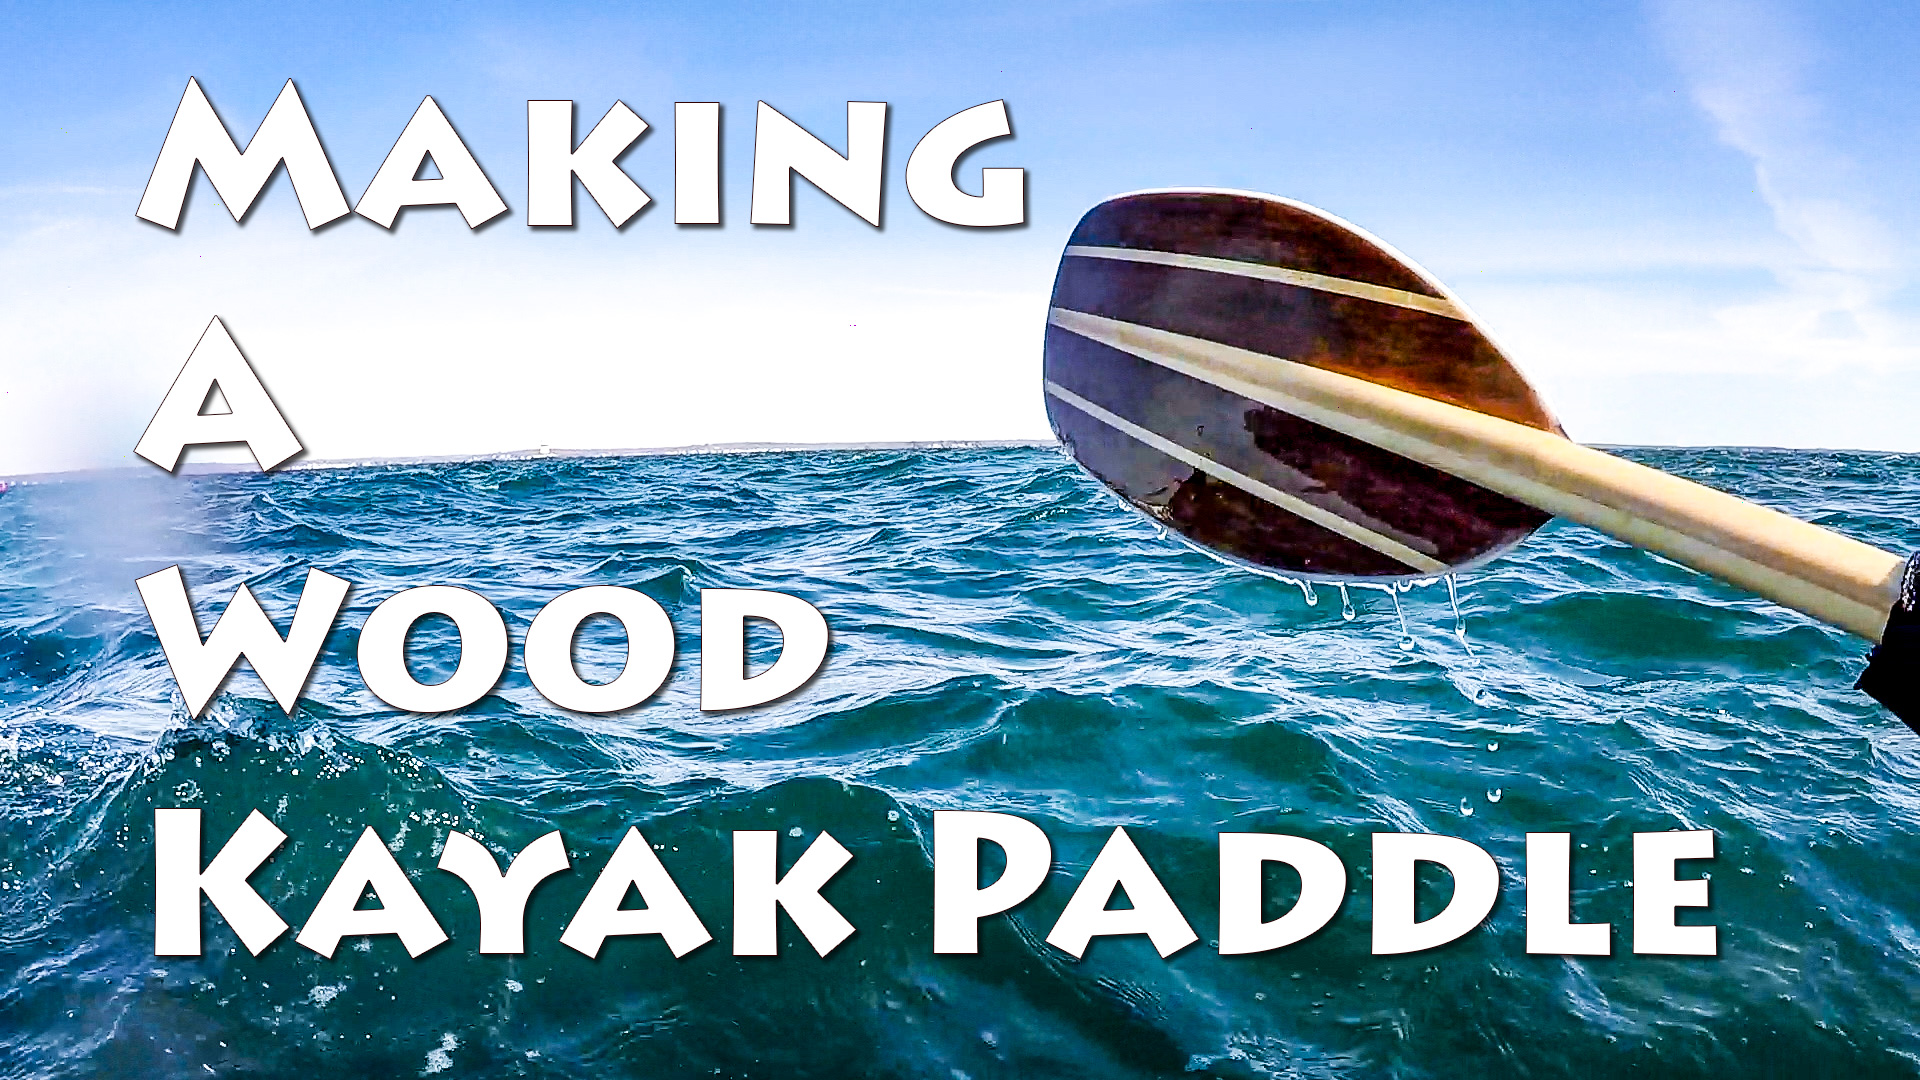
In this video I demonstrate the whole process of making a kayak paddle from wood. Starting from cutting the wood through getting out on the water.
Plans for building a similar paddle are available Here.
Making your own wood kayak paddle is a great way to personalize your kayaking adventures. Instead of just another plastic paddle you can have a beautiful piece of functional art that you made yourself.
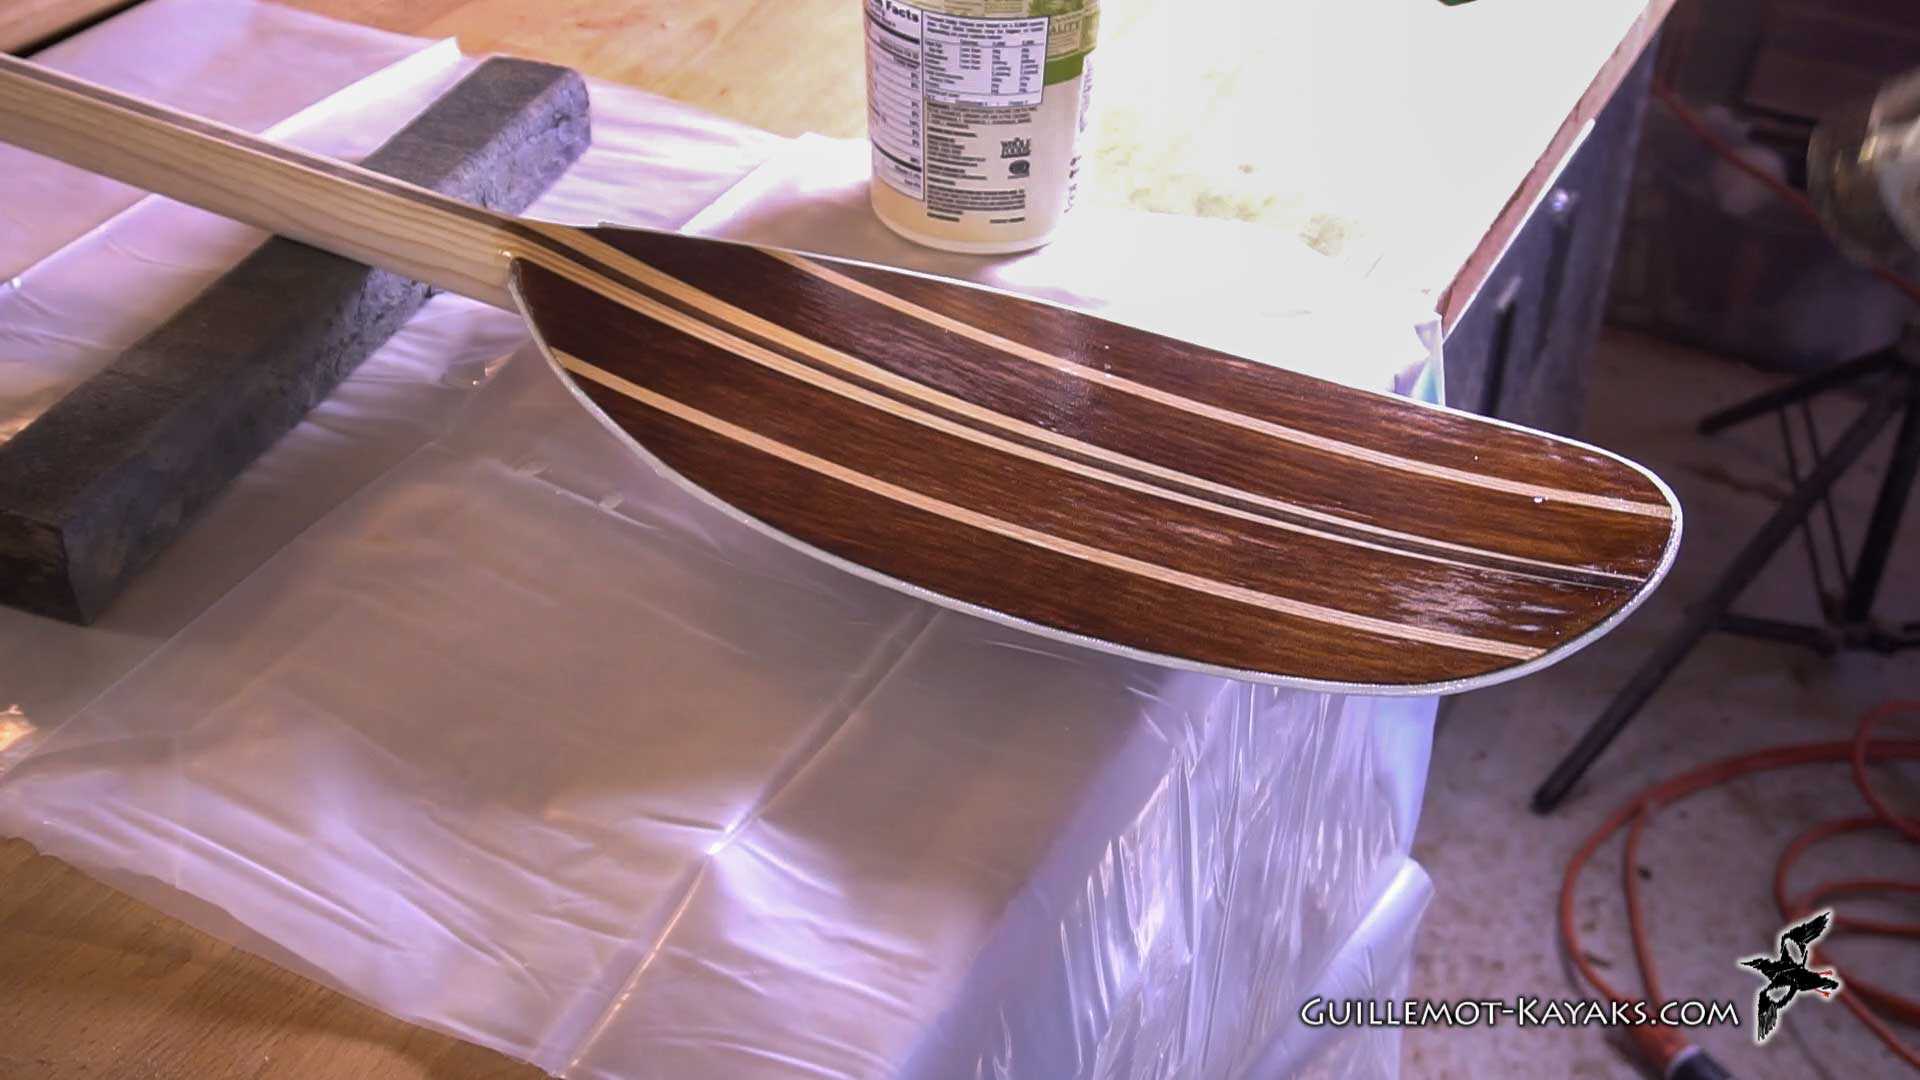
The wood I'm using is Western Red Cedar for the body of the blade, with a bit of Ash as the reinforcing accent. The shaft is made from Sitka Spruce with a reinforcing spline of Ash.
The blade is reinforced with fiberglass and has a nylon para-cord reinforcement around the edges. This make for a lightweight but very strong paddle.
For more detail about the process you can view in depth episodes showing all the steps:
"Making Kayak Paddles - Preparing the Blanks - E1"
- Introduction: Overview of the project, showcasing finished paddles and discussing materials.
- Choosing Woods: Explanation of wood selection for both blade and shaft, focusing on strength, weight, and aesthetics.
- Preparing Shaft Blanks: Demonstration of cutting and preparing Sitka spruce and hardwood for lamination into shaft blanks.
- Preparing Blade Blanks: Selection of western red cedar boards, emphasizing grain orientation for optimal strength and appearance. Creation of book-matched blade blanks with ash splines for added rigidity.
- Gluing Up Blanks: Gluing of both shaft and blade laminations, utilizing a waterproof wood glue and ensuring straightness during clamping.
- Wood Selection Tips: A broader discussion of wood options, highlighting the benefits of lamination for using a variety of wood types.
"Making Kayak Paddles - Cutting Blades - E2"
- Introduction: Overview of cutting blade blanks into individual pieces.
- Blade Design: Explanation of the pre-curved blade design and the importance of grain orientation for aesthetics.
- Marking the Blanks: Demonstrating the process of transferring a blade pattern onto the blank, ensuring proper grain alignment.
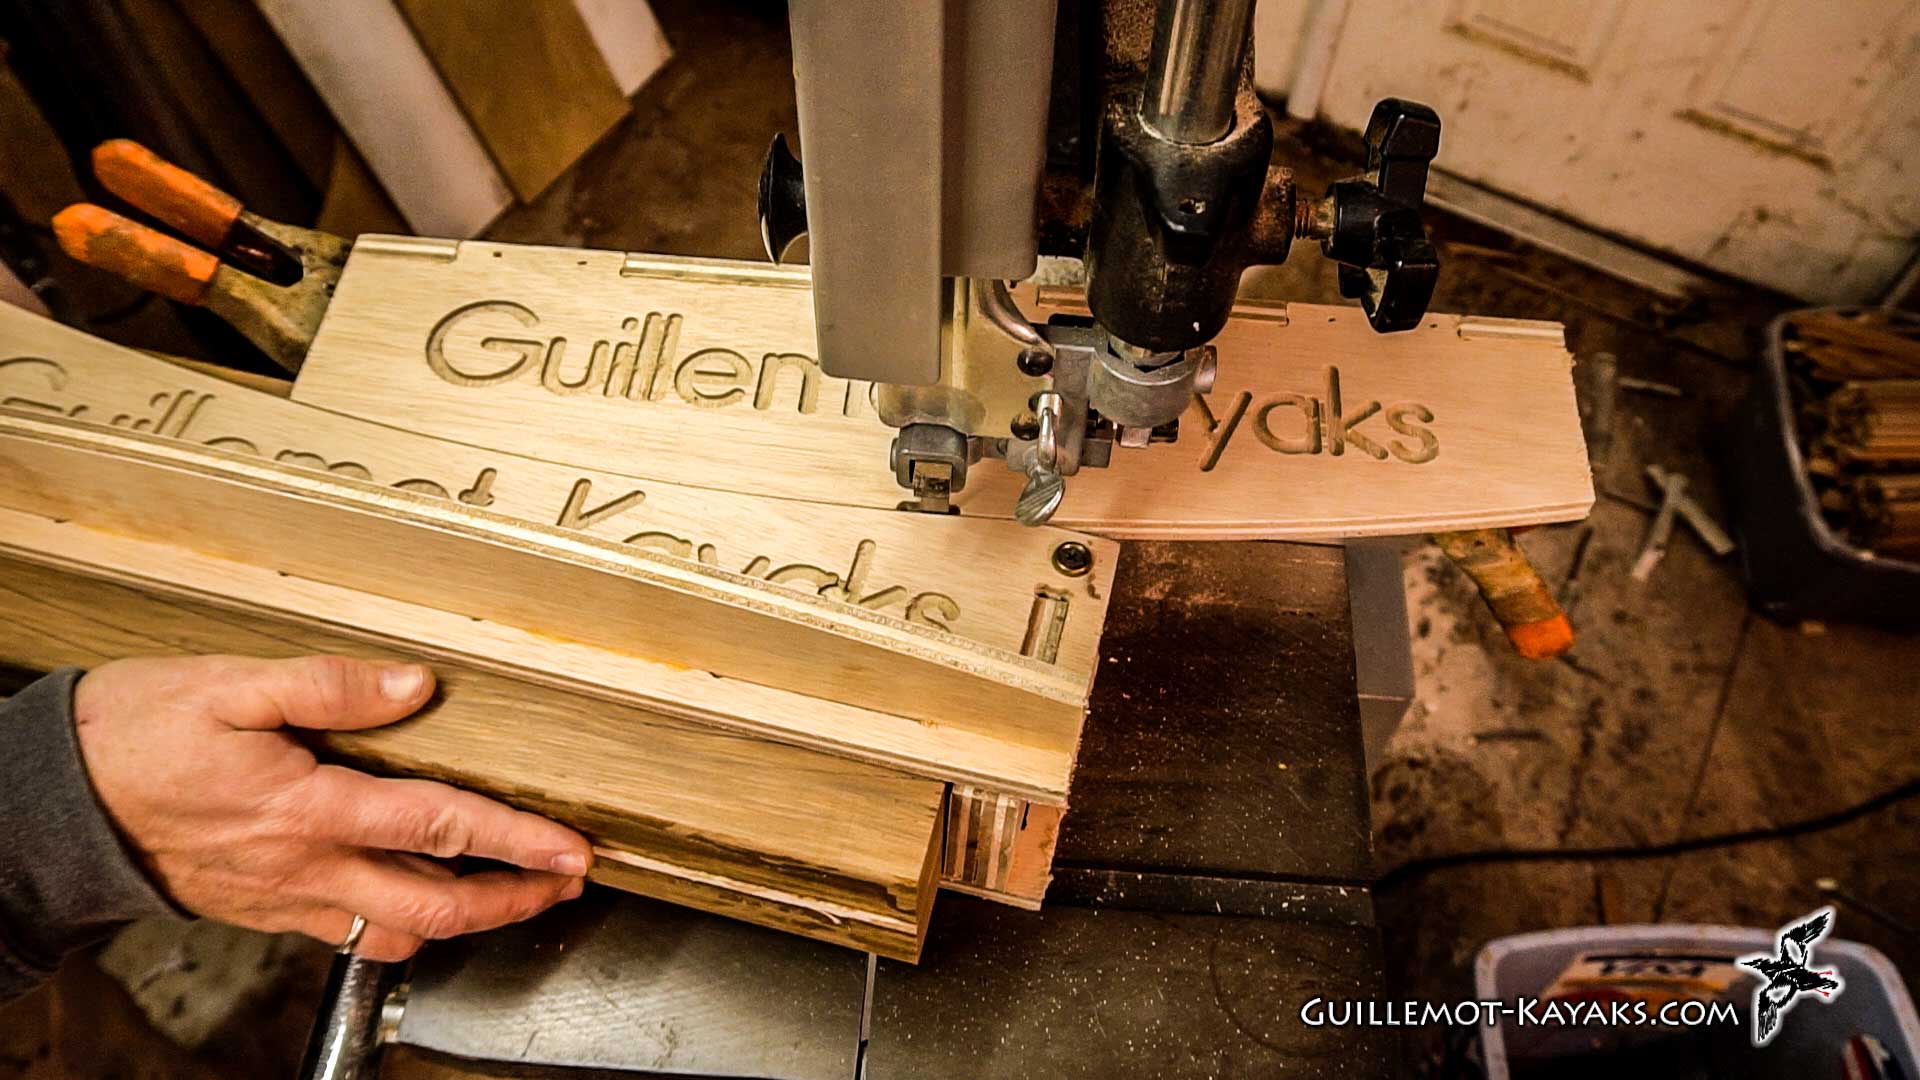
- Introducing the Cutting Jig: Description of a custom jig for cutting consistent blade shapes on a bandsaw.
- Cutting the Blades: Using the jig to efficiently cut multiple blade pieces from a single blank.
- Alternative Cutting Methods: Discussing alternative tools and techniques for cutting blades without a bandsaw.
"Making Kayak Paddles - Preparing the Shafts - E3"
- Introduction: Overview of preparing shaft blanks for blade attachment.
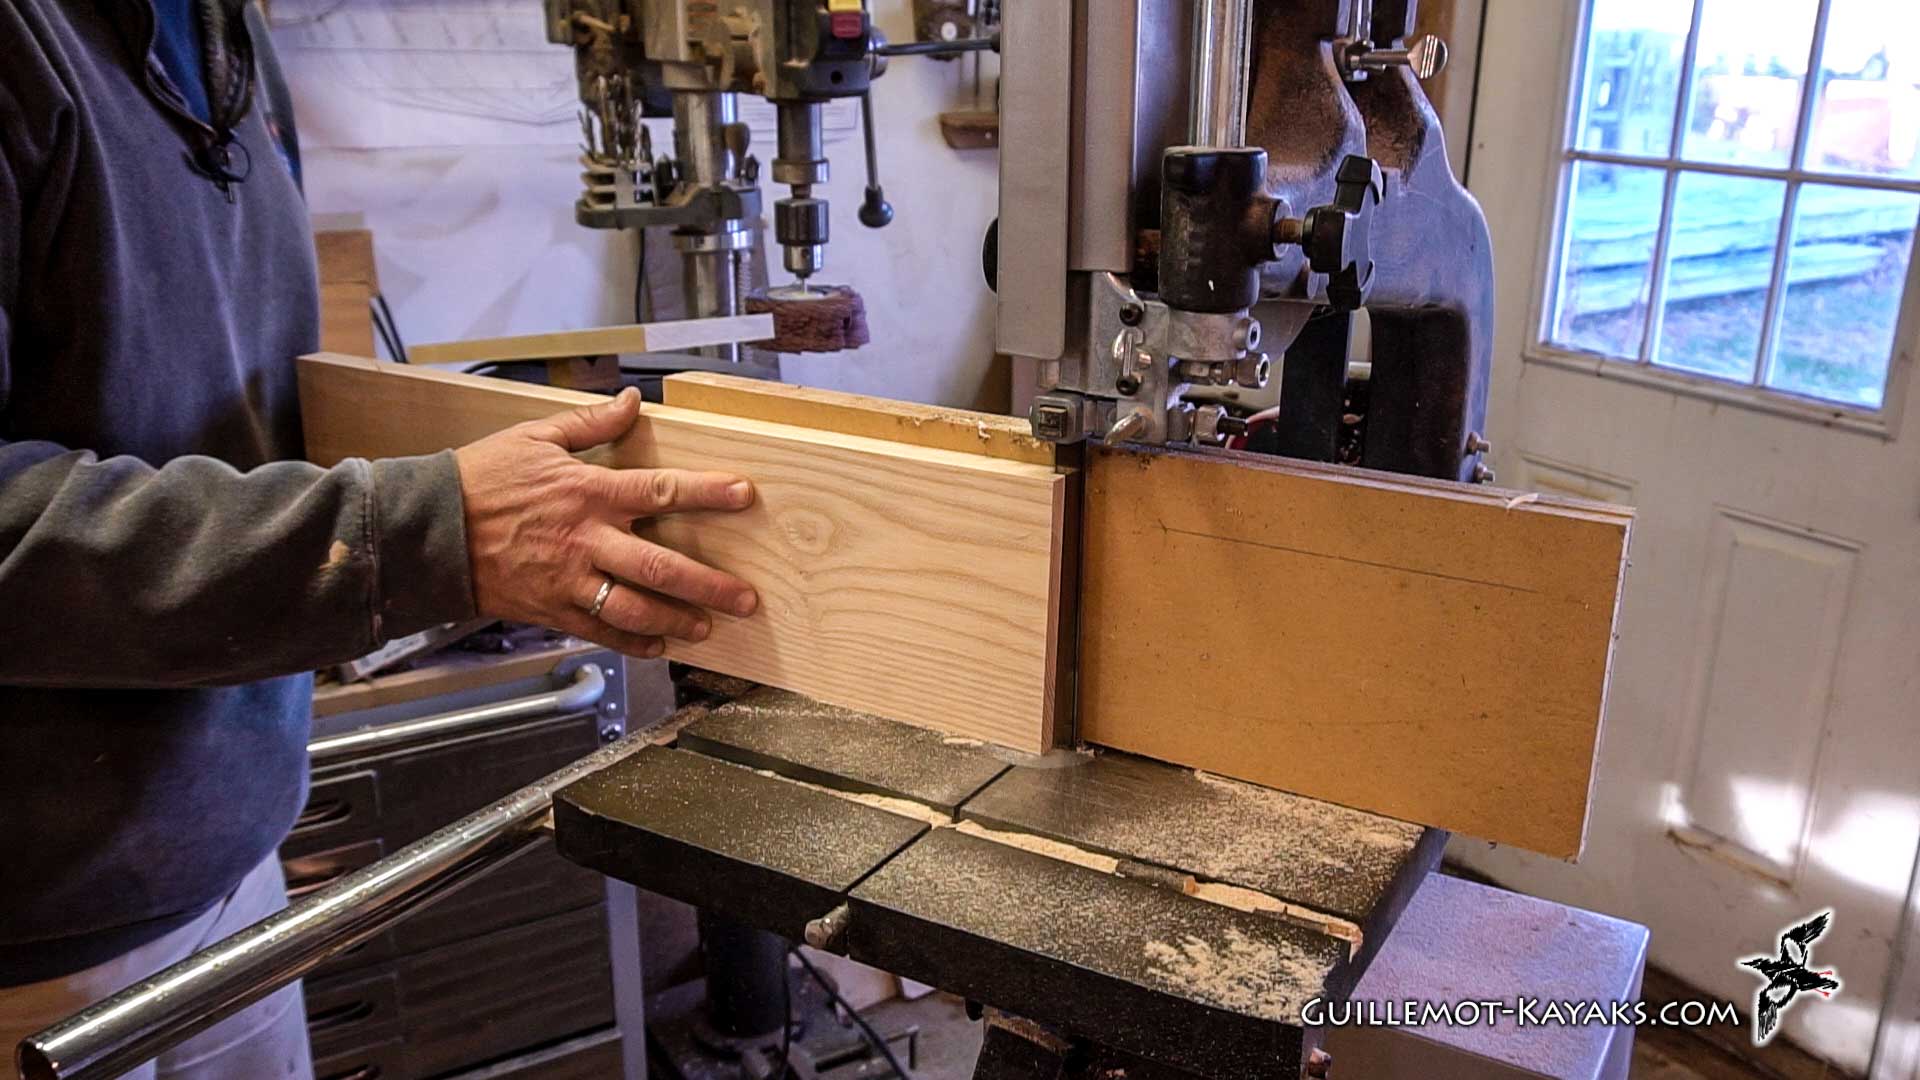
- Cutting and Straightening Shafts: Ripping shaft blanks and addressing any warping or curvature issues.
- Cutting Shafts to Length: Determining and cutting the appropriate length for both feathered and unfeathered paddles.
- Tapering the Shaft Ends: Using a table saw sled to create tapered ends for blade attachment.
- Cutting Scarfs for Feathered Paddles: Explanation of scarf joints and demonstrating the setup for achieving different feather angles.
- Determining Feathered Paddle Lengths: Calculating the necessary blank length for feathered paddles, considering scarf length.
- Marking Blade Orientation: Carefully marking the shaft to ensure correct blade orientation for both feathered and unfeathered paddles.
- Preparing for Blade Attachment: Trimming excess material from the shaft ends to facilitate blade alignment.
"Making Kayak Paddles - Gluing Blades & Rough Shaping - E4"
- Introduction: Overview of attaching blades and beginning the shaping process.
- Matching Blade Halves: Selecting and pairing blade halves for optimal grain matching and visual appeal.
- Gluing Blades to Shafts: Demonstrating the process of gluing the matched blade halves to the prepared shafts.
- Initial Shaping with Drum Sander: Using a drum sander to flatten the blade faces and even out the transition to the shaft.
- Asymmetrical Blade Design: Explanation of modern asymmetrical blade design and its purpose, as well as personal aesthetic preferences.
- Marking Blade Outline: Transferring the final blade shape onto the roughly shaped blanks using a template.
- Rough Shaping the Shaft: Rounding over the shaft using a router and a half-inch radius round-over bit.
"Making Kayak Paddles - Sculpting the Blade - E5"
- Introduction: Overview of refining the blade shape and achieving desired thickness.
- Marking Blade Thickness: Establishing an 1/8-inch thickness line around the blade perimeter as a shaping guide.
- Refining the Blade Shape: Using a combination of power and hand tools to achieve smooth transitions, thin edges, and a slight crown in the blade center.
- Detailing the Blade Throat: Demonstrating techniques for smoothly blending the blade into the shaft, removing material from both the blade and shaft for a seamless transition.
- Tools for Shaping: Showcasing various tools used for refining the blade shape, including planes, rasps, and sandpaper.
- Dust Collection: Emphasizing the importance of dust collection when using power tools like right angle grinders.
- Final Shaping and Smoothing: Using a combination of hand tools and sandpaper to achieve a uniform thickness, smooth curves, and a refined overall shape.
"Making Kayaks Paddles - Applying Edging - E6"
- Introduction: Overview of the edging process and its importance for blade durability.
- Preparing for Edging: Final sanding of the blades and creating a groove along the edge for the nylon cord edging.
- Securing the Edging: Demonstrating the method for applying and securing the nylon cord edging using tape and superglue.
- Saturating the Edging with Epoxy: Coating the entire blade with epoxy to ensure complete saturation of the nylon cord.
- Using Heat to Enhance Saturation: Applying heat to lower epoxy viscosity and facilitate better penetration into the cord weave.
- Managing Outgassing: Dealing with air bubbles released from the wood due to heat and ensuring proper epoxy coverage.
- Removing Excess Resin: Scraping and wiping away excess resin to achieve a smooth, even finish while avoiding drips.
"Making Kayak Paddles - Glassing the Blades - E7"
- Introduction: Overview of the blade glassing process.
- Preparing the Edging: Smoothing and blending the ends of the nylon cord into the blade shape using a utility knife.
- Cutting Fiberglass Cloth: Preparing 2-ounce fiberglass cloth pieces for application to both sides of the blade.
- Applying Epoxy and Fiberglass: Demonstrating the application of epoxy and fiberglass cloth, ensuring smooth coverage and avoiding air bubbles.
- Using Heat to Remove Bubbles: Using a heat gun to release trapped air and achieve a smooth, bubble-free finish.
- Applying Additional Reinforcement: Adding extra layers of fiberglass cloth to the blade tips for increased durability.
- Applying a Full Coat of Epoxy: Coating the entire blade with epoxy for a smooth, even finish and improved protection.
"Making Kayaks Paddles - Gluing the Shafts and Finishing - E8"
- Introduction: Overview of joining feathered paddle shafts and finishing the paddles.
- Gluing Scarfed Shafts: Demonstrating the alignment and clamping process for gluing scarfed shaft halves, achieving the desired feather angle.
- Blending Scarf Joints: Using hand tools to smooth and blend the scarf joint into the shaft for a seamless appearance.
- Refining Shaft Shape: Shaping the shaft to an ergonomic egg shape for comfortable hand placement.
- Tools for Shaping: Using a variety of tools for refining the shaft shape, including planes, rasps, and sandpaper.
- Final Sanding: Sanding all surfaces smooth in preparation for finishing.
- Applying a Protective Finish: Discussing finishing options and choosing a durable clear coat for long-lasting protection.
Materials
- Western Red Cedar: Used for the blade due to its lightweight and strength.
- Ash: Employed as a spline in the blade and for accents, adding stiffness. Also used in the shaft lamination for strength.
- Sitka Spruce: The main wood for the shaft, known for its lightweight and strength.
- Mahogany: A hardwood option used in shaft lamination for added stiffness.
- Walnut: Another hardwood used for shaft lamination.
- Epoxy: Used as an adhesive, to saturate the nylon cord edging, and as a base for the clear coat finish.
- Waterproof Wood Glue: Employed for joining the blade halves to the shaft and potentially for scarf joints.
- Nylon Parachute Cord: Creates a durable, reinforced edge around the blade.
- Fiberglass Cloth: Applied to the blades for strength and water resistance.
- Clear Coat Finish: A protective and aesthetic coating for the paddle, likely a two-part automotive clear coat.
Tools
- Table Saw: Used for ripping shaft blanks, cutting shafts to length, tapering shaft ends, and cutting scarfs.
- Bandsaw: Could be used to cut the initial curved blade blanks.
- Planer: Employed to smooth and thickness wood pieces for the shaft and blades.
- Router: Used to round over the shaft.
- Drum Sander: Levels the blade surface and performs initial shaping.
- Right-Angle Grinder: Used with a carbide attachment and sanding disc for rough blade shaping.
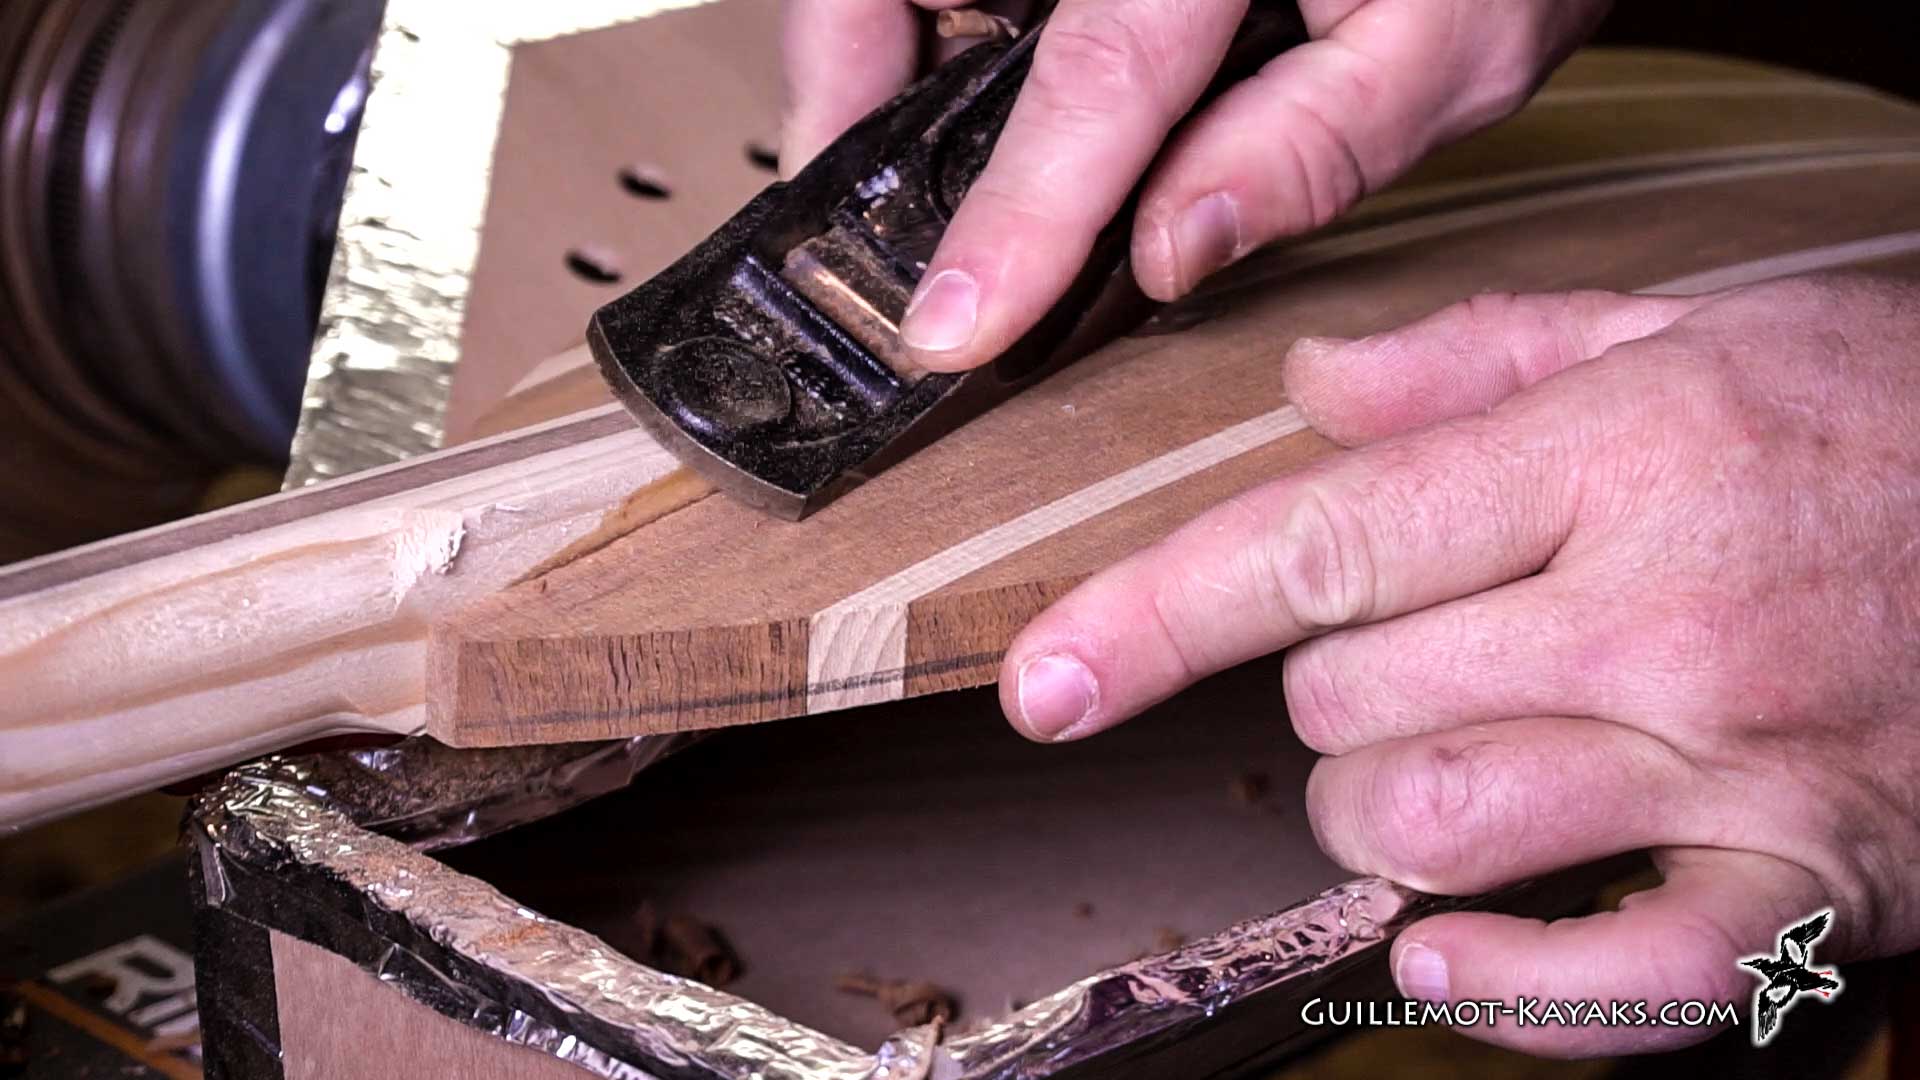
- Block Plane: Shapes and smooths the blade and shaft, particularly for creating the fillit.
- Micro Plane: Refines the shape of the blade and fillit.
- Luthier's Plane: A specialized plane with a rounded sole for detailed shaping in the throat of the blade.
- Rasps: Employed for shaping the shaft and refining the blade.
- Sandpaper: Used throughout the process for smoothing and refining surfaces.
- Clamps: Essential for holding pieces together during gluing.
- Tape: Secures nylon cord edging during gluing.
- Heat Gun or Blowtorch: Used to warm epoxy, improving its flow and penetration.
- Dust Collector: Helps capture dust generated by power tools.


