In this episode I break expensive router bits and tear apart expensive plywood.
- microBootlegger Sport Plans
- Robo-Bevel
- Get the "Just Build It" T-Shirt
- Read along in my Book
Tools:
- Adjustable Temperature Professional Heavy Duty Hot Glue Gun - http://amzn.to/2nSK3OW
- 3M #2060 Masking Tape: http://amzn.to/2CeLOdF
Please support the making of these videos through my Patreon site: https://www.patreon.com/NickSchade
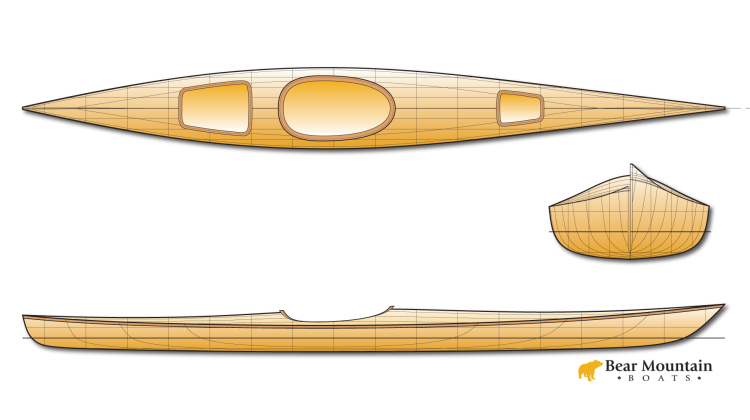
hi welcome back to the Guillemot Kayaks
workshop I'm Nick Schade. Yesterday I
finished stripping up the boat so I've
done with all the work with the cedar
strips but I still have wood work left
to do I need to make the recess for the
cockpit and I decided to make that out
of a Kume plywood so there's a bunch of
options I could have done I could have
glued up a wide panel of cedar strips
sanded them thin fiberglassed it and
then cut my recess out of that material
I've done that before works great you
can continue with the book matching
theme that way but I decided to go with
a little bit of contrast and have the
okoume there instead and so I'm gonna cut
that it's gonna be four millimeter or
okoume while I'm a 10 I'm going to cut the
risers out a 9 millimeter plywood and
the coaming lip out of more 4 millimeter
okoume the combing is going to be quite a
bit different in the way I make it then
the petrol play was where I used
vertical strips of cedar to make the
riser then laminating mahogany strips
around that vertical riser this is just
going to be a stack of plywood pieces
all glued up together and saying it
smooth and made pretty so it's just
gonna be CNC work today I got the files
all ready to go so I'm just going to cut
them out the first step with the CNC
machine is always zeroing out the tool
and so I will start by zeroing the XY
axis and so that just moves the tool up
against the stops double checks that and
so now if 0 2 on the x-axis and this is
now zeroing the y-axis up against the
stops double checking that and so that's
zero and so now I want to 0 the z-axis
the up and down so just bring it out
into the middle of bed here someplace
get the zeroing plate place it under the
tool
sure there's no dust there then run the
z0e program now I'm gonna put the
material for the riser in place and this
is some actually good quality a little
one not Dora skin stuff but higher
quality than that it's not the best
material but I'm going to be sandwich it
between the coup mate and fiberglassing
everything it's all going to be sealed
up nicely so it'll be well protected
it's very strong I'm gonna nudge down
the bit a little bit just to make sure I
cut all the way through the material and
we'll just preview this cut the riser
all right that's what we should be
looking at start the dust collection
despite my best efforts to nudge the bit
down a little bit to cut all the way
through still then cut completely
through here scoring this edge do that
and then we've got the tabs so that's
one half of one layer of the riser
laminations so these will be stacked up
too high and left and right side and
then I have these little pieces that
will fit at the front in the back I'm
never really happy with this way of
making a calming just due to the way it
wastes so much wood if I do my method
where I'm using strips of wood
vertically that's very efficient with
the wood and it's using what I already
have but I thought I'd show you this way
this is a very quick way of making it
calming it goes very quickly very easy
to do
once you have the pieces cut and you
ignore the waste it works out great
there's all the pieces for the riser
these little pieces flow in the front
and they sort of have a little scarf in
there to fit together and likewise on
the back and so I will make up the full
ring and so I'll super glue those
together to cut the coaming lip and the
recess I'm going to switch to an eighth
inch diameter a bit to cut through this
four millimeter plywood
[Music]
so it looks like I had the zero
reference at the top of the material
instead of the bottom of the material I
usually like to sit it at the bottom so
when I zero out on the spoil board it
cuts right down to the spoil board and
doesn't cut into it too far but if I am
not paying attention and make it so the
zero reference is on the top of the
material then when it goes to make a cut
this was a quarter-inch cut even though
it was thinner material I was going for
a quarter-inch cut that means the first
cut was 1/8 inch down which cut right
through the material or nearly so and
then the second cut went down into the
spoil board a substantial amount and
actually it ended up hitting the screw
holding the spoil board down and that's
what broke off the bear so I have a I
have a way of breaking these picks that
was the inside cut I can still make the
outside cut I'll put in a new bit rezero
out the fit to the top of the material
then I'll cut the outside diameter of
the coaming left so just kind of zero it
out to the top of the material not the
bottom one problem I have with a lot of
what I do since I'm doing everything in
the shop I don't have enough time to
really get dialed in on any particular
things so the CNC machine you know I'm
not using it all the time I don't
develop great habits and you know I'm
continuing to learn on it and you know
editing video I'm not ending video all
the time I'm not running the table so
all the time I'm not working on my
website all the time I was actually
working on a webpage the other day and
had to make a little form on the webpage
and it's not hard but it's been a couple
years since I made a form on my web page
and so just what am I doing here
everything I do was tend to have that
similar problem where you know I've done
it a lot before but it's been a long
time and
remembering how to do it from one time
to the next can be really hard for me
all right there's the calling left this
waste in the middle is is kind of
annoying when I cut a full ring like
that you know this perfectly good
material here I can use it for something
else but it's sort of an odd shape now
it's a little hard to use one more time
I will zero it down to the bottom of the
bed I've double-checked the file it's
zero to the bottom of the bed
I'm right out at the limits of what I
can cut on this tool bag I have a
nominal of 48 by 24 inch bed here and
I'm cutting something that's about 26
inches wide and I noticed when I got
over here it seemed to hit the stops I'm
suspecting that this cut here is not
right
which means this the whole panels
probably a little bit out of whack if
it's off base and it's messed up anyways
and might as well continue with the cut
and see what happens
all right this is a righteous mess I
thought you know once I saw this problem
over here happened I remembered what I
needed to do to make this cut right so
again I've got a nominal 24 inch bed
here again I have a piece here that's
just about 26 inches wide the bed can
cut a little bit more than the 24 inches
I know I can cut the width here it's you
know it's almost 26 inches the zero
point here isn't the limit of where it
can cut to it's actually about an inch
away from the arrow so it can go
negative 1 inch and negative like three
quarters of an inch this way and so when
I lay this piece down in here I will
need to offset that zero point
sufficiently that I get where I need to
be so I have enough room so this piece
is pretty much a waste I think I've got
another one of these egg shape pieces
like this it should be a perfect match
to the other one but all this other
stuff you know it's just it's all out of
whack I need to buy some new material
before I can continue with this either
buy new material if they don't have it
which is a good possibility my local
supplier does not have four millimeter
Okuma plywood if that's the case I need
to come up with a plan B which might be
like I said earlier making a panel of
strips and cutting the this whole piece
out of a panel of strips so we'll see
what we end up doing
all right that's not too bad I have some
little score marks here that didn't
quite cut deep enough I think I had this
set up for a thicker plywood so I'm
going to recut those to just get those
right and to do that I'm going to pin it
down a little bit more so they don't go
around so much so I'm just going to
select those two scoring lines and save
those and I'll end up nudging the table
down a little bit
okay it took a while a lot longer than I
had in mind but this is all the parts
for the recessed cut out of this is
three millimeter plywood general wood
craft over in the one and only had the
three mil stuff so that's fine it'll
work perfectly get some glass on it'll
be plenty strong enough so I need a
little bit of cleanup work on there and
I think I'm going to end up staining
these before I assemble them I'm not
exactly sure about that I'm gonna sleep
on it what I have here is these pieces
essentially wrap around something like
that front and back I have it about a
half inch wider than it actually needs
to be because in some places this this
is only a sixteenth inch wide or so that
was going to be too delicate so I left a
half inch border on it and so the
scoring line is where the final piece is
actually going to be cut to the next
episode we'll be dealing with that
dealing with the combing look the
combing riser we'll start assembling
some of those pieces getting stain on it
I might end up putting a little edging
around this just to spice it up a little
bit
we'll see if I come up with a good idea
as I sleep on that overnight so I'm not
exactly sure what I'm gonna be doing
tomorrow it depends on any inspirations
I get as I sleep on it and as I'm
working on the editing all this stuff
down I'm hoping when they have this
episode edited down it's not one of
those half-hour ones like the last one
hopefully this one's a little bit
shorter well if you have any questions
post them down in the comment section if
you like this video give me a thumbs up
if you're enjoying this whole series hit
subscribe turn on notifications all that
wonderful stuff so as I say the patreon
subscribers get all these videos a
little bit early so if you're impatient
you know give me a buck a month and
you'll get to see them too so until the
next episode thanks for watching and
happy paddling