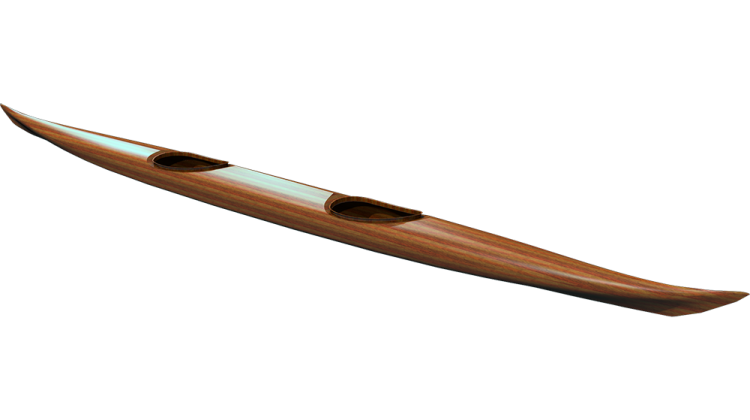
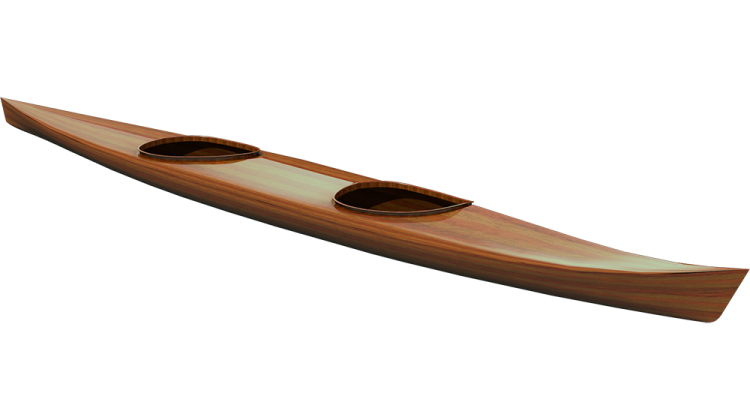
Installing the first strips on my microBootlegger Sport sea kayak. Discussion about keeping all the matching strips organized and in order.
hello welcome to the Guillemot Kayaks
shop I'm Nick Schade today we'll be
taking the material we sorted out in the
previous episodes and arranged it for
use on the forms I want to set up a
system where all the thinking I did to
get the strip's sorted out is done so
all I have to do is pick up a strip and
install it on the forms we have
everything arranged in order and I've
got each strip individually identified
with a number at the end but I don't
have anything to help me keep track of
the process and make sure everything
stays in order while I'm working on the
strip's I want to give myself a few
reference marks and just stuff to help
me keep track of where all the strips
are so again this just starts out with
some good lines across the strips I'll
do this to find the center line so I
have a crossing right at the mirror
point of these strips do it a couple
locations along the length while I'm
here I'm going to put some numbers on it
just to make it easier to keep track I'm
going to number from this side over and
they're going to circle it alright so
end up 26 on both strips across the
center line so we'll do this a couple
more locations
so we now have it marked out with
hopefully enough sanity checks that when
we're going to put all this wood on the
boat we're able to keep track of where
everything goes who get everything in
order and we get this pattern moving
evenly across the boat and you know
everything stays true to form what I
need to figure out now is exactly where
to start which strips were where they're
going to start with so the the
measurement from water line to water
line which is where I want to place
these strips going up from the datum
water line up over the top and back down
to the other side that measurement is 32
inches so from the water line up to the
centerline is half at 16 inches so if we
look at this starting in the middle here
this is going to be the centerline we
want to get at least 16 inches out here
so the last four strips here we probably
aren't going to use likewise on the
other side so we'll be starting at strip
five but the other thing that's going on
is I want this material to run from
datum water line to datum water line but
the part line for the deck hull joint is
someplace else it's a little bit above
that let me show you in the forms so
here we have the datum water line and on
the other side it's over here and so my
goal is to strip from here all the way
up to the center line with a mirror
image on the other side so measuring
from datum water line the datum water
line we've got just under 32 inches so
in other words from datum water line up
to the center line we have just under 16
inches
so in order to get from here up to here
we need 16 inches worth of width of
strips and so I and you know actually a
little bit less so I have a little bit
more than 16 inches pretty good
guarantee we'll get all the way up here
but the part line between the deck and
the hall is this line right here so we
have this distance right here that's
going to be using the wood for the deck
but it's actually going to be applied
when we're stripping up the hull and so
I want to separate out these strips
right here and put those with the whole
material and have the rest of the strips
here be with the deck material and so I
need to figure out how much width of
strips I need to get from here to here
it doesn't need to be exactly whatever
this is but I need something to work on
so I can separate out those strips and
if I end up with the datum water line a
little bit off I'm okay with that so
this right here is the water line this
right here is the part line and so we
need to have enough strips lay along
here and build up to this point and
actually what we're going to be doing is
stripping from here down to here and so
if we're starting here 1 2 3 4 or
however many it needs to be so we again
we take out a tape measure and I'm going
to use the bottom edge of this as my
point and to the bottom edge here is two
and a half inches for those in the
metric system it's about six and a half
centimeters so back here at the strips
this is going to be the datum water line
right there and we want to go up two and
a half inches to get to the part line so
here's two and a half inches which is
just over three strips
four strips is just under three inches
I'm gonna call that close enough so this
is the part line so these these four
strips will be applied to essentially
the hull of the boat and the rest of the
strips from here on over will be the
deck of the boat so I want to separate
these out as I start stripping up the
hull of the boat I'll start with this
strip this will be the first strip to go
on it'll be right parallel to the part
line then I'll put on one two three four
strips and I'll end up with some accent
strips then I'll switch over to what
were the flat grain strips the lighter
colored material right there and so
these four strips which are strip
eight seven six and five end up going
with the whole material these strips
four three two one
are spare I'm gonna keep those aside I
might need them to patch something up or
something like that you never know so
same thing over here these four strips
will be part of the hull and this from
here on over is all part of the deck and
so this is a datum waterline this is a
part line and these are spare those will
be put aside and so these strips from
here on over up to the keel up to the
centerline are all gonna be in the deck
but so the other thing I need to keep
track of is which is the left side of
the boat which is the right side of the
boat so facing forward this will be
starboard this will be poor so this is a
port side over here this is a starboard
side over here and so I want to keep
track of those because it
it's confusing especially when I go to
put these four strips here onto the hull
of the boat because the boats going to
be upside down so I want to end up
marking these port and starboard and be
clear on which is going to be which and
be consistent here while I'm at it I'm
going to mark up the ends in the same
manner just to have a bunch of sanity
checks so these are spare this is the
waterline this is the part line this is
a part line this is a centerline this is
port starboard port port port over here
we've got spare waterline marked all
right now it's time to start bidding all
of this so again the last strips to go
on are going to be the thinner line so I
have this split up into the port and
starboard and here's the centerline and
so that those are the last strips that
will go on to the deck and so I'll put
those on in the bins first so these are
hull these are spare and now likewise
for the port side
so I've brought the material for the
bottom of the boat back into the picture
I've got this bundled up use the spares
here's the two sides waterline right
there this is a lighter color which was
originally the flat grain one inch stock
where we ripped everything off the edge
book-matched set right there and we'll
add to these stacks the strips that are
the topside strips and again in the
order in which we want them to appear on
the boat the thing I'm going to do is
since these are port and starboard here
left and right eye and the boats going
to be upside down when I go here I'm
going to end up with the port strips
over on the starboard side of those bin
in the starboard strips over in the port
side of the bin just to make sure that
when I go to pull the strips out of the
bins I'm pulling the correct ones out
and we are going to be starting that's a
water line so this strips the water line
so that's the first trip going on the
boat we want that to be the last strip
in the bin so we end up here with the
first strip going in to the bin is strip
number eight and that will go in on the
far side and these fare strips will just
drop in to spare a slot in the deck bins
and so these will be in the similar
order on the other side of the den and
the last strips to go in are the topside
strips that go into the hull bins so
there we have all the material and this
is just the spare of the bottom material
and we'll just drop
have been here and then before
everything gets messed up we will bundle
these all together easiest way to bundle
them is just wrap some stretch wrap
around the bins
I'm bundling up the deck pieces now
because I'm going to work on the haul
first so we've cut all the strips
bundled up ready to go in bins so it
should be easy at this point whenever we
need a strip the next strip in the stack
should be the one going on the boat and
I think we're ready to start putting
strips on the boat see if we can get a
strip on the last thing I have to do
before the forms are ready to accept
some strips it's just put some masking
tape on the edges this helps helps
prevent the strips from getting epoxy to
the forms but with masking tape I can
still take the hot melt glue and hot
melt glue strips to it the hot melt glue
sticks ok the masking tape but the epoxy
will not penetrate through this and glue
the strips to the forms so it's just a
matter of putting tape all the way
around the edges
so now I have the forms all taped up and
I'm just going to flip the forms over so
I'm ready to work on the bottom I
haven't completed the beveling of the
bottom of these forms to match the inter
stems so I'm just going to take a quick
swipe down here with a block plane and
just give this bottom edge of the in
form a little bit of a bevel essentially
I want it to blend in with the existing
forms with that done I'll put a little
bit of tape on it keep thinking so now I
can secure this in a stem in place and
same drill down at the other end this is
a rolling bevel started a high angle
here and end up with a low angle where
it's a higher angle more material needs
to be cut off so I spend more time to
high angle and they do it the low end so
if the forms upside down so the bottom
of the boat is on top my plan is to
strip from the part line which is this
point right here which is the widest
point on most of the forms and strip
from there up to the center line and
again we're going to strip with what's
essentially the topside wood from here
up to the waterline and so from the
water line up to the keel line we'll use
a lighter color bottom wood so first
from the part line up to the water line
the darker material and from the water
line up to the center line the lighter
color so to get a good reference for the
part line I'm going to notch some strips
into those part line slots so we'll just
be put it in like that and hold it in
place since I happen to have these
grooves here which are a quarter inch
wide I'm just taking a quarter inch
thick little scrap woods quarter inch
square and notching it in there and so
the first strip will lay on top of that
strip and we do that to all the forms
now is another time to double-check the
form alignment make sure that those
little tabs are all of the same
elevation all the way down the boat they
should end up in a nice straight line
again we need to get our eyes right down
on that plane
and if everything is perfect should it
look like one continuous flat surface
all the way down there we need to do a
little bit of adjustment of any of the
forms you can do it now so we've got the
little sticks out on either side on the
part line and now we should be ready to
put a strip in place so we're working on
the bottom of the boat and the left and
right are flipped because the boat is
flipped so the port side of the boat
this is a starboard side of the boat
when you flip it over that's the way it
would lay out and so the first strip
that's going to go on is going to be
right here on top of this little stick
and we're going to it's going to be one
of the dark strips it should be counting
down from there so this will be the
first dark strip and there should be
four dark strips before we start
proceeding with the light colored strips
so now we have my first opportunity for
a sanity check I've got this marked as
waterline we're starting at the part
line and we're going to be moving up
from there so five six seven eight then
we start in with the lighter color
material and you see I have this part
line here and waterline there so I
actually have these in the reverse order
and I can sanity check that again
working up here five six seven eight
look over here and I see this is strip
nine so the next strip after this when I
flip it over and start working on it
should be strip nine so I want to end up
with the first strip on here being strip
eight I'm not sure what I said when I
was stacking these up but this should be
the first strip this should be the last
strip so I need to reverse the order of
these so I'm just going to take out of
the bin down to the next bin so now I
have part line on top and we'll stick
back up into the bin up here and
likewise on the other side now I have
them in the right order part line port
side strip eight seven six five and now
we start with the lighter wood working
up from there I'm going to start with a
strip on the port side of the boat so
I'm going to take this strip out of the
stack
so I can just stick the strip right on
top of those little sticks so with a
strip plate in place it should be nice
and straight couple things we want to
check we want to make sure there's
enough overhang here to get beyond the
end in same thing down at this ends so
enough oh we're hanging to get beyond
the end this is the part line portside
strip number eight the marks are on the
outside I want them on the body of the
boat and I want the marks on the outside
this first strips fairly critical we get
it right all the other strips and their
location will be defined by how this
strip lies on the boat every other strip
is pretty much running parallel to that
because we're butting the edge of one
strip next to the edge of the other
strip and this is defining that first
edge so we want to try and get this as
accurate as possible and so it's another
chance to check the alignment of the
forms we can see if anything's a little
bit off if anything needs a little bit
of tweaking the other thing too that
happens with this is since we're laying
strips side by side by side all the way
up to the centerline and doing the same
on the other side eventually they're
going to meet up at the keel line and
how well we get this balanced
height-wise on either side will
determine how well those strips meet in
a sort of perfect situation the end of
each mirroring strip the tip of it
perfectly lines up with the tip of the
strip coming from the other side that
mirrors it and so we end up with a bunch
of perfect V's running down that Kia
line that's a lot to ask there's a lot
of opportunities for little inaccuracies
to accumulate by the time we get to that
center line but by doing as accurate a
job
we can laying these out at the first
strip out that will go a long way to
getting that sort of ideal situation
along the Kia line it's a lot to ask to
get it perfect there and if you don't
get it perfect it's really hard to see
that it's not lined up perfectly
especially when you have matched wood
like this in that the tone of color from
one strip to the next doesn't change all
that much and as a consequence it's hard
to see where one strip ends and the next
trip begins since I had the CNC machine
I had the opportunity to cut this groove
along the edge of the forms the goal of
that is to be able to clamp the strip
down tight against the stick and then
tight up against the form it's not
absolutely necessary there's other ways
you can do it if I don't have that
little groove I have a bunch of these
little blocks and I can take and use
that to just hold the strip down tight
against the oil stick there I don't
always use these sticks either but this
is a good way to get started I'm going
to then clamp all the way down the
length of the boat and I'm all test
fitted in place
since this strip is so critical to the
alignment of all the other strips it's
worth taking your time and getting this
one right and so you know be patient
look I ball down a double-check
triple-check and come back and make any
adjustments you need if something looks
a little bit out of alignment
double-check that your strips your
little sticks in the right place it's
not crooked make sure the strip is tight
down against a little stick and then if
you need to you can always twist the
form a little bit a little tap with the
hammer to line things up and make sure
everything's straight so I'm going to
attach the strips to the forms with this
hot melt glue gun this is a sort of an
industrial glue gun it's got a couple
things going for it it's got a very fine
tip on it basically a piece of brass
tubing coming out to the end let's me
sneak the tip down in between tight
sections
it also has temperature control I find
with the glue I use the best compromise
between sticking well and releasing
easily is setting the temperature at
around 425 something like that it takes
big long glue sticks and so you're not
running out all the time with little
dots of glue this stick will last a very
long time I'm gonna start near the
middle of the boat and work out towards
the ends you could start at one end and
work to the other
I just find working from the middle out
works best for me you don't want to
start at the ends and work towards the
middle you end up might have a little
bit of excess length in the strip that
will buckle a little bit and make the
boat a little bit less fair and so
starting in the middle I'll just take a
clamp off take the clamp off open up a
little gap stick the tip in there make a
little eight-inch dot or smaller press
it tight with the beveled forms that
should be a pretty tight fit there
and so that glue should be a hard almost
instant
from there move on to the next one
so we're taking the clamp off open up a
little gap stick the glue gun in there
make a little tiny dot that was even
more than I wanted press it tight
once we've got a strip on one side we
can double check it again make sure
there's nothing crazy going on and then
we'll put a strip on the other side so
I'm grabbing it should be strip number
eight starboard side tip number eight
starboard side now the strip on this
side we want to align to the strip on
the other side to start our mirror image
book match a couple things going on here
we've got this piece of tape that's
already under that strip we want to get
that out of the way and we can align
this end down to that end and now these
are matched to each other so when we go
to clamp in this strip on the form we'll
just use the same alignment to make sure
we get a mirror image side to side
constant annoyance when you go to adjust
the length of a strip like this right
now all that's holding it to the forms
are these little sticks you go to slide
it one way or the other and it ends up
falling off and you get a start from
scratch so I use those little u-shaped
brackets just as a little thing to hold
it in place while I'm doing my adjusting
so you kept this little u-shaped bracket
stick it on there and strip can slide
through there but it's not going to fall
off so it can
just the end here and so the length is
just right and then start clamping these
downs of the forms double check the
strip again make sure it's all straight
and fair and start gluing it down in
place with everything glued in place we
want to double check it again triple
check I want to see the strip looking
nice and straight and fair smooth curves
so this is why we double check here we
have this strip it came off the little
stick right here and is now swooping up
so we want to fix that break it off you
know that any glue us in the earth way
come in and glue it again so now that
looks straight at the ends here I
haven't yet done anything with the inner
stem I want to attach these strips on
either side to that inner stem I just
want to make sure they're straight so
first thing I need to do is get them out
of the way from each other they won't
stay in place right now because one's
pushing on the other so get it down in
here and we'll cut off the excess a
little proud so now I want to make sure
this runs straight and true I've got a
little mark right here that shows that
part line so I'm gonna try and align
that with that part line like that now
we can get this glued the strip glued to
the inner stem this inner stem again is
part of the finished boat and so this is
a first glue that's actually
contributing to the finishing of the
boat so we will take and put a little
bit of glue up on the surface of the
wood there you don't need to soak it
down get it lined up with that
part line line there top of that line
strip on the other side it's gonna line
up with that as well get it clamped in
clean out the excess glue make sure it's
still running straight cut the excess
off one side it's glue on it and put
another piece of tape on the top of this
just hold it temporarily because this
tape is in the way this goes in here get
the tops aligned perfectly double check
everything's straight so we're about ten
episodes into it now and I finally got
the first pieces of wood onto the kayak
and we're actually making forward
progress on building this kayak the next
episode we'll be adding more strips to
the bottom here and it'll probably be a
few episodes now of stripping progress
showing you different techniques along
the way please be sure to post any
questions you have I really want to be
able to help you out answering your
questions if you're enjoying this build
please hit like and subscribe to my
channel there's there's a lot more ahead
of us here this is a big project it's
gonna take a little while but one step
at a time we'll make some nice progress
and it's gonna be a beautiful boat when
it's done my thanks to all my patreon
supporters your donations really helped
me produce these videos my bonus to my
supporters is they get to see these
videos a few days before the general
public so if you're impatient and want
to see what's going on please go to my
patreon page and make a donation I
really appreciate it until the next
episode I'm Nick shot at the Gihon life
kayaks workshop thanks for watching and
happy paddling