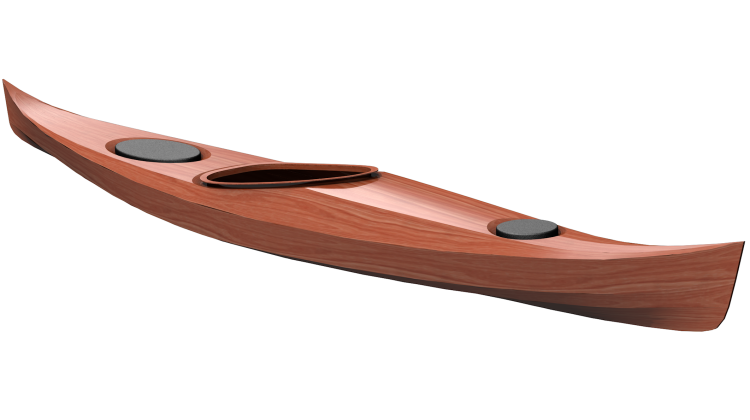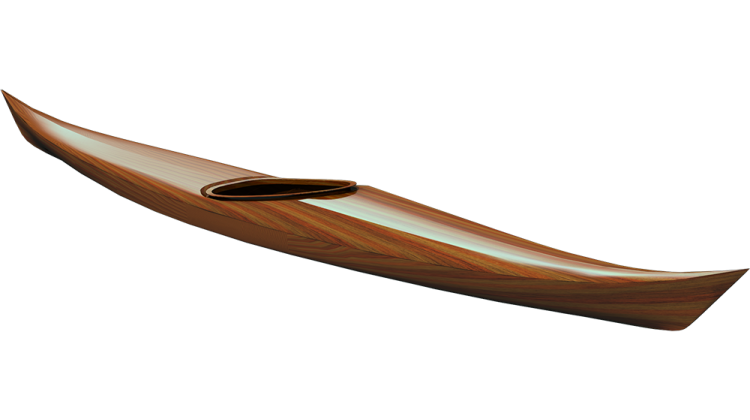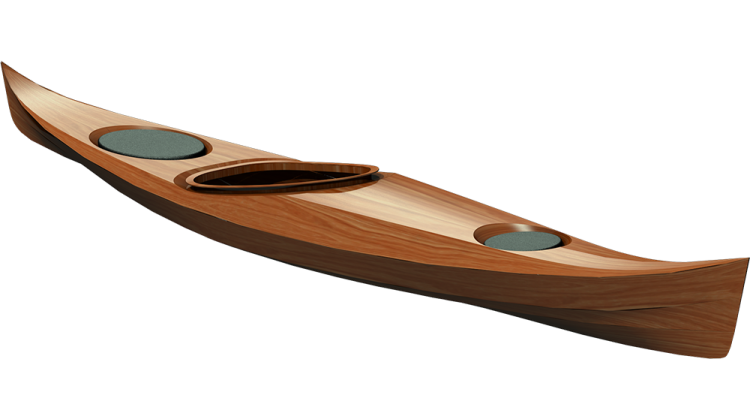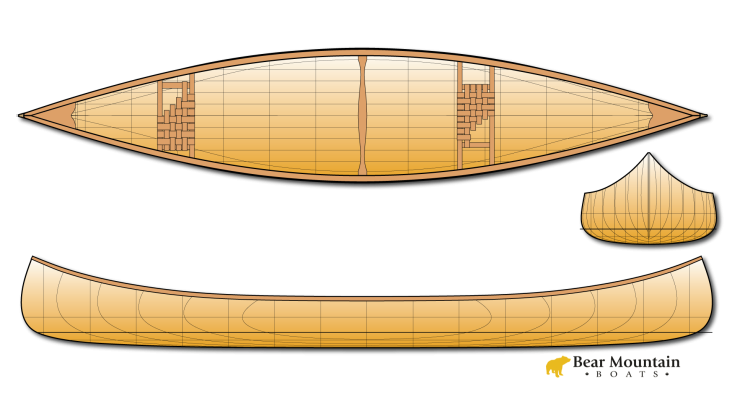
Nick Schade leads us through the construction of a strip-built Petrel, a versatile 17-foot sea kayak perfect for rough waters or leisurely lake exploration. Renowned for its speed, maneuverability, and stability, the Petrel promises an enjoyable paddling experience in various conditions.
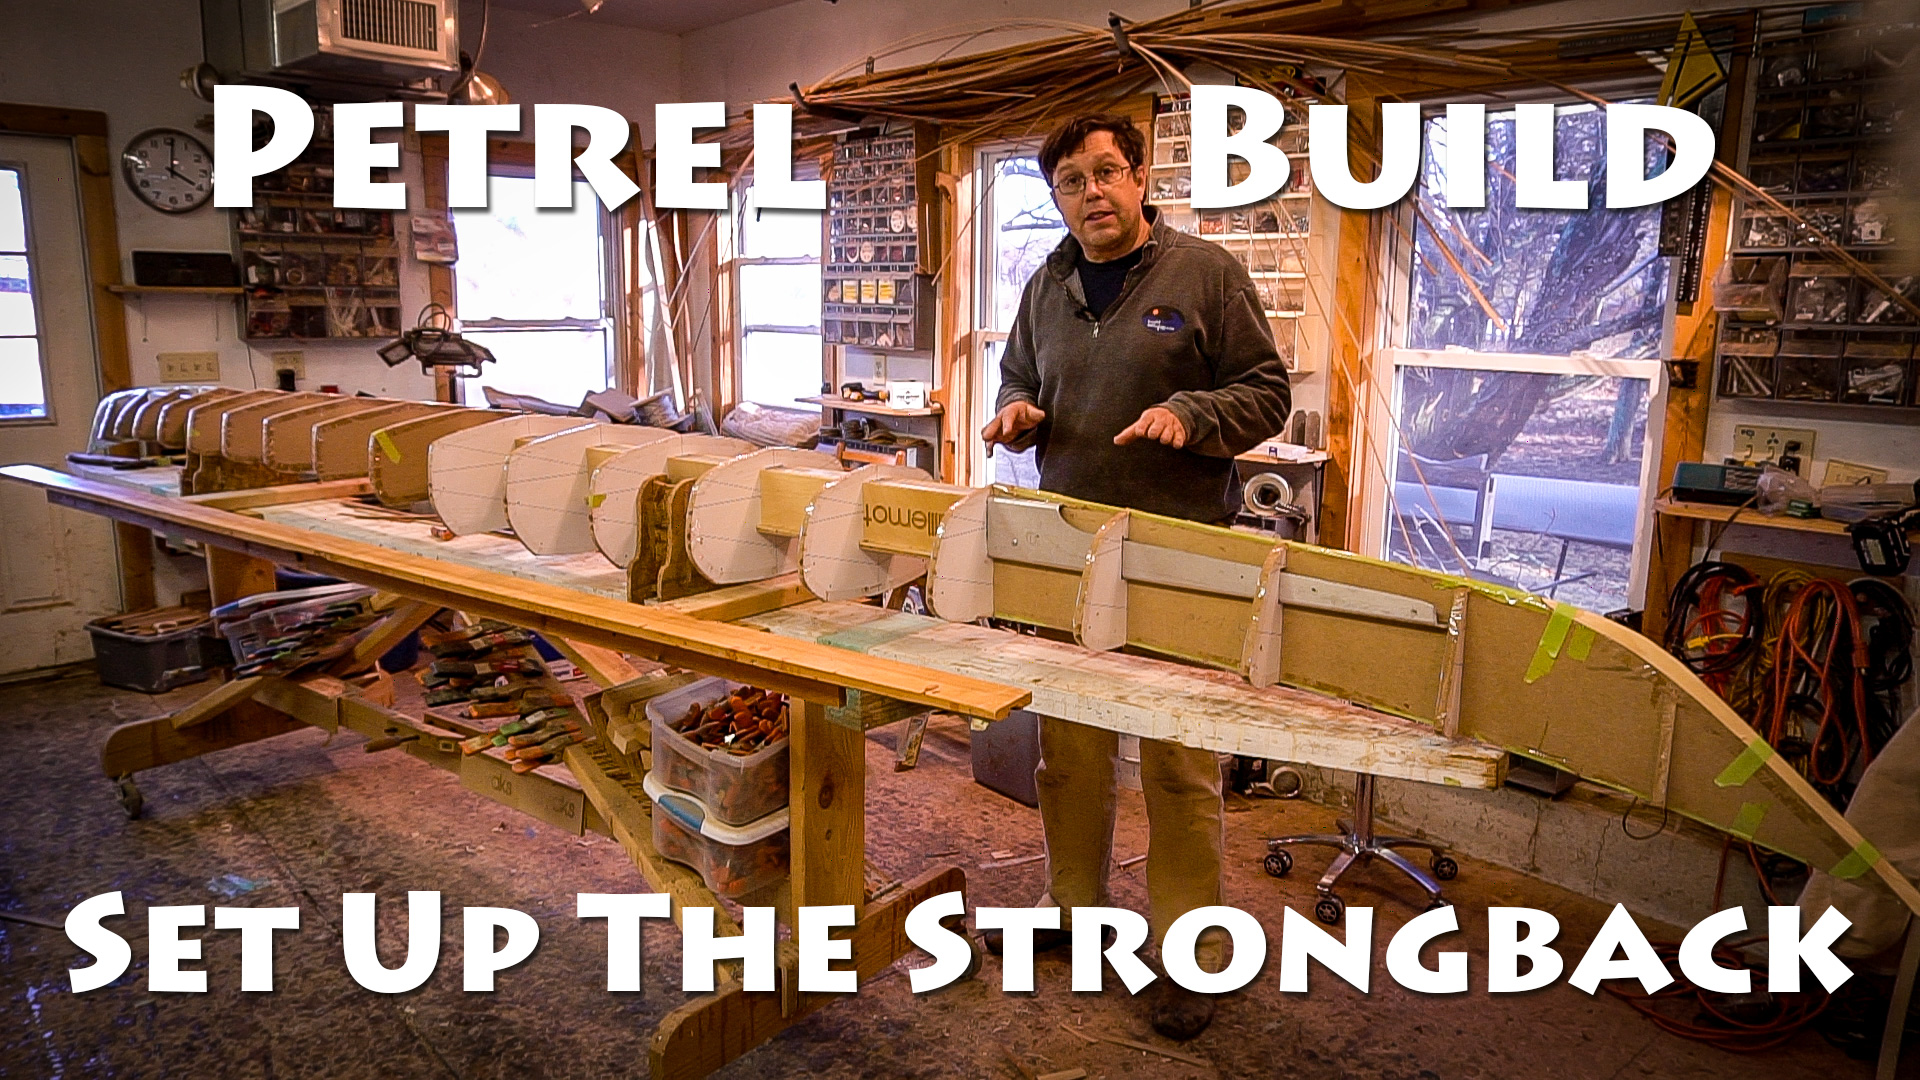
The episode begins with setting up the forms. Nick already has pre-cut forms from a previous build, tailored to fit his 13-foot-long strong back. While these forms may differ slightly from standard kits, the process remains consistent. Next, attention turns to preparing the sheer strips. Nick opts for cove and bead strips, requiring scarfing to achieve the necessary length.
With forms in place and strips ready, it's time for installation. Nick effortlessly strings the strips along the strong back, ensuring proper alignment. For the sheer strip, which requires a length slightly longer than standard strips, Nick expertly scarfs together shorter pieces, prioritizing aesthetics and functionality.
Attention to detail is paramount as Nick selects strips with visually appealing qualities for the shear line. He meticulously inspects each strip, ensuring quality and symmetry. To achieve the desired length, Nick scarfs shorter strips onto longer ones, maintaining uniformity and structural integrity.
Using hand tools, Nick carefully planes the scarf joints, ensuring a seamless fit. He employs a stack-and-stagger method for scarfing, optimizing efficiency and precision. Gluing the joints with superglue, Nick ensures a secure bond, enhancing the strip's durability and longevity.
Nick explains the importance of maintaining a consistent edge along the shear line, necessitating the removal of the bead. By eliminating excess epoxy buildup, Nick ensures a clean finish and streamlined construction process.
Introduction: Welcome to Guillemot Kayaks Workshop
Hey, welcome back to the Guillemot Kayaks workshop. I'm Nick Schade, and in this episode, we're building a strip-built Petrel. The Petrel is a 17-foot-long sea kayak suitable for rough water paddling or exploring lakes, and whatever you want to use it for. It's a really fun boat to paddle; it's fast and maneuverable, and it's really confidence-building in rough water.
Setting Up the Forms
So, in this episode, we'll be setting up the forms. I already had the forms pre-cut from a previous build, so I'm just reusing those same forms. You'll notice since I have a 13-foot long strong back that the end forms are a little bit longer than they typically would be on a kit or something. Since my strong backs are all 13 feet long, I make my forms to fit those strong backs. If you were to get a kit or something or deal with my plans, you'd find the standard strong backs a little bit longer and thus the end forms a little bit shorter. But it's the same process, just slightly different forms.
Preparing the Sheer Strips
After I get the forms put together, I'll work on making the sheer strips. We're using Cove and bead strips, and I don't have any long enough, so I will end up scarfing the strips together. So, let's get started.
Installing Strips and Scarfing
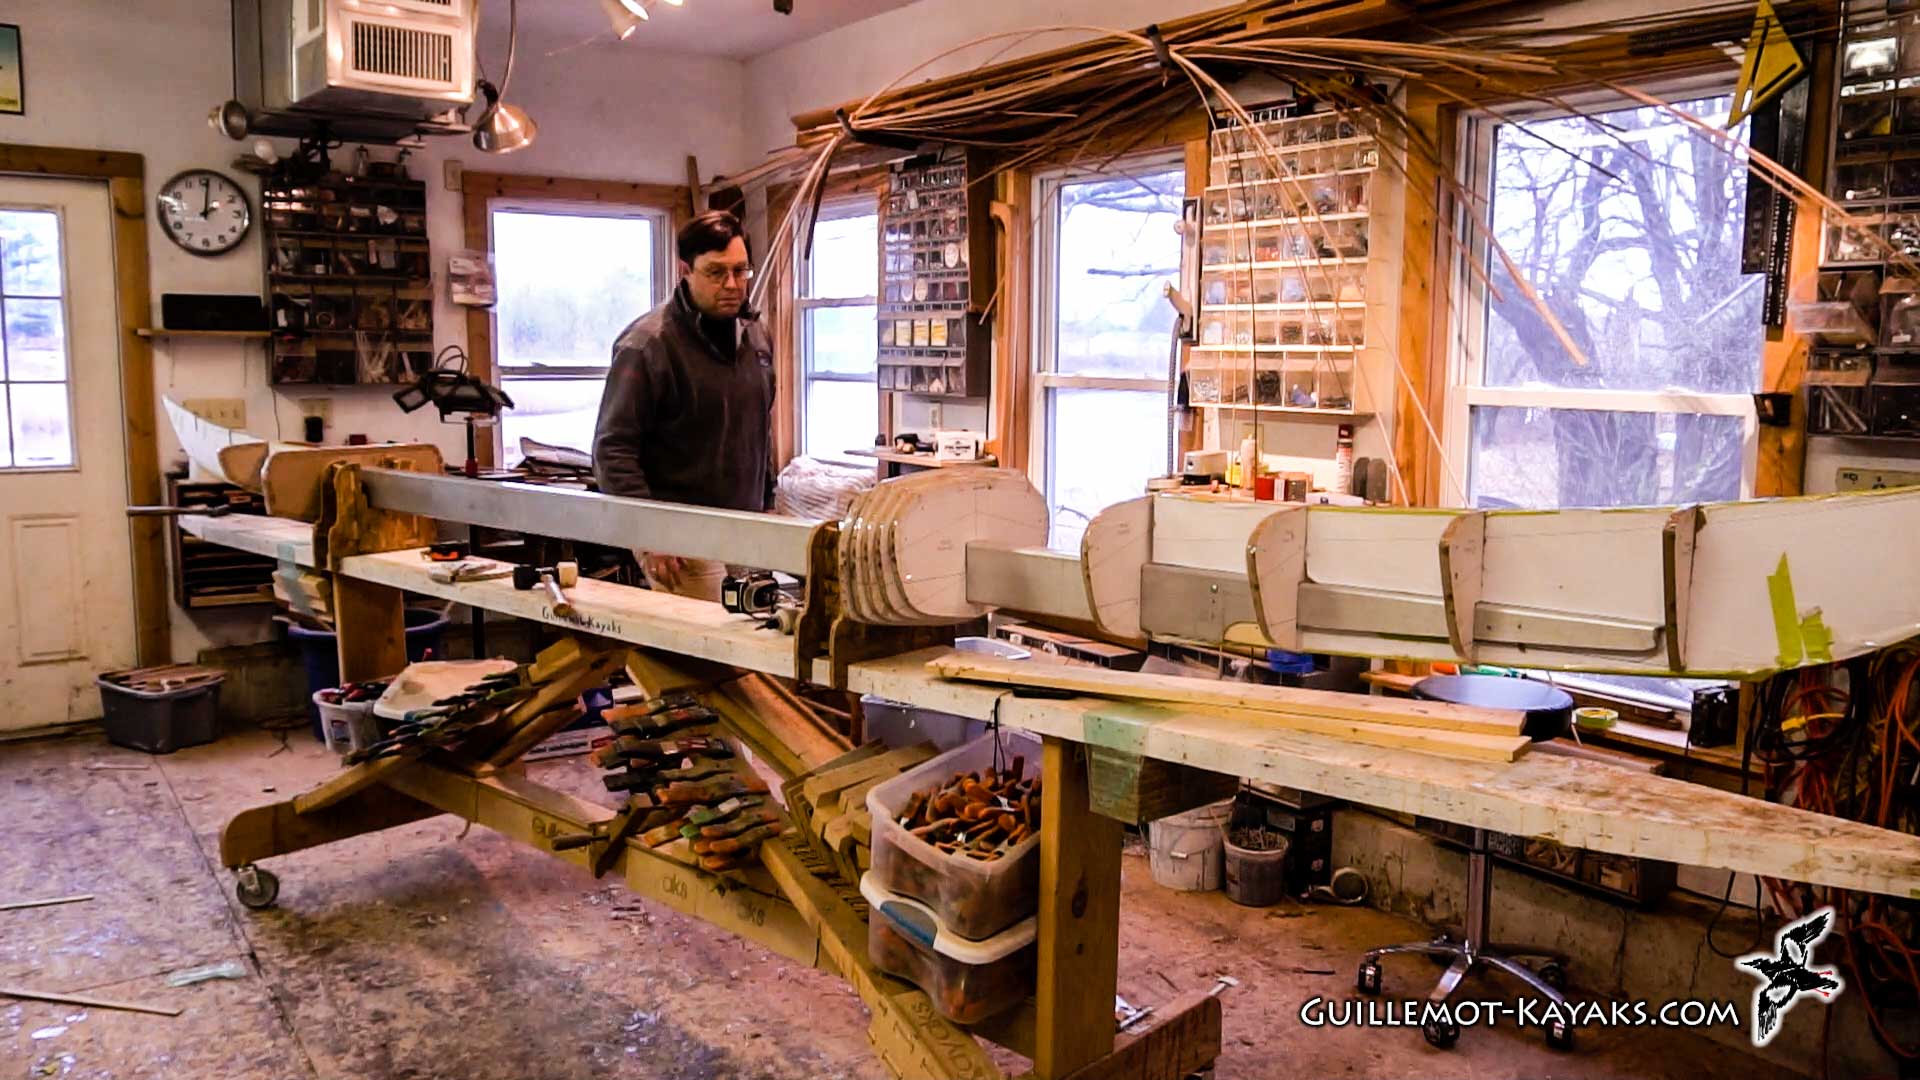
So, I have a set of forms here from the last time I built the Petrel, so I don't need to make any. Looks like I didn't have the CNC machine when I last built the Petrel, so we'll just break these out and string along the strong back. With the inner stems installed, I get the strong back ready to work.
Here, I've got some little work benches on either side of the strong back that I can work on strips on. So, I'm ready to start installing strips. The first thing I need to do is the sheer strip. This is a 17-foot kayak, and the longest strips I have are 17 feet, pretty much exactly. And if you follow the shear along here since it's curved, the 17-foot kayak has a shear that's a little bit longer than 17 feet, not a big deal. So, what I'm going to do is I'm going to scarf together a couple strips to make a long strip for the shear strip.
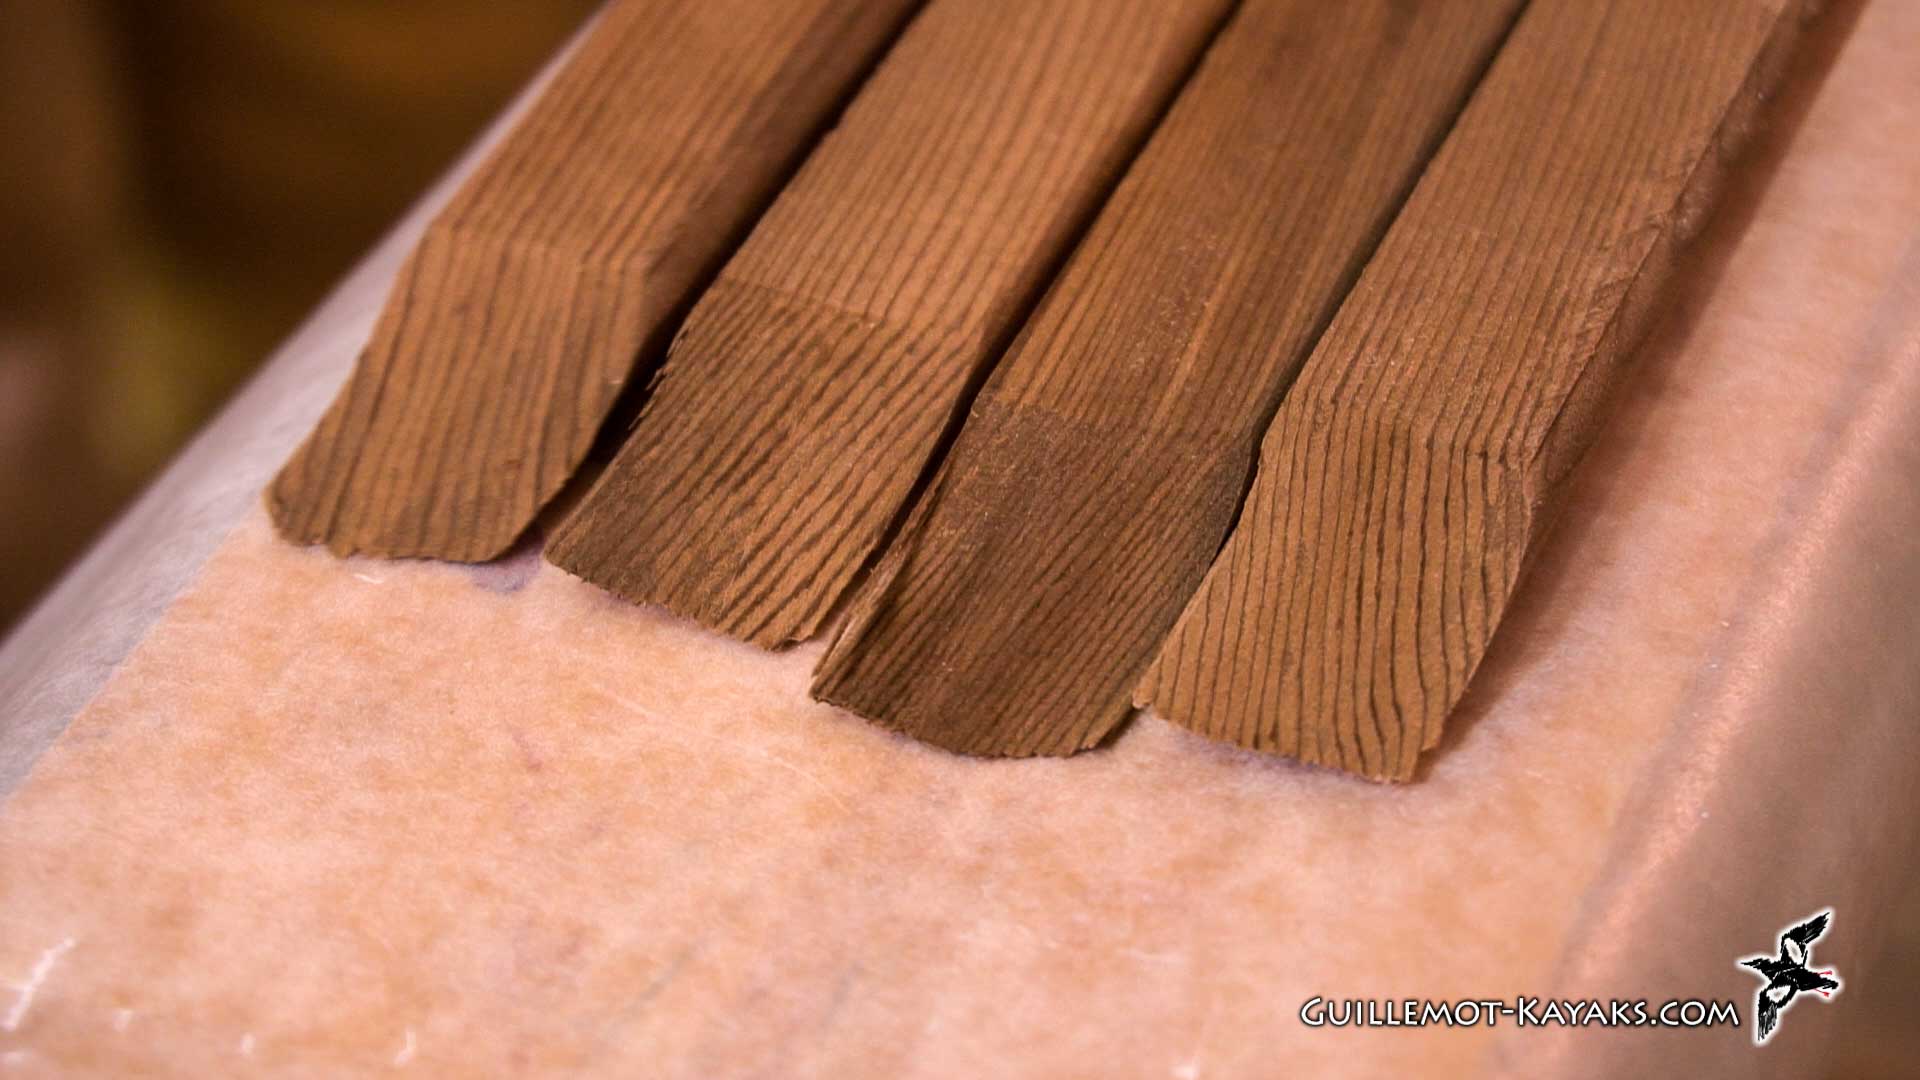
I like to scarf the shear strip together so I have something that bends in a nice fair curve. And I also want to select a strip that I think will look nice along the shear line, that's sort of a point that attracts the eye. My plan is to put a pin stripe along the shear line, so what I want to do is choose a dark strip so when I put the pin stripe there, there's the most contrast between the pin stripe and the wood at that location.
So, I'm just going to look through my stack of strips here, find some strips that are reasonably dark, pull them out, see what we got. I've got three strips here that are quite dark, and just inspecting the strips, and I see that this strip, the plane sort of gouged into it a little bit, so it's a little bit narrow here, a little bit thin. So, I'm just going to cut that bit off and then just look down the length, make sure everything else is good about these strips.
Started out of 16 footers, so I'm just going to take one of them, cut 2-foot sections off of it that I can scarf onto the ends of the 16 footers, and that way I'll have something around 18 feet, which should be plenty to reach the end here. So, just double-check to make sure I have enough length. So, I'm going to make a scarf on the end of these strips, and they're going to do it all at once. I'm going to do it all with hand tools.
I'm going to stack my pieces of wood in a long stack here, and I'm going to stagger each and back an inch or so. So, I have a stack here, everything staggered back about an inch or so. Just try and make it a fairly uniform stagger, and the beads and coves are all on the same side on all those strips. And I'm just going to put some scrap strips as the bottom layer and also the top layer, just putting a clamp on it all to hold it all together, try and make that spacing a little bit more uniform.
I want to set the end of this one just at the end of my workbench there. Now, I'm going to take and just run my plane down that stack so I have stairs here. I'm trying to make it a ramp. This requires a good sharp plane, so if your cedar is not cutting well, you probably need to sharpen your plane. So, it should cut pretty easily. So, you want these ends pretty close to square. Doesn't matter if it's perfect. This isn't that critical a joint; we're just trying to make a decent scarf there.
And you know the length of these, each side just sort of eyeballed it, but if you do it in a stack like this and just take this piece and flip it over and join it to that piece, since you did it together, the slope should match up pretty well. And I'll go together somewhat like that, and this one will go together someone like that. So, that should be decent, not perfect but decent. I'm going to glue these joints with superglue.
I have found that super glue is nice in that it's quick, but on the end grain of wood like this, it doesn't stick all that well the first time. So, what I do is I put some glue on it, spread that around, let it soak in a little bit, and then spritz it with the accelerant. Let that harden up so now that end grain is sealed. And so, when I go to glue it, it'll be a little bit more effective. So, it's just going to go together like this. I want to make sure when I put it together that it's straight, doesn't have a kink in it. So, I'll put glue on here, spray the other piece with accelerant, and then stick it together, likewise with the next piece.
So, I have two strips ready to go here for the shear line on either side of the boat, and they're going to go right here, which is also the part line. So, the deck and hull will get joined together at this sheer line or part line. And right now, I'm going to work with the cove side up as I'm stripping. So, in this case, I'll start at the sheer line, move up to the keel line, and the cove will be up the whole way. When I flip the forms over to work on the deck, I will then be working with the cove up again. And in that case, that means if the cove's up here, the cove's going to be down on the other half. So, it would be meeting bead to bead at the shear line. That's just not practical.
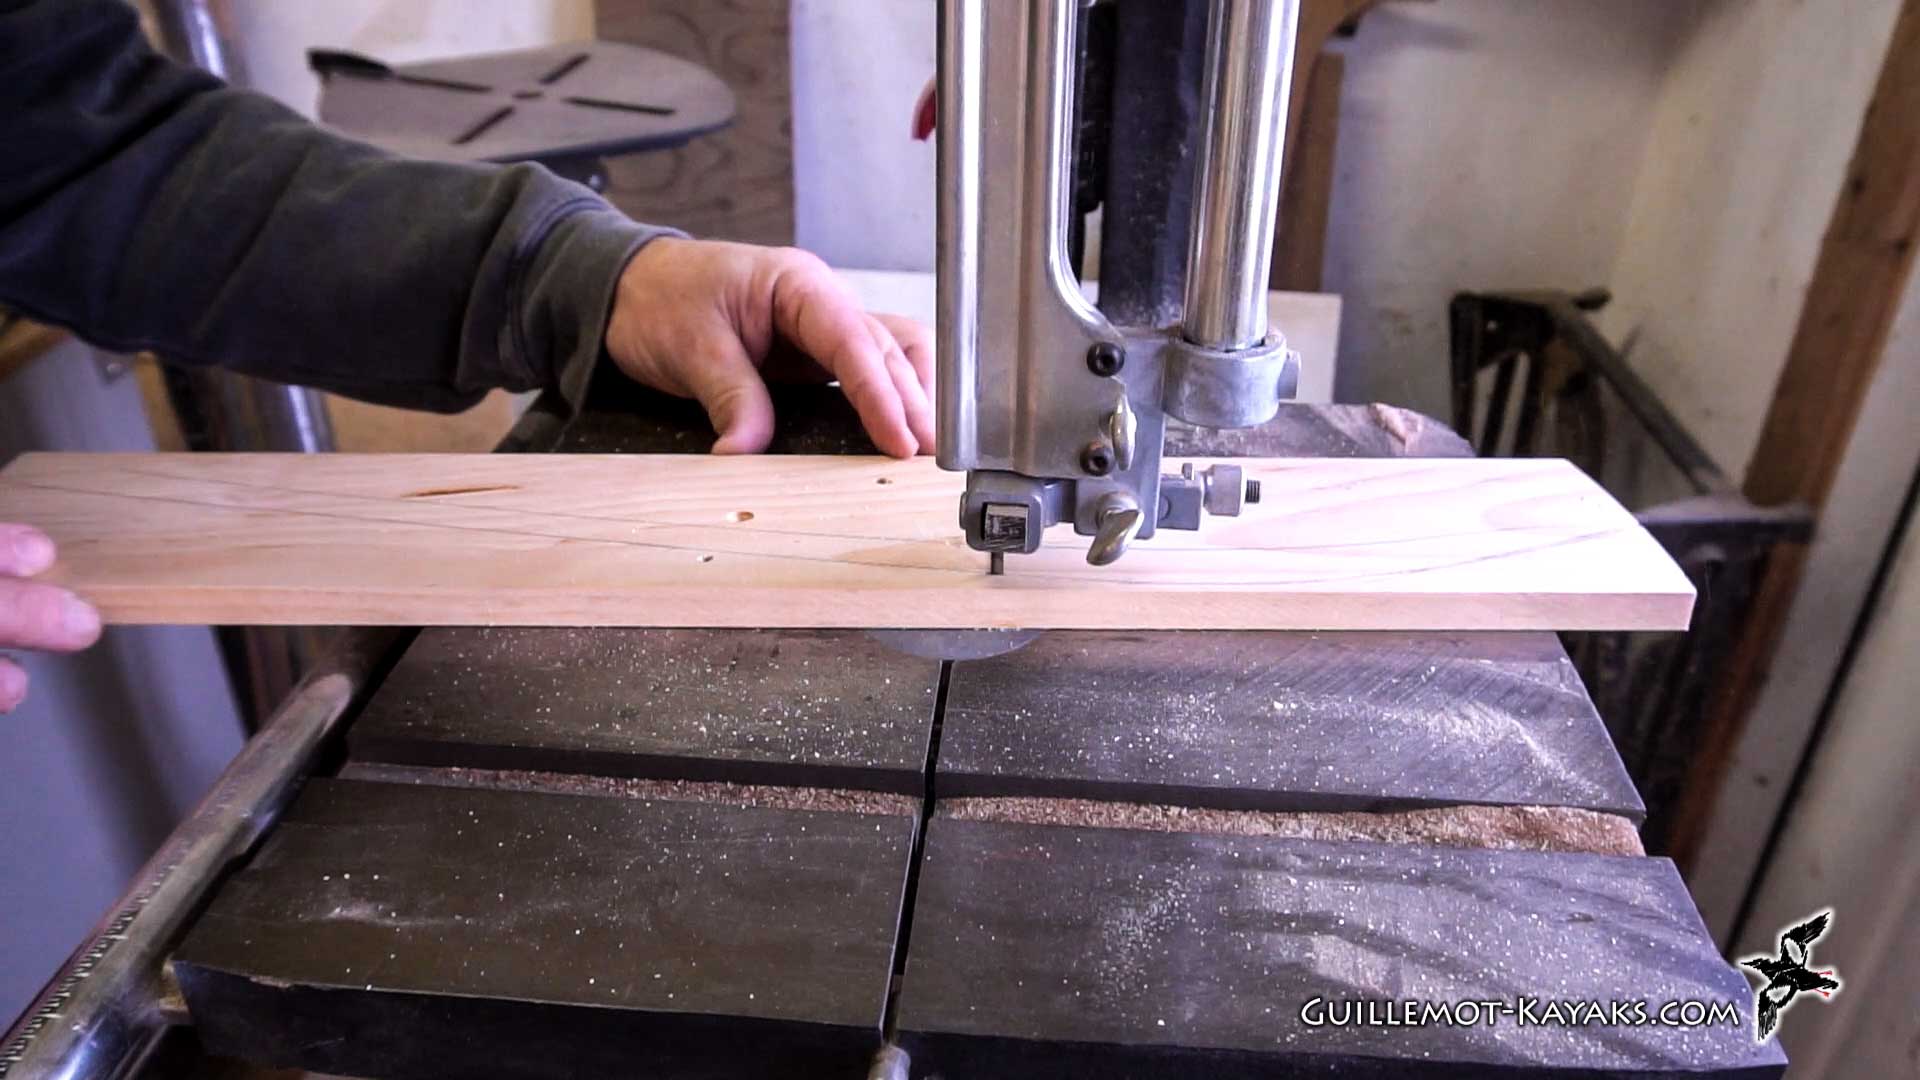
You might think it would sort of snap together, but as a practical matter, when you get the epoxy on here and the fiberglass, that ends up dripping off this edge a little bit and messing up that edge. If I had a bead there, it would just be full of blobs of epoxy, and that's not practical to deal with. It's almost impossible to get that cleaned up, and it's just a mess. So what I do is I cut the bead off, and that way it's going to be essentially a flat edge where it meets at the part line or the shear line.
So I'm just going to take these to the table saw, cut the bead off, and then I'll be ready to use them. I'll set the table saw up here such that I cut the bead right off, and it's kind of arbitrary with whatever is enough to carve cut that bead completely off.
So that's it for this episode. I hope you learned something. I support these videos by selling plans. For example, the plans for the Petrel that I'm building here are available on my website. I have got all the plans for all my other designs. I've also got my Robo bevel tool, which by the way, I won't be using in this build too much. And I've got t-shirts, etc. So that's one way you can support these videos.
Otherwise, just liking and sharing and subscribing to my channel here really helps a lot. And if you're really into direct support of these videos, head over to my Patreon site where you can chip in for direct support and really help me produce all these videos.
Until next time, thanks a lot, and happy paddling.