In this episode, Nick Schade of Guillemot Kayaks gives a detailed demonstration of the deck construction process for a small boat. He shares insights into addressing gaps in the deck strips, pre-assembling the recess, and managing delicate wood grains. Additionally, he highlights the importance of beveling edges for a snug fit and demonstrates the removal of staples in the assembly. Through these methods, Schade provides a comprehensive guide for boat enthusiasts and showcases his expertise in boat design and construction.
This is the Strip Built Petrel design.
Support my Patreon at: https://www.patreon.com/NickSchade
Tools:
- Mini Shoulder Plane: https://www.leevalley.com/en-us/shop/tools/hand-tools/miniature-tools/p…
- Verita Side Rabbet Plane: http://www.leevalley.com/us/wood/page.aspx?c=&p=60012&cat=1,41182
- Wood River Side Rabbet Plane (not as good as Veritas, but more affordable) http://amzn.to/2CvRa4f
- Stanley #79 (Ebay): https://www.ebay.com/itm/Stanley-79-Side-Rabbet-Plane
- kunz #79 (crappy castings but with love it would work great) https://www.highlandwoodworking.com/kunz79siderabbetplane.aspx
- Low Angle Block Plane: https://www.lie-nielsen.com/products/small-block-planes?path=handplanes…
- Apron Plane: https://www.leevalley.com/en-us/shop/tools/hand-tools/planes/block/4679…
- RoboBevel: https://www.guillemot-kayaks.com/catalog/boat-building-tools/robo-bevel…
- T-50 Stapler: https://amzn.to/2U7XjA0
- Bostitch Heavy Duty Staple Remover: https://amzn.to/2Gy8F8L 9/16"
- T-50 Staples: https://amzn.to/2RDOyfw
- Craftsman Cutting Sheers: https://amzn.to/36Cr5PW
- Heavy Duty Hot Melt Glue Gun: https://amzn.to/2U3c9YJ
- 1" Spring Clamps: https://amzn.to/3aP8fZy
- Green high-stick Tape: https://amzn.to/317aLFV
- Titebond Glue: https://amzn.to/3aOhSaP
- 4-oz Boston Round Squeeze Glue Bottles: https://amzn.to/2RAYK8B
Hey, welcome to the Guillemot kayaks workshop. I'm Nick Schade. I design and build small boats, primarily kayaks, but also canoes, row boats, anything that you can put on top of a car. I've been designing boats since the 1980s and Guillemot Kayaks has been around since 1993. I've written a couple books about building boats primarily with the strip building method, and I've written articles for WoodenBoat Magazine, Sea Kayaker and others. And with my company Guillemot Kayaks, I sell plans and instructions for people to build their own boats, and all my designs are offered as kits through Chesapeake Light Craft.
In this episode, I'll finish up stripping up the deck and get to the point where I'm about ready to put in the cockpit recess. I'll start off with putting in an accent line along the feature lines on the deck and then I'll fill in the remaining strips. So, without further ado, let's get right to it.
I didn't make this strip long enough, so I've got a little gap right here. I'm just gonna glue another piece in there, fill that in, and it's such a small piece, if I don't have a perfect fit, nobody will notice. So, most of it will get trimmed off. Here's where I put that little extra bit in. This is a glue, the super glue right there, so it's like a 32nd or 64th wide at that point, goes out to about there. Really, all that did was fill a cove in on this strip, so when I glued this down, there wasn't a gap there.
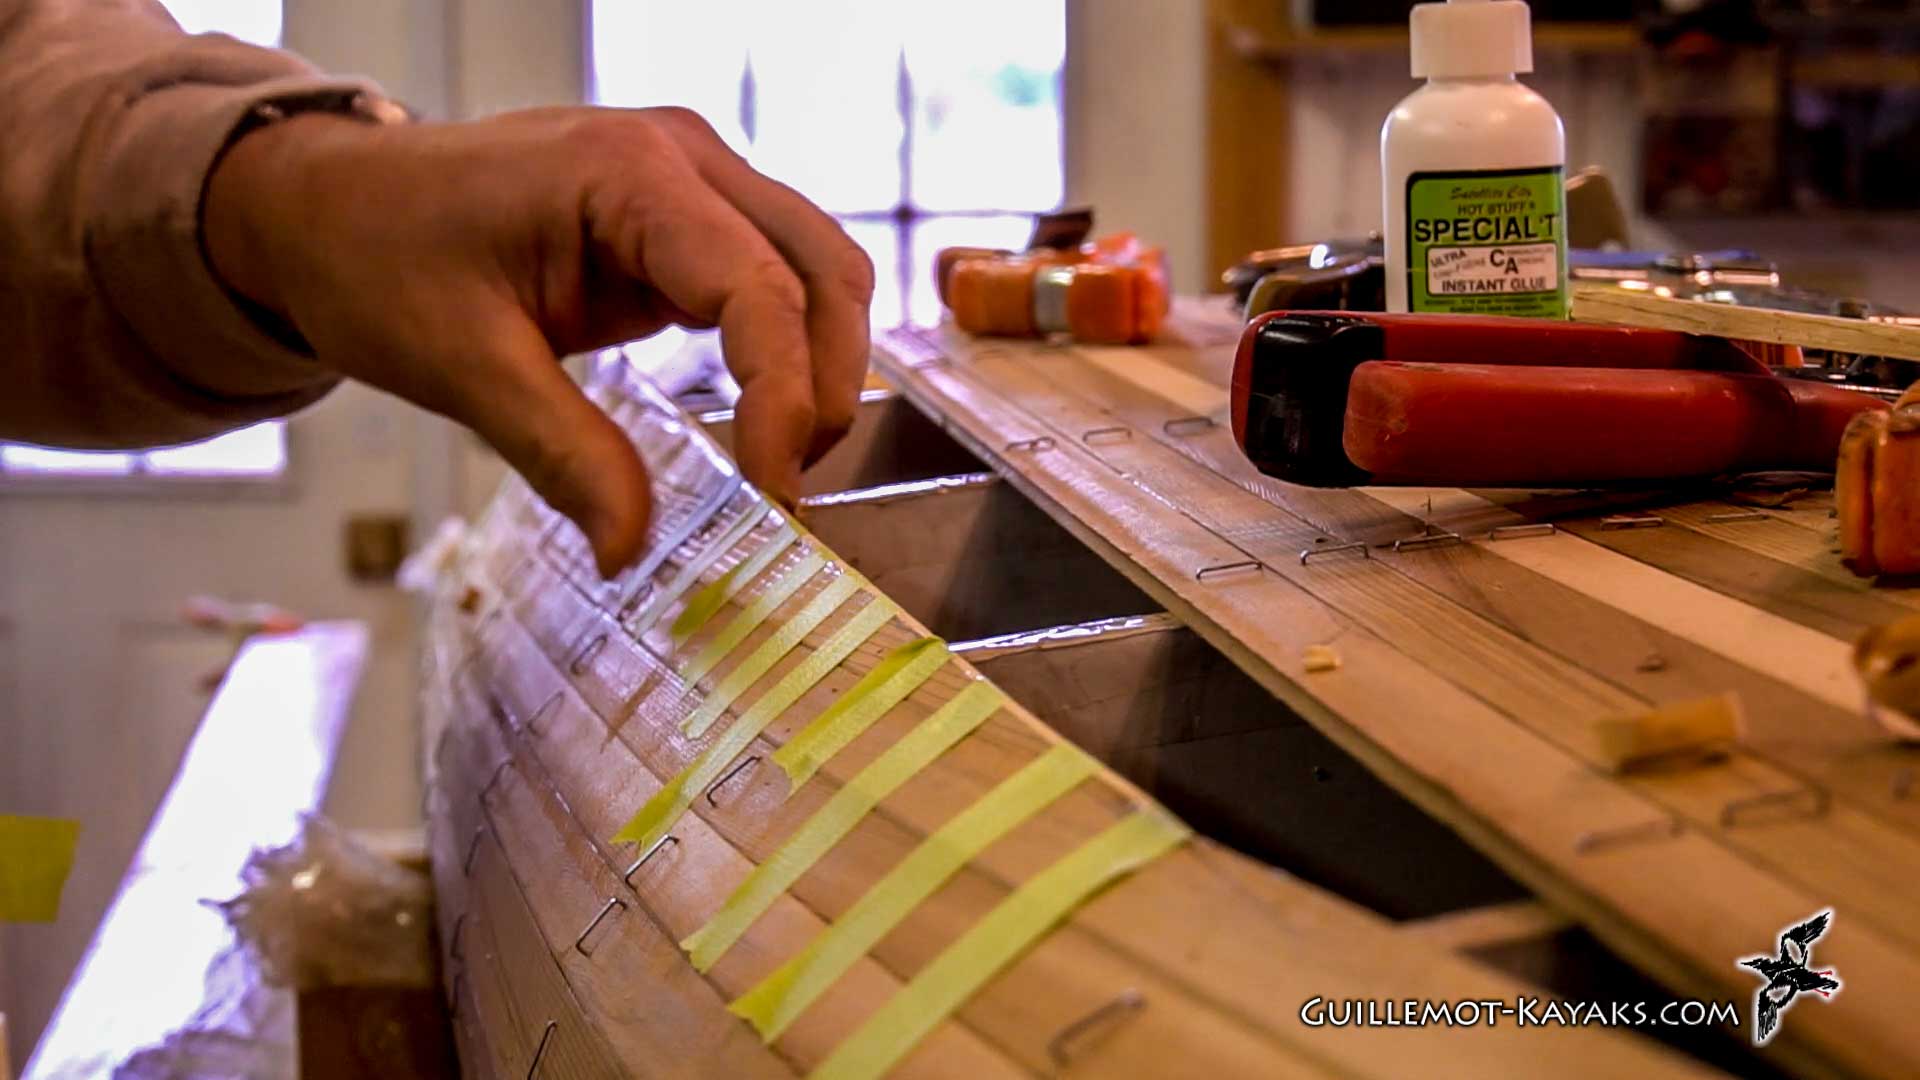
So, I cut these calming recess pieces on my CNC machine. It's just a quick way to do it, but I didn't get it on video. So, what I'm just gonna do is pre-assemble this recess, just to bend these around here like that, put a little tape on it, then super glue it together, and then work on installing it on the deck of the boat.
I cut this recess sill piece with the grain going across like this. That happened to be the way it fit in my plywood the best structurally. When it's all done, it's going to be fine, but right now, it's a little delicate because of this short grain right across here. So, I'm just taking a little bit of masking tape and sticking it down. This is the whole thing to bind the grain together a little bit more, give it a little bit of reinforcement. I'll be delicate with it, but just added insurance.
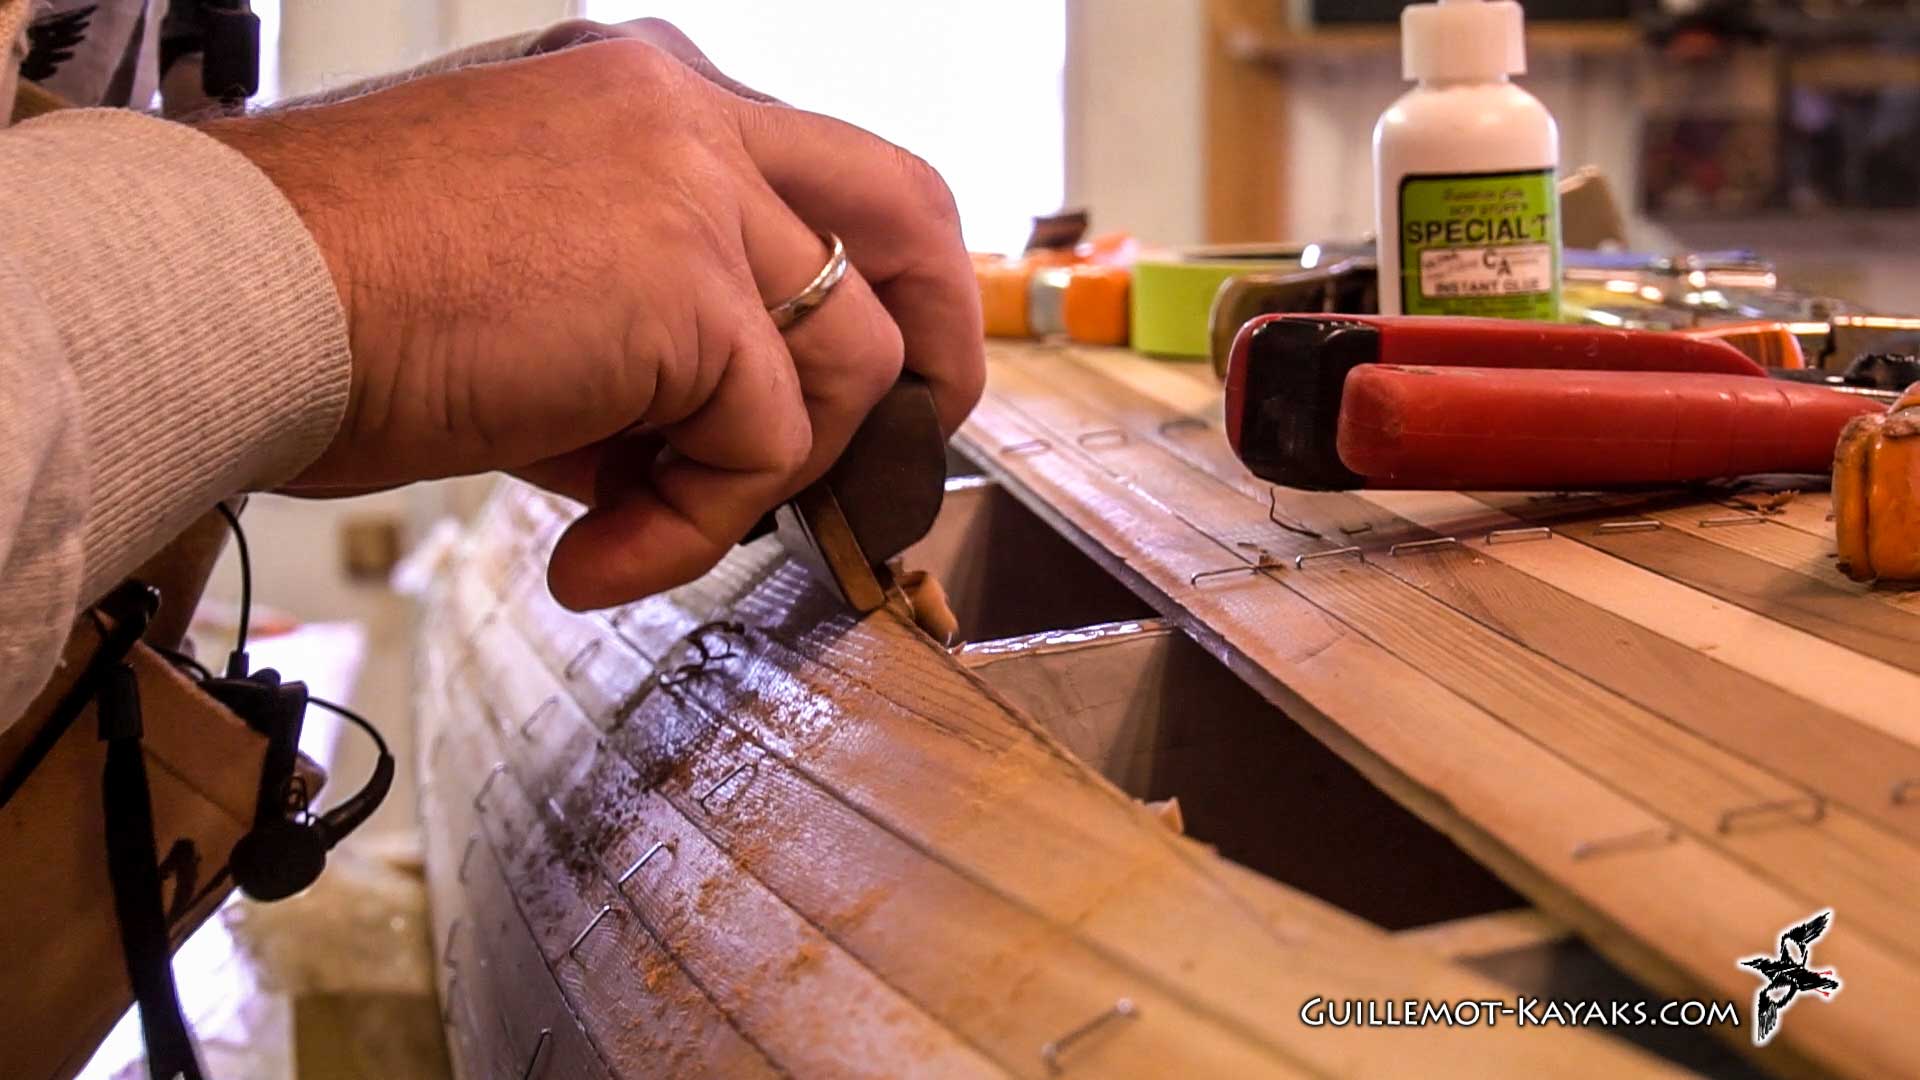
I remembered as I was gluing this up and I'm gonna stain everything, and it might be a problem later because this will act as resist in here, this super glue. But I have some solutions, I think. We'll see how it works out. Right now, before I install this bit, I want to work on beveling this edge. Right now, that edge is angled out through the square edge of the cut, and I want to bevel it down and a little bit inward. So, when I go to press it into the deck, it has a squeezing tight fit there. So, I want to go all the way around this edge here, blend this in a little bit here and there, and get this a little bit more vertical for the installed unit.
This recess is going to drop in here something like so, but in order to make that fit, I first got a couple an approximation of the hole that's going to drop into. So, I have a paper pattern here, which will lay up something like this, and that'll guide me on where to make the cut. So, I'll tape this in place, but I want to get the staples out of the way first, so they're not interfering with the fair. So, I'm just going to remove the staples from this area.
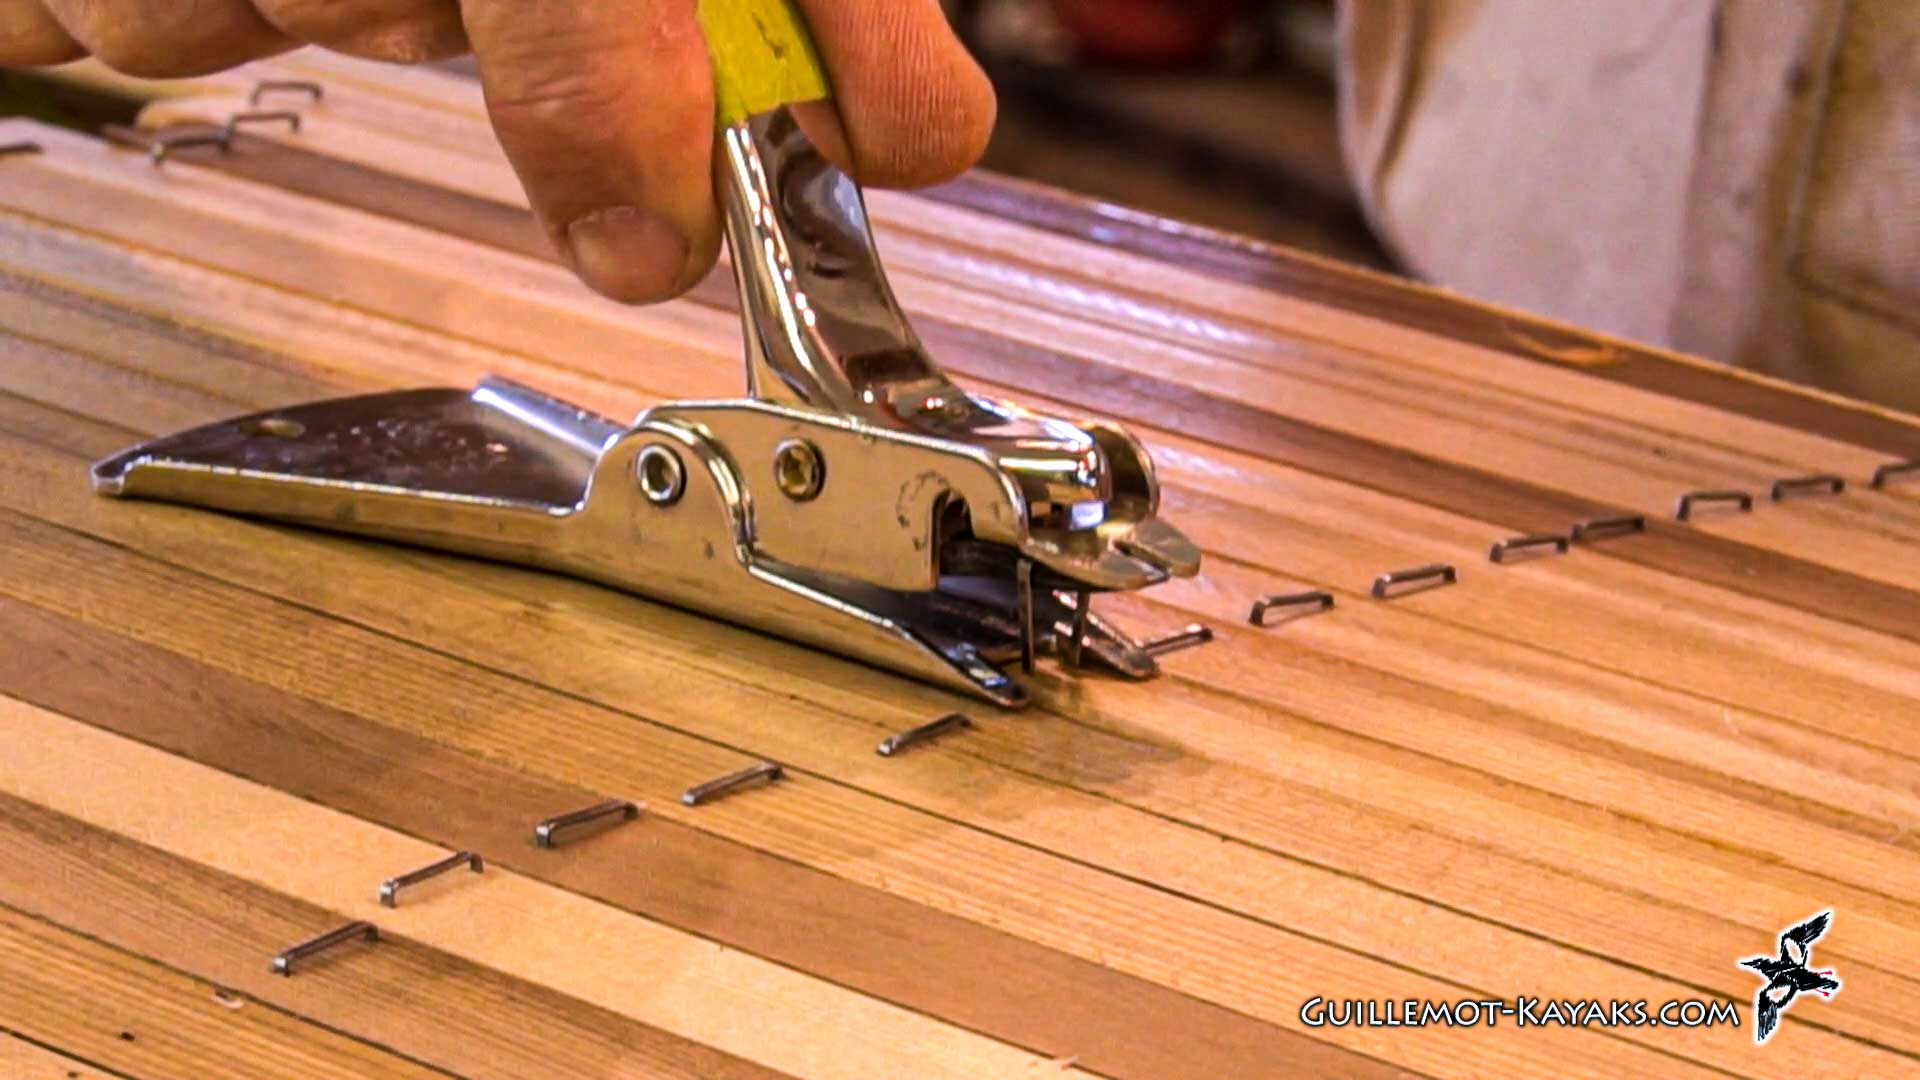
This heavy-duty Bostitch staple remover is pretty nice. It's a model G27W staple remover from Stanley Bostitch. One thing about it, basically, you have this flat surface to press against the wood so it doesn't dimple the wood, and you just stick the little tooth there under it, push down on the lever, and it lifts that staple right out of there.
This little tooth here you see is on a screw. It can come out, and you can sharpen this little tooth to make it easier to get under some of the staples. I have not yet done that with this so I think I'm going to do that, make it a little bit easier to get into some of the staples that were a little too close to the wood. Just tried to make it a little bit easier to slide under the staple, so it still has a bit of a square edge there, but it's down a little bit lower -- good way to start. So, just get the tooth under the staple a little bit, start wiggling it up, take it out off the staple -- avoid trying to dig in like this, that'll leave a divot in the wood, little horseshoe shape that'll leave a mark that will be hard to sand out.
Just try and slide it horizontally, and once you get it hooked in a little bit, a little wiggle, pull it out. So, be a little careful that you don't end up with a staple hanging off the bottom here like this. Sometimes, when you go to dump it out, it stays on there, and you end up pressing that staple down into the wood as you go to pull the next staple out, so just be a little careful with that. Seems to be in the ballpark.
I'm going to cut it out with a saber saw with a really fine tooth blade in there. I don't want to cut through the form, so I'll just go in between the forms and use a handsaw to get at the forms. And again, I don't want to cut too strong back, so I'll come up to here and stop. Going to here and stop. This is gonna sit in there about like this -- you'll see it's starting to hit this spacer in the strong back, and when it's all the way in, it's going to hit that. It will not hit the strong back itself, though; it's just the spacer.
So, I'd like to remove the spacer, and in order to do that, I need to move this form, and in order to do that and go into some of the other forms, I'll move the staples from these three forms that way. So, that's about enough for this episode. In the next episode, we'll put in the cockpit recess and see how far we get with that.
If you're interested in building your own boat like this, head over to my website, Guillemot-Kayaks.com. I've got plans and instructions there for this design and a bunch of other designs, and there's probably a boat there suitable for your needs. If you'd like to provide some direct support for these videos, I've got a Patreon site. You can chip in a buck or two a month just to help the production of these videos. If you don't want to do any of that but you like these videos and you want to see more of them, hit subscribe, like my Facebook page, share with your friends, turn on notifications - all that good stuff.
So, until the next episode, thanks for watching and happy paddling.


