Transcript
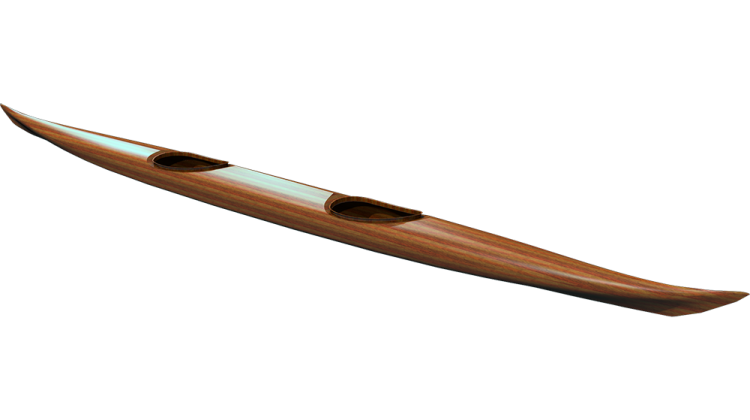
Hi, I'm Nick Schade at Guillemot Kayaks. Welcome to Episode 13 of my series of videos on making the Petrel Play, a strip built kayak.
In the last episode I cleaned up the hull interior and then fiberglassed it. In this episode I will do the same to the deck, with the added excitement of glassing the coaming lip.
The cleanup of the deck interior proceeds in the same manner as the hull. I start with good sharp paint scrapers.
I select a scraper edge that best matches the sectional shape of the deck at the point I'm working.
The deck is resting in some cradle forms that match the deck shape. Some tape keeps the light weight deck from flying all over the place as I work.
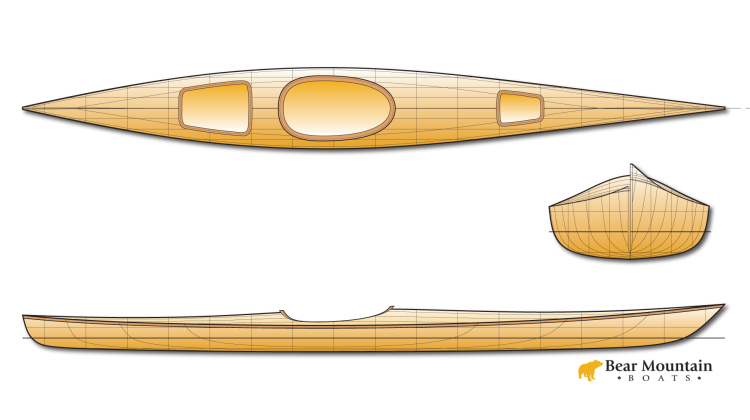
This Petrel Play design has a tight radius at the deck edge which the tear-drop scraper fits into nicely.
I can't use a power sander everywhere on the interior, but I will do as much as I can.
An up-and-down, then back-and-forth sanding pattern does a good job of leveling all the strips equally.
Its amazing how flexible the shell is at this point. It is just 3/16-inch of cedar with glass on one side, but it is already pretty strong.
I do as much as I can with the power sander, adding a contour pad to help with some of the tighter curves.
I then touch up some spots with a scraper and finish up the sanding with some 60 grit sandpaper wrapped around a shaped piece of foam.
Back in Episode 11 I built up the cockpit and coaming. I double check to make sure it is all sanded out and ready for fiberglassing.
Wrapping fiberglass around the coaming is an excellent demonstration of the capabilities of cloth that has been cut on a diagonal or a bias cut. With the yarns running at a 45° angle to their length bias cut strips distort easily, so handle them carefully.
A thin coating of epoxy on the coaming helps hold the strips of cloth in place as I get them situated.
With bias-cut cloth you need to be careful not to tug or pull at it because doing so will make the strip narrower. By carefully unrolling the cloth and gently patting it into position, I will have enough width to wrap around the underside of the coaming lip.
I'm trying to position the cloth on the vertical part of the coaming, with enough fabric above to wrap out over the top of the lip, then tucking back underneath the lip, but not so much that it will need to go down the outside of the riser. I also want enough to wrap around the bottom of the coaming to the underside of the deck.
With the strip of cloth positioned, I make sure it is well stuck to the coaming riser.
Now I can fold the top edge out over the top of the lip, pulling the cloth from the inside out towards the edge.
It looks like I have more than I want hanging out on my side of the coaming, so I pull it back it in and down the inside of the riser.
Around the front I don't have enough, so I pull a little up. This creates a little bunching, but I can move some of that to the underside of the lip.
A bit of resin applied to the underside of the lip will help tack the cloth in place.
Now I start folding the edge of the cloth under the lip. A bent acid brush comes in handy for reaching the bottom side.
It takes some patience. The cloth will not stay until there is enough resin on it and the lip to make it stick in place.
So, initially it is a process of carefully stroking from the outer edge in towards the riser with a wet brush getting more and more resin on the cloth.
Eventually, visible progress is being made. The cloth sticks and stays adhered to the underside of the lip.
If the edge of the cloth wants to start wrapping down the outside of the riser, I pull it back to keep it on the lip. The excess is then pull back over the top and down the inside of the riser.
With the first piece in place, I renew the epoxy on the rest of the coaming to prep for the next section.
The next section overlaps the prior about 1 inch.
I've got a short bit remaining that does not have glass on it yet. I measure a piece to fit with about an inch overlap on either end.
The last bit of glass to get epoxy is the stuff hanging down below the coaming. The easiest way to get this is to flip the deck over.
I want to pull the glass tight as I fold it onto the underside of the deck, so I pull the brush from the edge out over the deck.
After I've finished wetting out the glass, I scrape off the excess with a squeegee and grunge cup.
I'm going to proceed directly to glassing the inside of the deck, but first I want to make a fillet between the cockpit recess and the deck to reduce any stress riser in this area.
A cake decorating bag or zip-lock makes quick work of distributing the dookie schmutz into the seam.
While I'm at it, I add a fillet to the foredeck feature line.
The filleting mix of epoxy with wood flour is shaped using a rounded piece of scrap wood. This eases the transition from the coaming recess to the deck.
I clean up any squeeze out with a squeegee.
Without waiting for any of the epoxy to dry, I go directly to laying out the fiberglass.
I placed the back edge of the first piece of glass directly behind the cockpit. This way when I add the piece to cover the stern, I end up with a doubled up section behind the cockpit to help support the load of climbing in and out of the kayak.
I always wetout around the cockpit first because this is the hardest part and any wrinkles that develop are easier to deal with before the rest of the glass is saturated with epoxy.
Trimming the scrap glass out of the cockpit hole reduces the tension on the yarns winding over the various contours of the cockpit recess.
A couple darts around the cockpit will help allow the fabric to drape down onto the coaming riser.
The trimmed edge of the cloth is wetout to create a second layer on the coaming.
Once the cockpit area is dealt with we can now get on to the easy stuff.
Pulling from the puddle at the center, up the side, I want to wet out all the way to the sheer.
Like at the chine in the last episode, I do get some bridging at the feature line. Instead of stressing about these bubbles now, I ignore them. Time spent now fussing with minor issues result in the epoxy setting up more and making it harder to deal with any issues later.
Trimming off the excess glass prevents the sagging edges from lifting the fabric off the interior.
I dump the resin in the middle and spread it to the edges with the squeegee. The resin-rich layout at this point allows the wood to soak up its fill, preventing starved areas later.
I'm doing an initial scraping to even out the resin.
There is no point in fixing the bridging until I've completed the scraping.
With the wet out complete everywhere I do a final grunge cup round, inspecting for issues as I squeegee off any remaining excess resin.
I'm not showing the light fill coat like I did in the previous episode because I neglected to record it.
In the next episode I will install deck hardware and hatches and make the endpours.
If you are curious about anything in this episode, please post your questions to the comments area. I will do my best to answer your questions.
Happy paddling and thanks for watching
The Tools used:
- Utility Cutter
- Small Festool Sander
- Japanese Pull Saw
- Thick CA Glue
- Thin CA Glue
- CA Acclerant
- HD Hot Melt Glue Gun