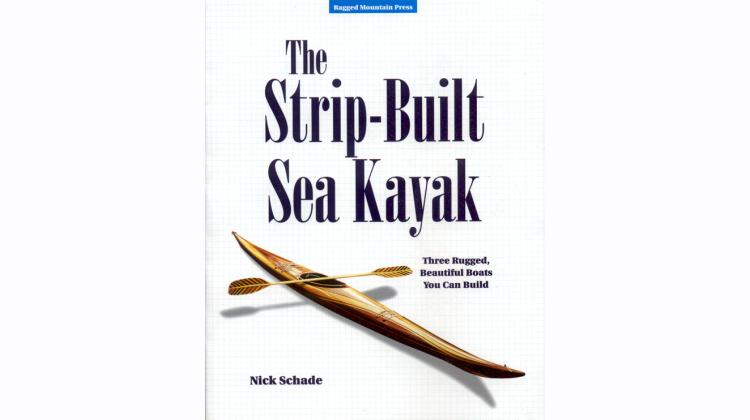
Adding strips to one side of the front deck.
Tools:
- Adjustable Temperature Professional Heavy Duty Hot Glue Gun - http://amzn.to/2nSK3OW
- 3M #2060 Masking Tape: http://amzn.to/2CeLOdF
Please support the making of these videos through my Patreon site: https://www.patreon.com/NickSchade
Music:
Morning Mandolin - Chris Haugen Banjo Hop - Audionautix: is licensed under a Creative Commons Attribution license (https://creativecommons.org/licenses/by/4.0/) Artist: http://audionautix.com/
good morning welcome back to another day
in the Guillemot kayaks boat shop I'm Nick
Schade. today we will be doing more
stripping go figure
I'm getting really close to finishing up
the stripping here today I'll be
primarily working on the front deck the
back deck I'll leave for another day
but I should be able to get mostly up
one side of the front deck you've seen
most of this before so I'm not going to
spend a lot of time talking there's not
too much to say but I'll show where I am
with the cockpit and obviously I don't
need to strip over the cockpit I'm gonna
cut a big hole there in the long run so
no point laying down a bunch of wood
there and trying to make it all fit and
then come back and saw it all out again
[Music]
I put several reference lines on these
forms to help me figure out where things
are happening and as guides for
stripping under here there's some
diagonal lines at this angle that
defines the chine or feature line
between the side of the boat and the
back deck of the boat up here I've got
some slots where the recess of the
calming is going to be over here these
slots also define where the recess of
the calming is going to be and there's a
hole in here that's where the edge of
the recess is going to be we've cut that
hole in there so when I saw through here
I'll just saw right through those forms
and that hole will give clearance for
the saber saw or jigsaw to cut through
there the cockpit is in this area
so I've already stripped beyond the
cockpit here on both sides and so now
the strips can start to get shorter
substantially shorter here I'll probably
bring it a little bit long out into this
area and so as I'm peeling off the tape
just as a to help remind me where I can
go I'll leave this tape on here in other
words the strip will end right before
this tape and so pull all the tape off
so that'll be my guide for how far to
run the next strip
[Music]
now this is where I switch to just doing
one side at a time if I were to run a
strip up here on this side it would end
up hitting this strip and so this is
interfering with getting a tight fit on
that side and so basically this strip
has crossed the center line a little bit
so from here on out I'm just going to
add strips on one side having them
overhang the center line sufficiently
that I can cut them off and trim that
center line to a nice straight line
without having any gaps you may have
noticed that I wasn't stopping to do the
hot melt glue stitches along here you
may even see some places here where the
yellow glue between the strip's does not
appear to be completely dry it's not
completely dry where it squeezed out but
in between the strips where it got
pressed and squeezed tightly together it
stacked up sufficiently but I can take
the tape off as soon as I'm done with
one side I can switch to the other side
and take the tape off and keep on going
however now I'm only going to be working
on one side so I won't have enough time
for that glue to set up between
finishing up one strip and adding the
next strip so I'll end up at this point
starting to add those hot melt glue
stitches as I go that way it can take
the tape off and add a new strip before
that yellow carpenters glue between the
strip's has fully set up
this is a really tight radius up here
which means that it's going to take a
lot of beveling to get a tight seam
between this strip and the next strip
you see this strips at an angle like
this and I'm holding the Robo bevel at
an angle like this that means the angle
between this strip and the next strip is
pretty extreme
all right we're making progress now
I'm gonna break for lunch and continue
on with this afterwards or see how far
we get I think I got to be able to cover
all the way to the centerline today and
the excellent
[Music]
[Music]
okay I've used up all the strips I set
aside for the side of the boat but I
still have here's the centerline right
here and here's the centerline right
there so the line crosses these strips
right up in there so I've got a little
bit left to go I forget exactly where
the cockpit comes through here I think
it comes right through like this and
basically just kisses this form you know
so if I stuck one more strip there and I
would cover that centerline there but
just to make sure I'm I think I'll put a
couple strips there I know there's not
going to be much showing there there's a
strip here running out to maybe about
there and then mirror image on the other
side so I want to pick some wood that's
going to be similar to what we've got
here and so what I've got is these are
the off cuts from the forward end of the
strips running in so this is strip 26 26
25 24 so here I have strip 24 25 and 26
and again that's the forward end of
these three strips so those I know those
are going to be similar in tone to
what's already here just because they're
part of the same strip but I do have a
little bit of a dark streak running
right through here running up to here
and these are quite light in color they
don't have a whole lot going on so I cut
these strips all off right here and I
have this bundle of strips back here
that are just the off cuts from that by
the way a lot of waste when you're doing
this book matching because all of this
gets cut off and
left but let's see what we have here for
color wise so if I find strip 26 this is
strip 26 it's got some of those same
streaks that we see in here your strip
25 here I'm just looking for some strip
so they're gonna match color wise just
across that center line and I think what
I'll end up doing I run from here back
to here with this strip that's 20 strip
26
likewise strip 25 will have a set of
strips that the tiny little triangle we
see in here will look like it's matching
pretty well with the surrounding strips
I think that's what I'm gonna do is just
put in those two strips so this is strip
26 25 and we'll cut these two strips so
those are the next strips that are gonna
come in here and that should be plenty
to cross that center line
and crossing the center line they're
stuck down now chances are excellent
that none of this strip here will end up
in the finish boat the cockpit will come
up and trim off most of that and it's
likely that is just gonna be a little
bit of this strip showing but now with
that green going on it should be fine so
you know I in the best of all possible
worlds I would have included a couple
more strips to in this bundle to get all
the way there but frankly you know I'm
using two feet of this strip here and
you know there's going to be one
probably less than an inch of this strip
showing here and so it's kind of a waste
of a full length strip to just fill in
that tiny little bit but you know if
we're really trying to maintain the book
match to the bitter end that's what we
could do but nobody's gonna see this
it's gonna be a tiny little sliver there
and if I've got matching from the other
side so I mirror this little piece in
there it's gonna be awesome so that was
pretty quick this morning we started
about down here and you know 1 2 3 4 5 6
7 8 9 10 11 12 13 14 strips on this side
today that's pretty good progress but I
think it's cool you're starting to see
the pattern come out here I've got this
sort of dark streaks coming down like
this and converging here and when we get
the other side matching that I think
it's really going to look awesome this
is where
all the hard work of trying to figure
out the matching pattern and so forth
starts to pay off and tomorrow when we
get fitted on the other side I think
it's really gonna looks like I had a few
issues that almost threw me off but I
was able to catch them in time and it's
looking awesome
so if you're enjoying and watching this
series please hit subscribe you know if
you've watched all the way through this
video give me a thumbs up give me a like
if you want to give me any more support
go to patreon and the token amount there
is really appreciated
so next episode we will trim down the
center line and start stripping up the
other side and there's going to be an
accent strip going in on that center
line and I haven't exactly figured out
how I'm going to do that but tricky
thing about that is I want the center of
the center line centered on the center
line and if I have a accent strip of a
certain width I need to make sure that I
offset the center line sufficiently by
that with that accent line so it ends up
the center line is centered on the
center line if you're looking forward to
that and it subscribe and until next
episode thanks for watching and happy
paddling