Hand beveling the chine strip and then filling in the bottom.
Tools:
- Adjustable Temperature Professional Heavy Duty Hot Glue Gun - http://amzn.to/2nSK3OW
- 3M #2060 Masking Tape: http://amzn.to/2CeLOdF
Music: Castleshire - Chris Haugen
0:00:01.200,0:00:39.170
[Music]
hi welcome back to the guild on kayaks
workshop I'm Nik shotta
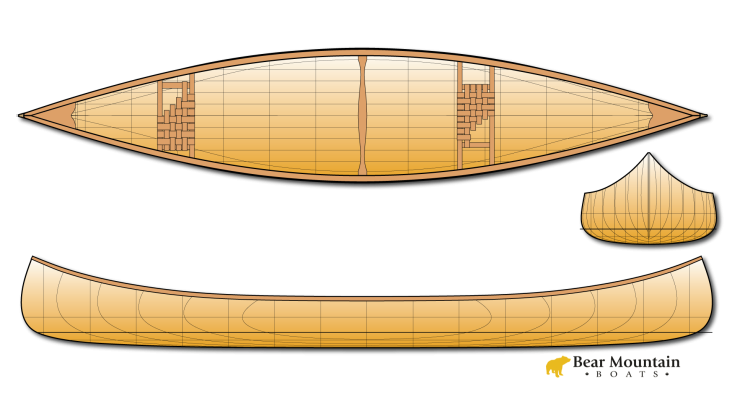
in this episode I'm going to trim back
to the chine line and then continue
stripping across one half of the bottom
of the boat the first step towards
trimming back the chine line is to just
transfer this diagonal which marks where
the chine lies to the outside of the
strips so just right there
[Music]
at the middle of the boat the shine
marks are right near the edge of the
strip but as we proceed towards each end
we end up needing to trim more off of
each strip again it's hard to mark out
towards the ends here because the strips
are covering the forms more so we'll
have to extrapolate from here out
towards the end so I'll grab a scrap
strip and use that as a spline to
connect those dots
since I marked this line off a common
reference line on all the forms a
diagonal line that diagonal line defines
a plane this at a diagonal slice through
the boat like this and so when this
spline is lined up right you ought to be
able to get your eye at such a point
where the this spline defines a straight
line when your eye is right on that
plane the spline is going to look like
it's a perfectly straight line and so
that's what we're trying to achieve
right here and what that means is when
it's straight in that one plane it's
fair and other planes and everything
will fit together nicely plate when I've
got the spline placed and I'm happy with
it I'll draw a nice crisp sharp line
along that edge so now we have a nice
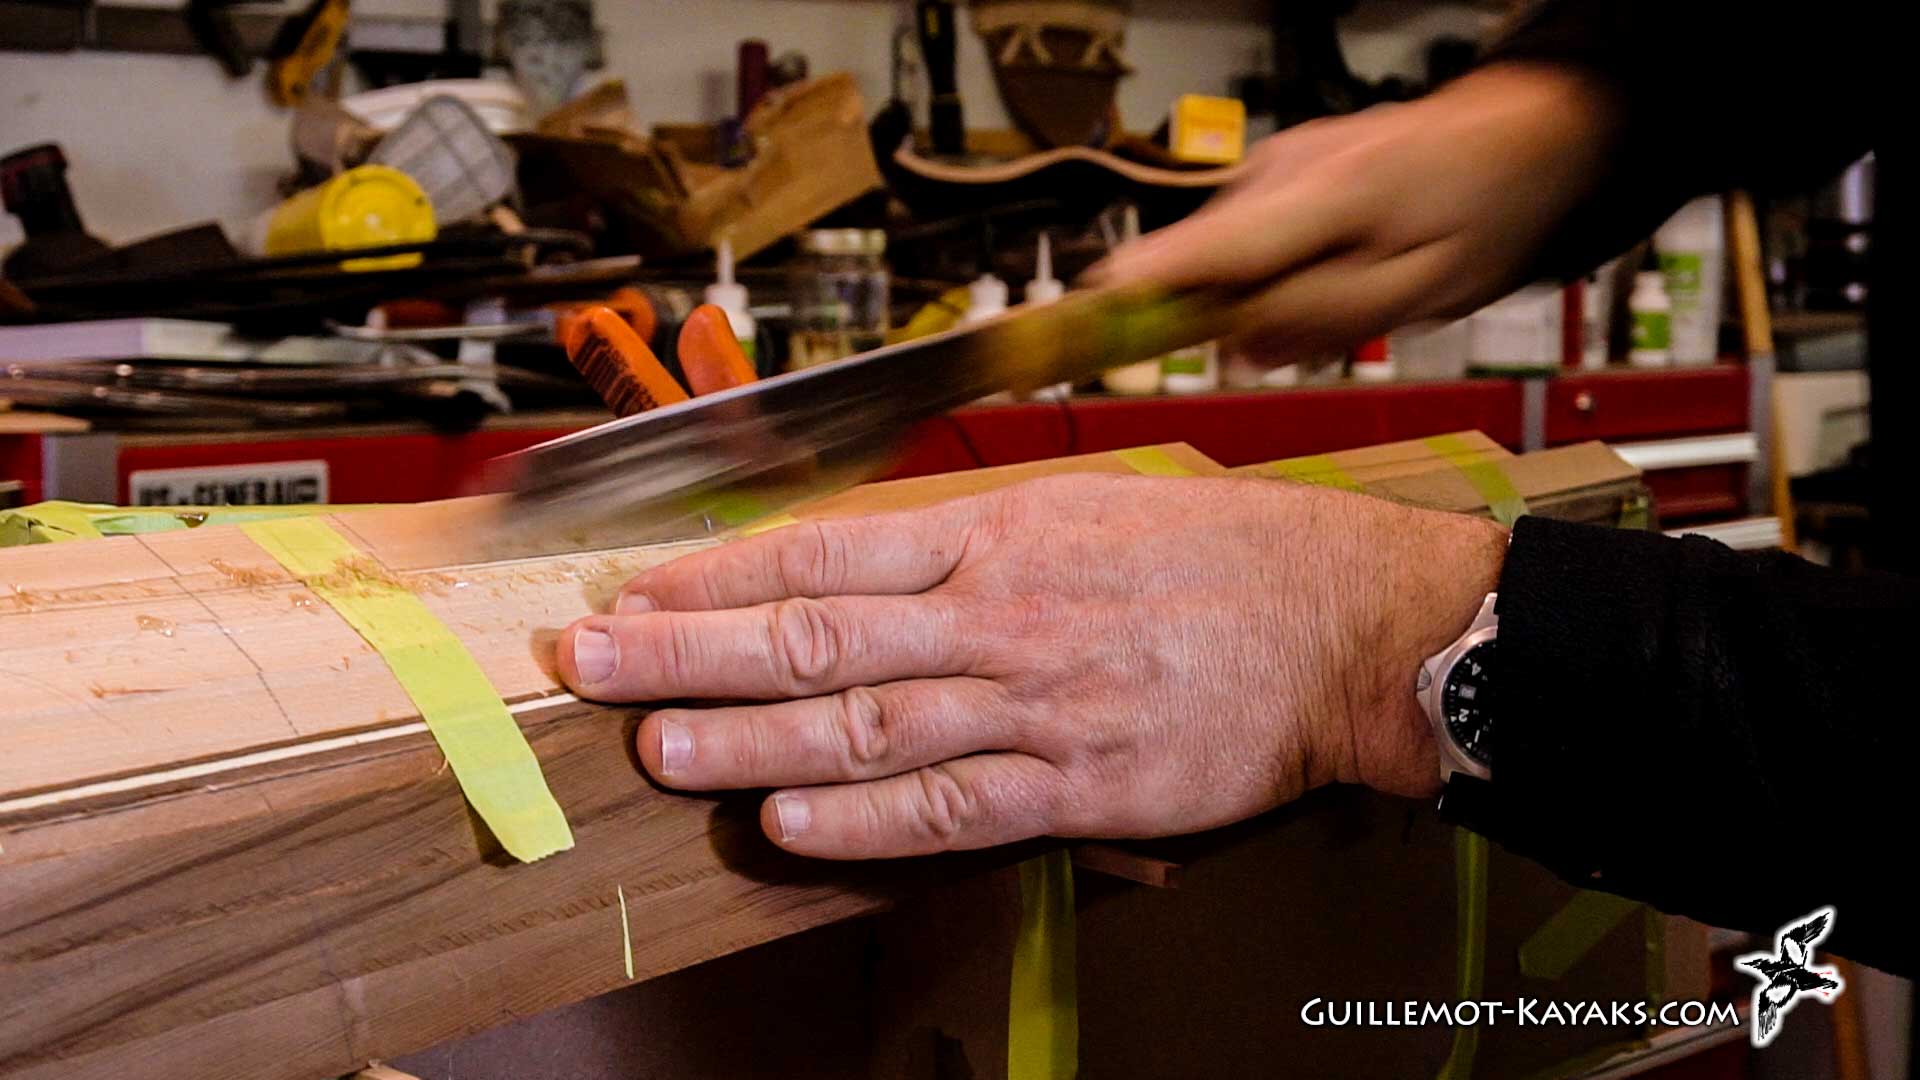
sharp line to cut to and we will cut
that off with a Japanese pull saw just
slightly above that line
I got these drops of hot and all glue
here right along the edge I cut right
through them which just gum up the saw
blade a little bit I don't want to plane
through them I don't need to gum up my
plane any so I'm just gonna take a
scraper and cut those right off at least
the ones right along the edge you've
done this job we're now back to the same
process we did on the water line where
we're just going to take a side rabbit
plane and knock off the high spots again
we want to straighten out this line
before we worry about exactly the
location I've got I've left it a little
proud of my mark here and I want to now
just true up this line get it nice and
straight and then we can pull the line
down if we need to so again find the
high spot use a plane and just knock off
the high spot and I use longer and
longer strokes as I as I flatten off the
top of that high spot I need longer and
longer strokes to maintain that flat
area it's just a patient process of
finding each high spot knocking it down
and again we're being intentional here
we're not just running the plane against
it because it's fun
it is fun but we're trying to find that
high spot and knock it down and it
doesn't take a lot of work if you're
systematic about it
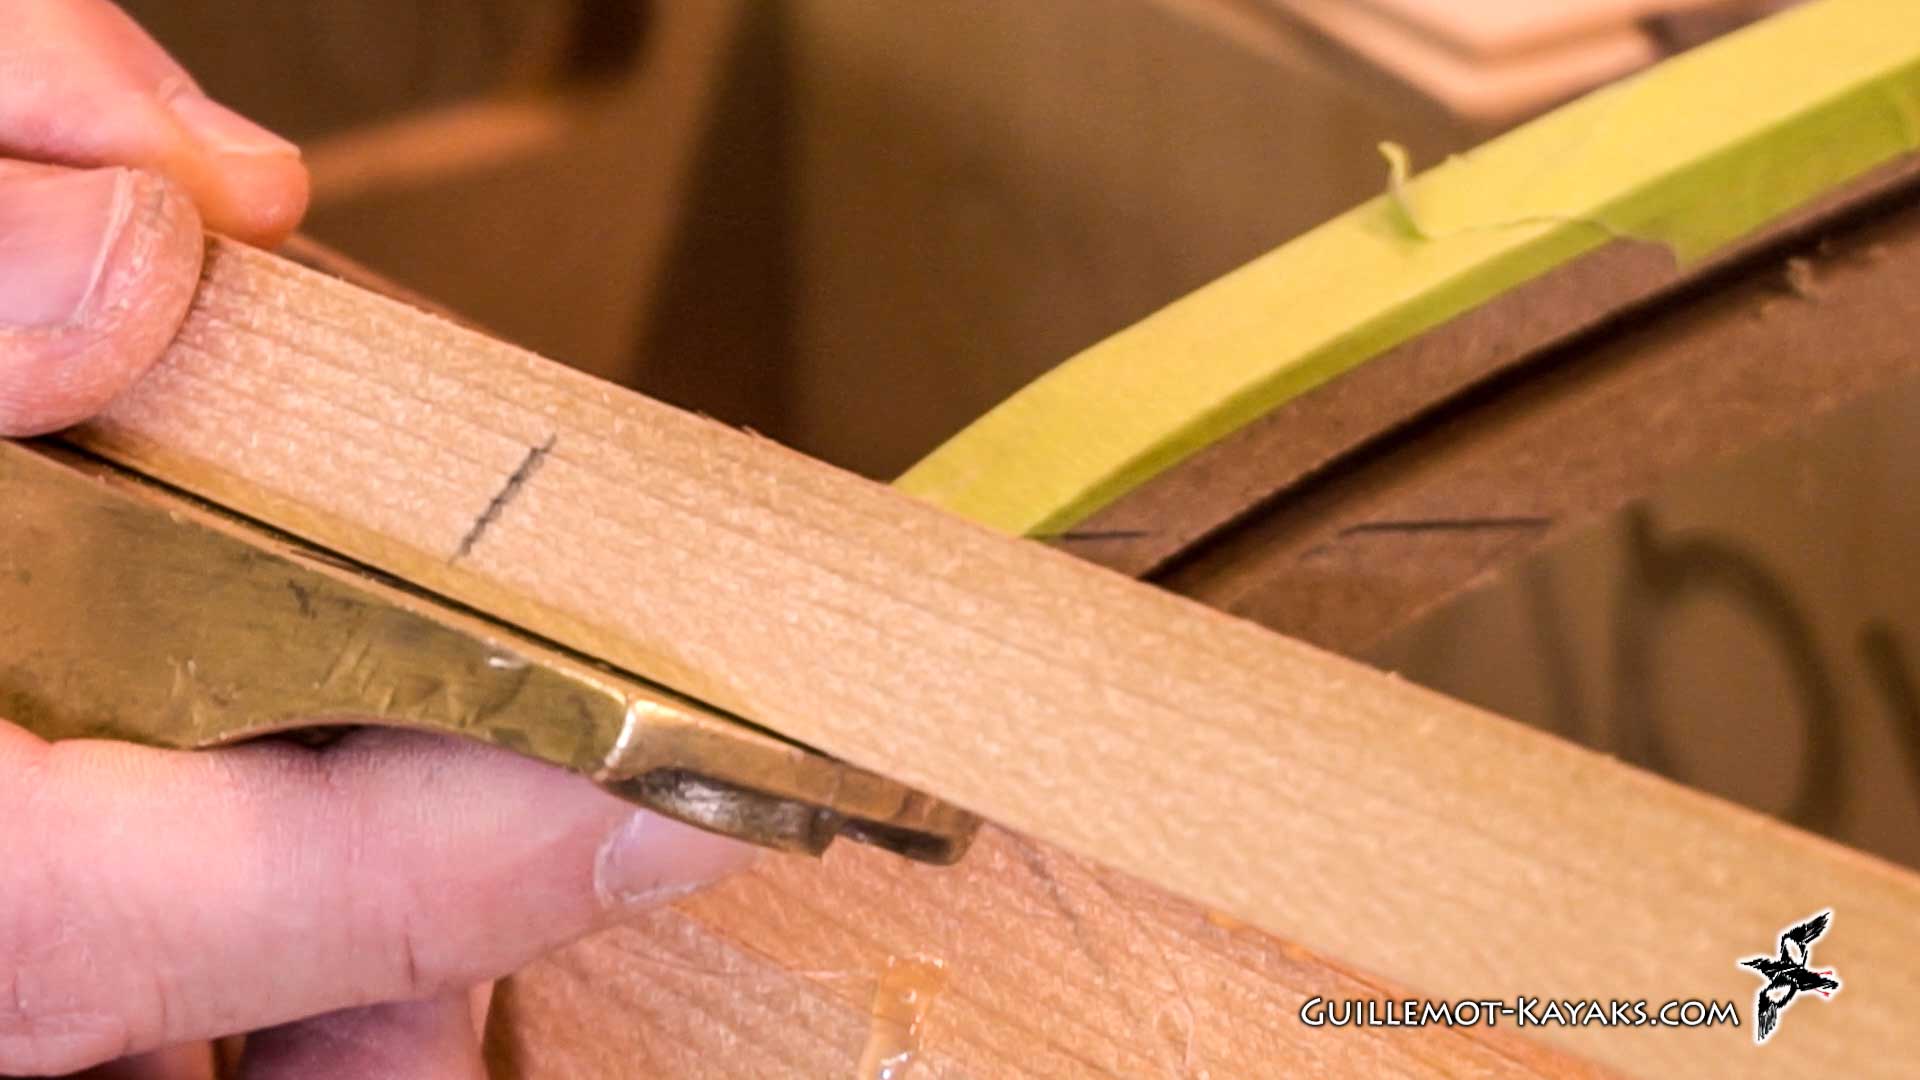
right along here where the China's hard
comes to a sharp angle I want to create
a bevel on the top edge of this strip
such that it bisects this angle
essentially makes them miter between
this surface and that surface so when
you put a strip in here next to it with
a bevel on it it will end up fitting
tight and we're going to cut that line
and trying to make the corner right out
here between these two strips and the
way I do that is I look at that bisected
angle which these grooves are helping me
find by connecting the dots here I can
see that angle that I need to cut and
now I'm going to hold my side rabbet
plane at that same angle and so when I
go to cut this I end up recreating that
bevel there and so I'll have a bisection
between the side of the boat and the top
of the boat and that way I'll get a nice
tight fit right between those strips
right there one feature the side rabbet
plane is this bottom surface of the
plane defines the same surface that the
blade is going to cut to so when we're
holding it here if we align the face of
the plane with that angle there we will
end up cutting a bevel at that angle so
it gives you a really quick feedback on
what you're doing and you can create
that bevel is exactly the angle you want
and we're going to keep on cutting this
bevel until we get that curl coming all
the way across the face of the strip to
help visualize that we can put some
little witness marks across here and
then when we go to plane
those witness marks start to disappear
when those witness lines disappear we
know we've made a bevel all the way
across the edge of that strip and then I
keep on checking making sure we're not
distorting the the curvature on this
strip after we straightened it out this
bevel should end up right at the corner
of the forum so the bottom the bottom
edge of the bevel and the corner should
be right hitting each other that way
when we lay a strip on top of it it will
end up being a nice crisp edge right out
there so if you have a bevel there it
will meet the bevel there and that
transition will happen right at the edge
between two strips on the top edge is
all playing down nice it should end up
lining up perfectly with these diagonal
lines so just get your eyes down on it
and try and bounce up and down a little
bit so you see where that line is
relative to the top edge of these strips
and again the pencil line here isn't
what we're worried about we're worried
about getting this edge nice straight
and fair and trying to match it up to
this diagonal line back there at the bow
of the boat with a China softer and that
there's not a hard angle there there's
just a nice round curvature but can use
the role available to true it up and
square it up to the forms beyond there
so when the next strip goes in it
doesn't need to be beveled the it will
need to be beveled back here where the
chine is hard will need to create the
other half of that mitre but eventually
if we just get this squared up to the
forms it'll just be a little less work
and fitting in that strip so you can
take the Rollo bevel and continue that
angle down once you're satisfied with
your bevel it's time to add the next
strip and this in this case I'm gonna
have to revert to the way I did it
before I had my Robo bevel tool because
we've got that mitre we're trying to
match and so I'll show you how that's
done it's a little bit different process
but works great we'll start with a dry
fit of the strip just like we always do
and I'll put the bow everything's nice
and tight all right here is starting to
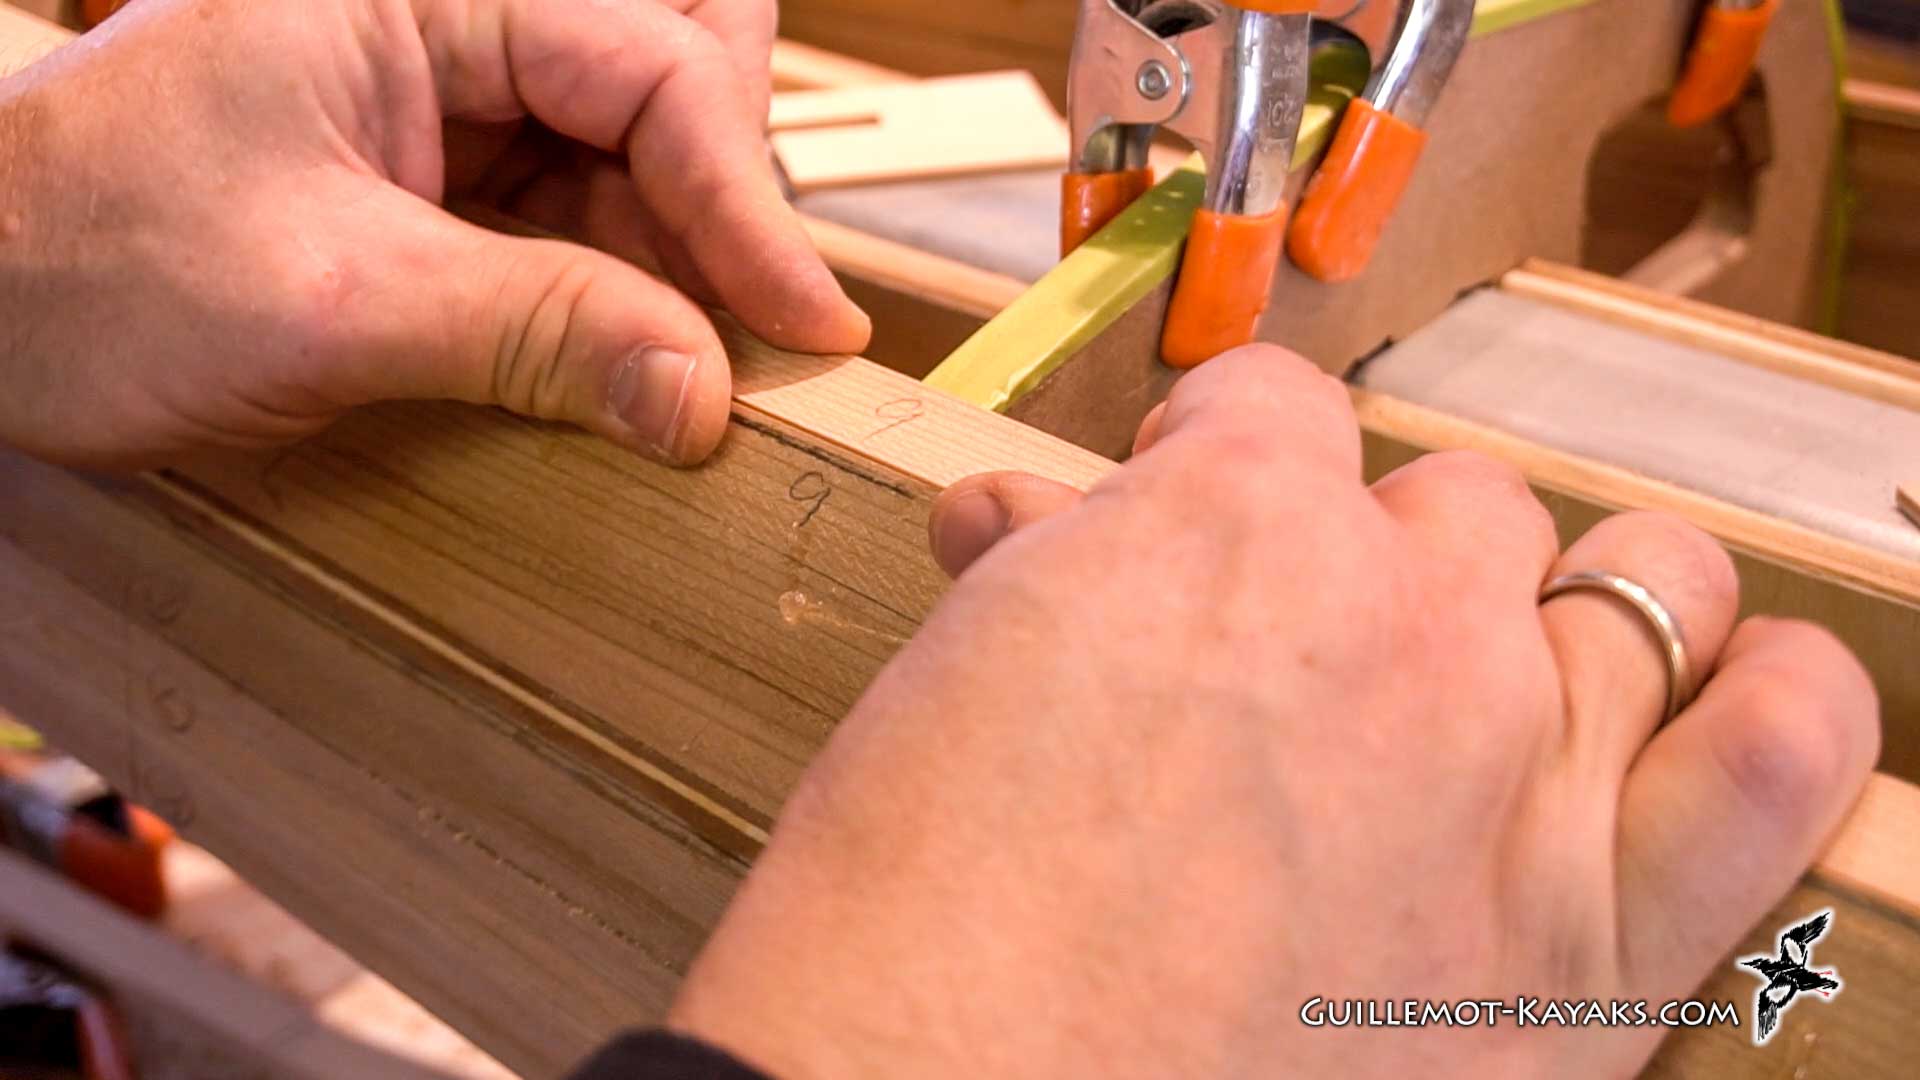
veil veer away from tight so I'm just
going to start numbering I'll call this
one form two just for easy reference
form three four five six seven eight
nine ten eleven twelve and we'll go on
our new form we'll mark the same thing I
think all right so now we have a
reference here to just quickly get the
strip back where it needs to be so as
I'm working at each form I don't need to
try and figure out where exactly it's
supposed to be I've got a number right
there and I can just quickly put the
form back and forth so here at the where
I've got it marked five if I hold this
new strip tight against the form and
then
it up tight against the existing strip
you can see obvious large gap right
there so what I want to do is just sort
of look at that gap and visualize it in
my mind my goal is to take a block plane
and reproduce that gap between the block
plane and the strip and then plane the
way until that gap is gone so starting
up here at the place where a start
severe away from my existing edge I see
I have a gap there it's like half a
millimeter or something like that
so when I pick up my plane I start with
it flat and then open up a half a
millimeter gap and now maintaining that
angle I plane it away until the gap
disappears and I put the strip back in
place and see what I've got how is it
doing it's I still have a little bit of
a gap there it's like a tenth of a
millimeter start with it tight and then
open it up just a tenth of a millimeter
or so
and playing away until that gap has
disappeared and try to fit again now
we've got a really tight seam this is a
process of match the gap we have again a
little over there maybe about a
millimeter there and so pick up the
strip at forum number two we'll start
clean match that millimeter gaps and
start planing away so we try and roll
our wrist from number two to number one
so we try and blend the bevel we have at
number one into what we're creating it
number two so you're playing a little
bit and again we've got the numbers here
so I can just lay it right back in place
at number two and still get a little gap
there so what I find I end up doing to
make a tight seam here is over bevel a
little bit so I devil it a little bit
farther than it needs to be that will
make it tight on the outside of course
now we've got a little bit of a gap on
the inside for this China I'm okay with
that for the structure of the boat later
on when we go to fiberglass the inside
I'm going to end up with putting a
little filler in there so some thick and
epoxy with wood flour in there we will
go and fill up the backside or the
inside of this seam and that will
reinforce the heart shine down here and
fill in any gap I may have the goal is
to make it tight so that no filler is
required so as you get each one done
move forward and again look at your gap
match the gap and plane away until a gap
between the tool and the strip
disappears and that should end up with a
pretty tight seam up here so again one
step at a time moving down the length of
the strip I'm up to number four look at
that gap it's over a millimeter match
that gap you will find that these floppy
strips can be a little bit hard to plane
because as you push on them they
tend to just flex away so you need a
good sharp tool and also you'll see I'm
bending this downwards so that way when
I push my plane against it I'm creating
some pressure against the blade I have
to do a little planing double check your
fit you still have some gap egde there
so it's about half what it was before as
you're moving down the seam check your
fit between the forms as well make sure
it's tight between the forms so we're
trying to roll our angle from this form
to that form so you have to keep in mind
what was going on back here while you're
working up here so it's going to be a
matter of rolling your wrist upwards or
downwards as necessary to blend that
bevel together it's easy to end up with
a perfect bevel right here another
perfect bevel right here and then a
square edge right here so you end up
with a sloppy fit in between so this
creating that rolling bevel takes a
little practice but you can end up with
really tight work when you're done you
notice I'm now wearing an apron and this
is what's called an apron plane a lot of
coincidence
I've got a good fit all the way down
here to the end I've got a fairly severe
twist right here so I'm going to give
this strip a little bit of a pre twist
with some heat it looks good
lay in there nicely so that will give it
all a final dry fit and they've got some
room for improvement right here at forum
9 it's just a little bit of a gap right
there so I'll get some glue on it and
install this strip it looks good so I
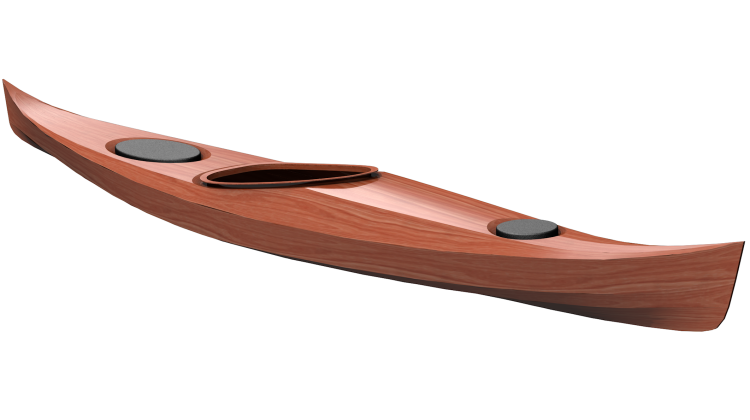
have this rounded chine up here and then
it transitions to the hard shine back
here this gives the kayak a little bit
of control when you're surfing on waves
you can edge and use that as a control
surface it really makes a fun boat so
with the first strip on above the chine
I'm now going to be filling in from here
over to the centreline and again I'm not
going to be doing the other side until
I'm done with this side and that way I
can come back trim this straight to the
centreline and then do all my fitting on
just that one side with the tape peeled
off it's now a matter of doing the
bevels make sure the bevels are good and
that'll be done with the Robo bevel now
that will pass the chine the Robo bevel
comes into its own again
so I want to go straight on to the next
strip so I'm going to glue the strips
down to the forms as needed and put some
stitches in to hold the strip's together
so that's the last strip of a day I got
one two three four five six strips on so
that's not bad
tomorrow we will continue on stripping
we ought to be able to get all the way
to the center line all the way the full
length of the boat and which time we
will again mark it back at the center
line trim that down through it up and
then start stripping in from the other
side so I should say although like
subscribe all that stuff hit up patreon
if you want to hold trust you'll do that
so go do it so tomorrow we'll continue
stripping and thanks for watching and
happy paddling
[Music]
hi welcome back to the guild on kayaks
workshop I'm Nik shotta
in this episode I'm going to trim back
to the chine line and then continue
stripping across one half of the bottom
of the boat the first step towards
trimming back the chine line is to just
transfer this diagonal which marks where
the chine lies to the outside of the
strips so just right there
[Music]
at the middle of the boat the shine
marks are right near the edge of the
strip but as we proceed towards each end
we end up needing to trim more off of
each strip again it's hard to mark out
towards the ends here because the strips
are covering the forms more so we'll
have to extrapolate from here out
towards the end so I'll grab a scrap
strip and use that as a spline to
connect those dots
since I marked this line off a common
reference line on all the forms a
diagonal line that diagonal line defines
a plane this at a diagonal slice through
the boat like this and so when this
spline is lined up right you ought to be
able to get your eye at such a point
where the this spline defines a straight
line when your eye is right on that
plane the spline is going to look like
it's a perfectly straight line and so
that's what we're trying to achieve
right here and what that means is when
it's straight in that one plane it's
fair and other planes and everything
will fit together nicely plate when I've
got the spline placed and I'm happy with
it I'll draw a nice crisp sharp line
along that edge so now we have a nice
sharp line to cut to and we will cut
that off with a Japanese pull saw just
slightly above that line
I got these drops of hot and all glue
here right along the edge I cut right
through them which just gum up the saw
blade a little bit I don't want to plane
through them I don't need to gum up my
plane any so I'm just gonna take a
scraper and cut those right off at least
the ones right along the edge you've
done this job we're now back to the same
process we did on the water line where
we're just going to take a side rabbit
plane and knock off the high spots again
we want to straighten out this line
before we worry about exactly the
location I've got I've left it a little
proud of my mark here and I want to now
just true up this line get it nice and
straight and then we can pull the line
down if we need to so again find the
high spot use a plane and just knock off
the high spot and I use longer and
longer strokes as I as I flatten off the
top of that high spot I need longer and
longer strokes to maintain that flat
area it's just a patient process of
finding each high spot knocking it down
and again we're being intentional here
we're not just running the plane against
it because it's fun
it is fun but we're trying to find that
high spot and knock it down and it
doesn't take a lot of work if you're
systematic about it
right along here where the China's hard
comes to a sharp angle I want to create
a bevel on the top edge of this strip
such that it bisects this angle
essentially makes them miter between
this surface and that surface so when
you put a strip in here next to it with
a bevel on it it will end up fitting
tight and we're going to cut that line
and trying to make the corner right out
here between these two strips and the
way I do that is I look at that bisected
angle which these grooves are helping me
find by connecting the dots here I can
see that angle that I need to cut and
now I'm going to hold my side rabbet
plane at that same angle and so when I
go to cut this I end up recreating that
bevel there and so I'll have a bisection
between the side of the boat and the top
of the boat and that way I'll get a nice
tight fit right between those strips
right there one feature the side rabbet
plane is this bottom surface of the
plane defines the same surface that the
blade is going to cut to so when we're
holding it here if we align the face of
the plane with that angle there we will
end up cutting a bevel at that angle so
it gives you a really quick feedback on
what you're doing and you can create
that bevel is exactly the angle you want
and we're going to keep on cutting this
bevel until we get that curl coming all
the way across the face of the strip to
help visualize that we can put some
little witness marks across here and
then when we go to plane
those witness marks start to disappear
when those witness lines disappear we
know we've made a bevel all the way
across the edge of that strip and then I
keep on checking making sure we're not
distorting the the curvature on this
strip after we straightened it out this
bevel should end up right at the corner
of the forum so the bottom the bottom
edge of the bevel and the corner should
be right hitting each other that way
when we lay a strip on top of it it will
end up being a nice crisp edge right out
there so if you have a bevel there it
will meet the bevel there and that
transition will happen right at the edge
between two strips on the top edge is
all playing down nice it should end up
lining up perfectly with these diagonal
lines so just get your eyes down on it
and try and bounce up and down a little
bit so you see where that line is
relative to the top edge of these strips
and again the pencil line here isn't
what we're worried about we're worried
about getting this edge nice straight
and fair and trying to match it up to
this diagonal line back there at the bow
of the boat with a China softer and that
there's not a hard angle there there's
just a nice round curvature but can use
the role available to true it up and
square it up to the forms beyond there
so when the next strip goes in it
doesn't need to be beveled the it will
need to be beveled back here where the
chine is hard will need to create the
other half of that mitre but eventually
if we just get this squared up to the
forms it'll just be a little less work
and fitting in that strip so you can
take the Rollo bevel and continue that
angle down once you're satisfied with
your bevel it's time to add the next
strip and this in this case I'm gonna
have to revert to the way I did it
before I had my Robo bevel tool because
we've got that mitre we're trying to
match and so I'll show you how that's
done it's a little bit different process
but works great we'll start with a dry
fit of the strip just like we always do
and I'll put the bow everything's nice
and tight all right here is starting to
veil veer away from tight so I'm just
going to start numbering I'll call this
one form two just for easy reference
form three four five six seven eight
nine ten eleven twelve and we'll go on
our new form we'll mark the same thing I
think all right so now we have a
reference here to just quickly get the
strip back where it needs to be so as
I'm working at each form I don't need to
try and figure out where exactly it's
supposed to be I've got a number right
there and I can just quickly put the
form back and forth so here at the where
I've got it marked five if I hold this
new strip tight against the form and
then
it up tight against the existing strip
you can see obvious large gap right
there so what I want to do is just sort
of look at that gap and visualize it in
my mind my goal is to take a block plane
and reproduce that gap between the block
plane and the strip and then plane the
way until that gap is gone so starting
up here at the place where a start
severe away from my existing edge I see
I have a gap there it's like half a
millimeter or something like that
so when I pick up my plane I start with
it flat and then open up a half a
millimeter gap and now maintaining that
angle I plane it away until the gap
disappears and I put the strip back in
place and see what I've got how is it
doing it's I still have a little bit of
a gap there it's like a tenth of a
millimeter start with it tight and then
open it up just a tenth of a millimeter
or so
and playing away until that gap has
disappeared and try to fit again now
we've got a really tight seam this is a
process of match the gap we have again a
little over there maybe about a
millimeter there and so pick up the
strip at forum number two we'll start
clean match that millimeter gaps and
start planing away so we try and roll
our wrist from number two to number one
so we try and blend the bevel we have at
number one into what we're creating it
number two so you're playing a little
bit and again we've got the numbers here
so I can just lay it right back in place
at number two and still get a little gap
there so what I find I end up doing to
make a tight seam here is over bevel a
little bit so I devil it a little bit
farther than it needs to be that will
make it tight on the outside of course
now we've got a little bit of a gap on
the inside for this China I'm okay with
that for the structure of the boat later
on when we go to fiberglass the inside
I'm going to end up with putting a
little filler in there so some thick and
epoxy with wood flour in there we will
go and fill up the backside or the
inside of this seam and that will
reinforce the heart shine down here and
fill in any gap I may have the goal is
to make it tight so that no filler is
required so as you get each one done
move forward and again look at your gap
match the gap and plane away until a gap
between the tool and the strip
disappears and that should end up with a
pretty tight seam up here so again one
step at a time moving down the length of
the strip I'm up to number four look at
that gap it's over a millimeter match
that gap you will find that these floppy
strips can be a little bit hard to plane
because as you push on them they
tend to just flex away so you need a
good sharp tool and also you'll see I'm
bending this downwards so that way when
I push my plane against it I'm creating
some pressure against the blade I have
to do a little planing double check your
fit you still have some gap egde there
so it's about half what it was before as
you're moving down the seam check your
fit between the forms as well make sure
it's tight between the forms so we're
trying to roll our angle from this form
to that form so you have to keep in mind
what was going on back here while you're
working up here so it's going to be a
matter of rolling your wrist upwards or
downwards as necessary to blend that
bevel together it's easy to end up with
a perfect bevel right here another
perfect bevel right here and then a
square edge right here so you end up
with a sloppy fit in between so this
creating that rolling bevel takes a
little practice but you can end up with
really tight work when you're done you
notice I'm now wearing an apron and this
is what's called an apron plane a lot of
coincidence
I've got a good fit all the way down
here to the end I've got a fairly severe
twist right here so I'm going to give
this strip a little bit of a pre twist
with some heat it looks good
lay in there nicely so that will give it
all a final dry fit and they've got some
room for improvement right here at forum
9 it's just a little bit of a gap right
there so I'll get some glue on it and
install this strip it looks good so I
have this rounded chine up here and then
it transitions to the hard shine back
here this gives the kayak a little bit
of control when you're surfing on waves
you can edge and use that as a control
surface it really makes a fun boat so
with the first strip on above the chine
I'm now going to be filling in from here
over to the centreline and again I'm not
going to be doing the other side until
I'm done with this side and that way I
can come back trim this straight to the
centreline and then do all my fitting on
just that one side with the tape peeled
off it's now a matter of doing the
bevels make sure the bevels are good and
that'll be done with the Robo bevel now
that will pass the chine the Robo bevel
comes into its own again
so I want to go straight on to the next
strip so I'm going to glue the strips
down to the forms as needed and put some
stitches in to hold the strip's together
so that's the last strip of a day I got
one two three four five six strips on so
that's not bad
tomorrow we will continue on stripping
we ought to be able to get all the way
to the center line all the way the full
length of the boat and which time we
will again mark it back at the center
line trim that down through it up and
then start stripping in from the other
side so I should say although like
subscribe all that stuff hit up patreon
if you want to hold trust you'll do that
so go do it so tomorrow we'll continue
stripping and thanks for watching and
happy paddling