Sorting strips for book matching from a 1-1/2" x 12" vertical grained board
Hi, welcome to the Guillemot Kayaks workshop I'm
Nick Schade today I'll delve into the
mysteries of book matching strips cut
from two biomaterial in the previous
segment I sorted out the strip's cut
from the edge of a 3/4 inch thick flat
grain board the options for matching
those strips were limited you cut them
out in order and then keep them in
something resembling that order when you
cut blanks out a thicker material then
ripped the blanks into strips there are
a lot more options for how you can
arrange those strips on the boat I'm
going to spend some time going through
some of those options then sort out the
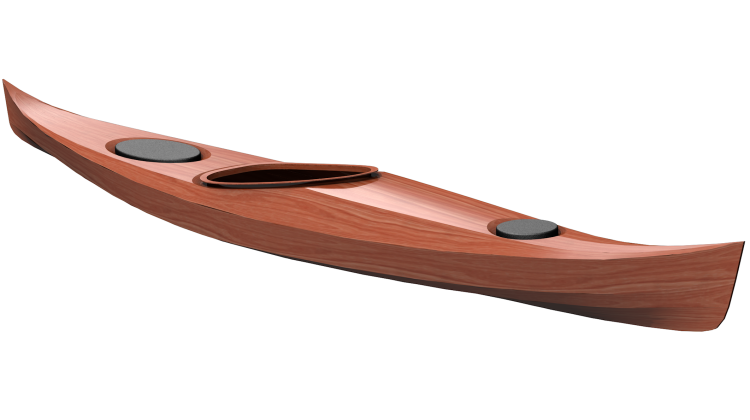
strips for the micro bootlegger sport so
I have here short piece of what was a 2
by 8 or so that I've just cut into
strips it's a little bit of a rough job
but this will should serve as an example
to help you out I've got it all kind of
marked up here but looking at the end
here you can see my original marks on
the end of the board showing the order
so this is what it looked like before
everything was cut up and I cut it up
with the 3/4 inch blanks and then I cut
that each of those blanks up into strips
so we'll start by looking at the blanks
so here we have the blanks and ripping
one off at a time
we end up here with a set of blanks
these are in the order that came off the
board
but this is before cutting the blanks
into strips so I've got just to flip the
whole board over I've got these blanks
in the order that they came off the
board
this was the edge of the original board
you can still see it's a little bit
rounded over it's not it's a little bit
darkened where it seemed more weather
here's where I cut into the board taking
it off the sides like this all right so
now let's look at one of these blanks
you can lay this out in order
we've got sort of cryptic marks on there
I have this marks as the backside see
what we have marked on the front side so
this is set I and this is strip one two
three four five and six out of set I so
this was the first strip here again you
can see this was the top of the original
board it's it's a little bit darker than
the rest
diva's getting a little bit more weather
but there you have the top of the
original board this was not part of the
original board it was not part of the
top of the original board this was one
layer down so again this was all like
this so there's our original blank again
if you look at these I'm recreating the
top of the original board again all
right so now I'm going to well we could
take this set of strips and slip match
it so we will have here the set of
strips that would match up pretty well
with the grain so slowly transitioning
across there you see the color fade
happen there or conceivably we could end
up book matching these
don't have a lot of grain happening here
but this whole set would end up book
matching together so we could do some
sort of pattern where we have sets of
three that book match together
now let's reassemble or put it back into
the same original blank here's our
original blank back as the top of the
original blank and we have all of these
pieces now by unbundle these just bring
the pack again is our original blank now
we have a set of strips here that is in
a little bit different order now imagine
if we took the top row of each of these
the top strip of each one of these so so
there's the first layer we now have
another layer do the same thing and keep
on going so you see each one of these
layers is a slice through that original
board and so this is these are
contiguous strips from the original
board and would just keep on doing that
I think this one actually should be the
way it was originally I've haven't
mislabeled so here I have the whole
board laid out in contiguous panels
that are adjacent to each other in the
board so now imagine how we begin
book-matched
the individual strips off the first
board we can do something similar here
this set of strips here was on top of
that set of strips we could now flip it
over and have a book match between these
two so these are a mirror image of each
other and then we slip match it so this
one the odd strips go over on this side
even strips over on this side and
continue that pattern putting the odd
strips on this side you can strip from
that side so here we have a book match
that repeats and it's also split matched
so this is this and this and this our
stack in order this this and this are
stacked in order
there's a book match pattern of strips
opening up like this and slip matching
that's creating a nice slip match
pattern but we could go one step further
and so it's mirroring right here and
then slip matching we could also make it
so this mirrors that so it opens up as a
book match there as well
likewise so now we have something
mirroring here and mirroring there and
then mirroring there and you know it's
it's not so obvious with this what's
going on but we get a you know smooth
blend that blends back into itself and
then you know as from dark to light to
dark to light dark to light dark to
light and so it ends up looking more
contiguous like all of these are right
next to each other and there's a bunch
of different ways these can be put
together obviously this one's right
there the number of permutations on this
are really kind of mind-bending it I
spend a lot of time just sort of looking
at it and thinking about it and you know
and for a better match we may actually
be better off you can't see the side of
the boat on this side next to the side
of the boat on that side so having those
matched perfectly is a little less
critical than having the centerline axe
perfectly and we might also find out
that it's more it's a better match if so
here we have one and two we could have
over here
so one on two were matching then for
matching that so I can make this pattern
where things are switching so here's
panel four and then take panel five be
next right here oh here it's alternating
boom boom boom boom boom alright and so
this is match to that this is match to
that this is match to that this is match
to that and so again we get these
patterns that come in waves back and
forth and so I think I'm going to try
and do something along these lines but
you can see you got to pay attention and
it's you know thinking about how these
are going to work it's confusing yeah I
have this whole other set of marks on
here so I can make a whole nother
pattern by taking the first one of each
of these so I and so i1 i2 i3 i-4 i-5 i6
and so there's a matched set
and then h1 h2 h3 h4 h5 h6 and just keep
on doing that and so we're creating a
pattern that flows and in a different
manner it still could look good these
could be matched you know again the
number of permutations here is hard to
keep track of and you know spending
right you know I'll spend time just
staring at the strip's trying to figure
out what I want what's gonna look good I
think I have an idea for this set
already but I'm not certain I'm gonna
have to just lay it out and take a look
at it see what it looks like get a feel
for it there we have the set of strips
that can also be matched up in various
ways we can so we have 1 2 3 4 5
six seven eight nine sets here they can
be book-matched
relative to each other and the whole
nother pattern made that way this is
where you have your chance just just to
sit and think and look at things and
determine what you're gonna do again I
think I'm gonna do the one I showed you
before where I was matched book matching
the planes cut through the original
slice these are sets of blanks so each
one of these was one of the original
blanks cut into strips and so I believe
if we take these flip them up this way
and it's one blank another blank another
blank and here we have recreated our
original board again that's so task I
have ahead of me right now is getting
those in order figuring out exactly how
I want to lay them out so before I do
that I'm just gonna bundle these sets
back together again
so you can see how it's be easy to lose
a bubble on this there's a lot going on
all these different layers put together
how it's all going to fit and how it's
gonna look on your boat will we need to
concentrate and numbering things is
extremely helpful just help you keep
track of everything I'm using a code
here where I'm numbering the strips and
lettering the blanks and that helps me
keep track of which blank they were in
and the numbers say which layer in which
blank they were in so numbers 1 through
6 again circling one side not the other
just to help keep track of everything
and so that's what I'm going to strive
to do next here I have the strips for
the body of the boat again these would
cut by cut out of a 2 by 12 and I have
those were each cut into three
quarter-inch blanks and
those blanks were cut into 3/16 strips
so I'm going to just unbundle these and
then get these into bins before I lose
the bubble on them all right
so there we have each bundle or each
original blank in its own bin so now I
want to just get these a bit organized
and labeled I'm gonna start by just
saying a b c d now my my goal my thought
with this for this pattern would be to
take each layer out as a set and lay it
down I think what I'll do is I will
unbundle these I'm bundle it down at
this end as well so now I'm going to
proceed to number these strips
I'm gonna keep them in these bins and
one layer at a time I'll go through a
number them and so I've got the first
ABCD on that these are all going to be
layer 1 so 1 1 1 all right now slide
back the first layer and this will be a
+ 2
all the way or two I'm going through all
of this process just so you know I could
conceivably just pull them out of the
bins right now and put them in the order
I think they should be and I could
probably manage that and not screw up
but if I did screw up reconstituting the
board and getting it back in the correct
order would be a real hassle and so by
doing this now taking the time to just
individually mark each one of these at
least once so it can be situated back in
the stack if anything should happen you
know a trip and push everything out of
the way or just somehow screw up I have
a means to get it back to where it
started oops
I need to pay attention so I let them
know I'm numbering them oops and I need
to stick with the same number whenever
I'm doing this kinda process my brain
tends to get ahead of me and do its own
thing so now slide the next row back
every strip now has its own unique
identification so if I should mess up I
can at least get everything back to this
order if I have strip 2f I know it's in
stack F and the second layer in that
stack so if all goes pear-shaped I have
a way to get back to where I am right
now basically I want to make it look
like the boats made out of one wheeler a
bunch of really wide planks so hopefully
the strip's will just about disappear
you know this we can have a discussion
on whether that's the best way to go but
that's where I'm gonna go here and so my
plan is is to take this first layer and
flip it over and so we will have layer 1
and layer 2 will be book-matched oh so
I'll draw off this side of the stack the
first strip off of each bin and lay it
down building out this way then the next
layer I'll draw off this side of the
stack and lay it down in a book match
layer with the first one strip number
one lift it out of the bin let strip a
one it's going over here I flipped it
face-side down b1 going over here c1
d one just of note this is the one I
broke when I was pushing too hard on the
strips and so just that is strip D one
so it's it's the first layer and the
third fourth been over so it's pretty
close to an edge there the way I'm
laying it out right now
so we're up to e one again by having
these benches all at the same height and
nice and wide I'm able to pull a strip
out and slide it across all from this
end of the strip everything moves easily
doesn't get caught on anything so
working is a one-man shop I don't have
somebody else to help ten the other end
so this helps me get it all lined up and
so there is the first layer and now we
will take the next layer so starting
from this side and building out so again
this this is matched like that so now I
have one book match set these are mirror
image from each other and look pretty
sharp
so now layer three we're putting
facedown again so we're matching it this
way
obviously I'm gonna need some more room
here eventually now we're back to face
up I found if you're going to try and
push on a whole stack like this having
something to keep things down I'm going
sprawling and be a big time-saver I'm
only on four layers here but I'm
thinking just looking at this I've got a
width here of 37 inches 37 inches is
probably enough to cover the whole boat
let's take a look so like on the bottom
of the boat where we went from water
line to water line on the top body of
the boat I'm going to do the same thing
just water line to water line so I only
need enough to go from the water line on
one side to the water line on the other
side at the widest point
so take this form here we whip down
under the water line measure it around
and we're at 32 inches right there and
I've got 37 already 3
I've got enough strips already laid out
here
the rest are spare I want to take a look
at these see if they create a pattern I
like and try and imagine how it's going
to look on the boat so looking at these
strips that at this end we've got got
sort of pale colors with a few streaks
running through it and then we looked at
skiing down the length here at the bow
we've got sort of a V thing going on
there with a dark streak down the middle
and two light streaks running through
there so I need to think about how this
is going to look on the boat if I lay it
out just as it is right now having this
be the waterline or approximately the
waterline on one side and that be the
waterline on the other side I end up
with coming up to the side of the bow
if I make this the bow I have coming up
the side of the bow this dark streak
look pretty nice and then it would get
up part you know start to get up on on
the top deck and the the deck tapers
away you know it's narrower at the bow
obviously than theirs at the cockpit and
so I'd end up starting to cut back some
of these strips and I'd end up with very
little of this dark stuff and personally
I like the dark stuff best I think it's
the the most interesting wood in the
board is the dark stuff and so if I had
this I'd have sort of a dark streak
starting at the side of the boat and
running down to the waterline and then
most of the boat would actually be this
pale color there's some interesting
grain going in here but I don't think
that would be the most interesting
pattern or the the most aesthetically
pleasing pattern I think having these
dark streaks sort of start at the bow
and then taper away towards the stern on
either side of the boat I think that
could look quite cool so kind of
centering these dark streaks in the bow
that's kind of where I'm where my mind's
at right now on this and so that might
be taking all of this stack right here
so this whole layer and putting it on
the far side so then we have starting at
the waterline light then it builds dark
dark dark and we have this streak
running down the side of the boat I
think that would look sharp and on the
other side this would be near the
waterline on the other side and so the
light lightest color is on the top of
the bow and most again most of that
would get cut
way so with it would be making this a
center line here right in there and so
we'd be cutting away that and so we'd
have a meeting dark in the front and
then a light triangle coming back around
the cockpit I think that would look
really sharp so to that end I'm going to
take and pull this pile towards me and
move this one to the other side is that
going to work
I've got I don't know if it shows up in
the camera but this is my broken strip
and so that's potentially going to
bollocks that using that whole piece
because I would end up right in the
middle of the bow so this is a broken
strip right here that would end up right
in the middle of the bow on one side of
the boat I don't want to have to glue
that together and try and patch that in
make it look right but it's not a big
deal I've got a whole bunch of other
strips still over there in the pile I
can take this whole layer off put it
aside and use the next layer off the
pile so I'll end up taking this whole
stack here this is one whole layer and
we will just dump that into a bin here
so what remains is three layers and
we're up to layer four I'm just going to
slide this whole layer across like then
pull layer five off so layer four here
is face up and ABC across this way we
want to do layer five face down pulling
from the far edge of the stack
so trying to visualize how this will
appear on the boat we have the
centerline here
the datum water line is going to be over
here someplace not necessarily exactly
at this edge but somewhere up from that
edge a couple strips and so this will
run down the centerline and the site the
bow of the boat is much narrower
obviously than the middle of the boat
and so we won't need as many strips to
get all the way up to the centerline at
this end as we will in the middle that
makes sense the votes only like ten
inches high at the bow and very narrow
and so we only need about 1
get all the way up to the centerline at
the bow of the boat and so that's about
here this will be probably about where
the first strip gets up to the top of
the stem at the bow of the boat but at
the middle of the boat is 31 inches wide
so we're using all of this strip in here
all of these strips fully from water
line to water line up through the center
line so there's going to be a taper down
through here to this point so much of
this is just going to get cut off both
sides this strip right here will end up
being right next to the same strip over
on that side so the book match here will
be much more evident that it's right
next to each other because they will in
fact be right next to each other at the
stern of the boat the stern is very
narrow and very low it's only a couple
inches high at the stern and so up at
this end we're only going to go like
five strips up before we get to the back
deck and remember on the back deck I
have a whole nother stack of wood over
here that's going to be the back deck
all of this stuff here will be cut out
and not end up on this boat it's
perfectly good wood I can use it on some
other project it might end up a stir
sticks we'll see but
what I'm looking at is just this long V
coming back here on either side of the
boat the cockpit will probably be
somewhere right in here and so these
this V will come and hit right next to
the cockpit so let's look at that over
on the boat itself so again the widest
part of the boats right here it is 31
inches from water line to water line at
the bow of the boat the water line is
right down here so it's 18 inches and so
we only have 9 inches from the water
line up to the bow at that point if
we're running strips up here
they're running parallel parallel
parallel up here they start to V in at
the centerline and so they start getting
shorter and shorter we have the light
strips at the water line and then if we
have a whole triangle of dark coming
back here starting wide getting narrower
and narrower and narrower and as it
passes here this is where the cockpits
going to be it starts to fade away here
on the back deck we'll have a whole
different piece of wood so what I'm
visualizing this end up being is a dark
streak tapering away from the bow
towards the stern through the cockpit
and I think that would look awesome and
so I think we'll stick with this layout
of wood we'll get this stuff we're not
using bundled up put that aside you
never know we might have a need I'm
gonna call that a day I'm really pleased
with how the strips have turned out I
think I'll be able to get some really
nice patterns on the boat with this wood
one thing you may see from the last two
episodes this book matching is tricky
like I said it can be hard to wrap your
mind around all the options and remember
if one strip gets messed up it can throw
off the whole pattern and you may want
to start over with a whole new board I
haven't even tried to fit a strip on the
kayak yet the opportunities for making
mistakes are only just beginning
some of you may be asking is this worth
it the answer is probably no I don't do
it on all my boats I build and any
improvement
appearance is probably not justified by
the added effort you probably won't want
to get involved with matching like this
until you have a few boats under your
belt there's so many other fundamental
aspects of strip building that will have
much more direct influence on the
aesthetics in your boat that you should
probably leave book matching until you
get more comfortable with the basics but
I thought some people may be interested
to see what's involved there's a lot of
time spent just record-keeping in the
next episode we'll start putting strips
on the forms if you can't wait my
patreon supporters see each episode a
few days before the general public if
you're impatient please lend your
support via my patreon page I really
value your support if you want some
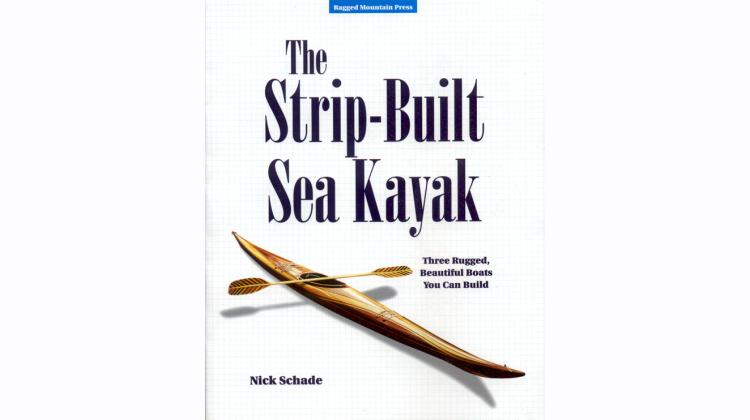
exciting reading I've written two books
on strip building which you can get at
the links provided below once again
thanks for watching and happy paddling
Nick Schade today I'll delve into the
mysteries of book matching strips cut
from two biomaterial in the previous
segment I sorted out the strip's cut
from the edge of a 3/4 inch thick flat
grain board the options for matching
those strips were limited you cut them
out in order and then keep them in
something resembling that order when you
cut blanks out a thicker material then
ripped the blanks into strips there are
a lot more options for how you can
arrange those strips on the boat I'm
going to spend some time going through
some of those options then sort out the
strips for the micro bootlegger sport so
I have here short piece of what was a 2
by 8 or so that I've just cut into
strips it's a little bit of a rough job
but this will should serve as an example
to help you out I've got it all kind of
marked up here but looking at the end
here you can see my original marks on
the end of the board showing the order
so this is what it looked like before
everything was cut up and I cut it up
with the 3/4 inch blanks and then I cut
that each of those blanks up into strips
so we'll start by looking at the blanks
so here we have the blanks and ripping
one off at a time
we end up here with a set of blanks
these are in the order that came off the
board
but this is before cutting the blanks
into strips so I've got just to flip the
whole board over I've got these blanks
in the order that they came off the
board
this was the edge of the original board
you can still see it's a little bit
rounded over it's not it's a little bit
darkened where it seemed more weather
here's where I cut into the board taking
it off the sides like this all right so
now let's look at one of these blanks
you can lay this out in order
we've got sort of cryptic marks on there
I have this marks as the backside see
what we have marked on the front side so
this is set I and this is strip one two
three four five and six out of set I so
this was the first strip here again you
can see this was the top of the original
board it's it's a little bit darker than
the rest
diva's getting a little bit more weather
but there you have the top of the
original board this was not part of the
original board it was not part of the
top of the original board this was one
layer down so again this was all like
this so there's our original blank again
if you look at these I'm recreating the
top of the original board again all
right so now I'm going to well we could
take this set of strips and slip match
it so we will have here the set of
strips that would match up pretty well
with the grain so slowly transitioning
across there you see the color fade
happen there or conceivably we could end
up book matching these
don't have a lot of grain happening here
but this whole set would end up book
matching together so we could do some
sort of pattern where we have sets of
three that book match together
now let's reassemble or put it back into
the same original blank here's our
original blank back as the top of the
original blank and we have all of these
pieces now by unbundle these just bring
the pack again is our original blank now
we have a set of strips here that is in
a little bit different order now imagine
if we took the top row of each of these
the top strip of each one of these so so
there's the first layer we now have
another layer do the same thing and keep
on going so you see each one of these
layers is a slice through that original
board and so this is these are
contiguous strips from the original
board and would just keep on doing that
I think this one actually should be the
way it was originally I've haven't
mislabeled so here I have the whole
board laid out in contiguous panels
that are adjacent to each other in the
board so now imagine how we begin
book-matched
the individual strips off the first
board we can do something similar here
this set of strips here was on top of
that set of strips we could now flip it
over and have a book match between these
two so these are a mirror image of each
other and then we slip match it so this
one the odd strips go over on this side
even strips over on this side and
continue that pattern putting the odd
strips on this side you can strip from
that side so here we have a book match
that repeats and it's also split matched
so this is this and this and this our
stack in order this this and this are
stacked in order
there's a book match pattern of strips
opening up like this and slip matching
that's creating a nice slip match
pattern but we could go one step further
and so it's mirroring right here and
then slip matching we could also make it
so this mirrors that so it opens up as a
book match there as well
likewise so now we have something
mirroring here and mirroring there and
then mirroring there and you know it's
it's not so obvious with this what's
going on but we get a you know smooth
blend that blends back into itself and
then you know as from dark to light to
dark to light dark to light dark to
light and so it ends up looking more
contiguous like all of these are right
next to each other and there's a bunch
of different ways these can be put
together obviously this one's right
there the number of permutations on this
are really kind of mind-bending it I
spend a lot of time just sort of looking
at it and thinking about it and you know
and for a better match we may actually
be better off you can't see the side of
the boat on this side next to the side
of the boat on that side so having those
matched perfectly is a little less
critical than having the centerline axe
perfectly and we might also find out
that it's more it's a better match if so
here we have one and two we could have
over here
so one on two were matching then for
matching that so I can make this pattern
where things are switching so here's
panel four and then take panel five be
next right here oh here it's alternating
boom boom boom boom boom alright and so
this is match to that this is match to
that this is match to that this is match
to that and so again we get these
patterns that come in waves back and
forth and so I think I'm going to try
and do something along these lines but
you can see you got to pay attention and
it's you know thinking about how these
are going to work it's confusing yeah I
have this whole other set of marks on
here so I can make a whole nother
pattern by taking the first one of each
of these so I and so i1 i2 i3 i-4 i-5 i6
and so there's a matched set
and then h1 h2 h3 h4 h5 h6 and just keep
on doing that and so we're creating a
pattern that flows and in a different
manner it still could look good these
could be matched you know again the
number of permutations here is hard to
keep track of and you know spending
right you know I'll spend time just
staring at the strip's trying to figure
out what I want what's gonna look good I
think I have an idea for this set
already but I'm not certain I'm gonna
have to just lay it out and take a look
at it see what it looks like get a feel
for it there we have the set of strips
that can also be matched up in various
ways we can so we have 1 2 3 4 5
six seven eight nine sets here they can
be book-matched
relative to each other and the whole
nother pattern made that way this is
where you have your chance just just to
sit and think and look at things and
determine what you're gonna do again I
think I'm gonna do the one I showed you
before where I was matched book matching
the planes cut through the original
slice these are sets of blanks so each
one of these was one of the original
blanks cut into strips and so I believe
if we take these flip them up this way
and it's one blank another blank another
blank and here we have recreated our
original board again that's so task I
have ahead of me right now is getting
those in order figuring out exactly how
I want to lay them out so before I do
that I'm just gonna bundle these sets
back together again
so you can see how it's be easy to lose
a bubble on this there's a lot going on
all these different layers put together
how it's all going to fit and how it's
gonna look on your boat will we need to
concentrate and numbering things is
extremely helpful just help you keep
track of everything I'm using a code
here where I'm numbering the strips and
lettering the blanks and that helps me
keep track of which blank they were in
and the numbers say which layer in which
blank they were in so numbers 1 through
6 again circling one side not the other
just to help keep track of everything
and so that's what I'm going to strive
to do next here I have the strips for
the body of the boat again these would
cut by cut out of a 2 by 12 and I have
those were each cut into three
quarter-inch blanks and
those blanks were cut into 3/16 strips
so I'm going to just unbundle these and
then get these into bins before I lose
the bubble on them all right
so there we have each bundle or each
original blank in its own bin so now I
want to just get these a bit organized
and labeled I'm gonna start by just
saying a b c d now my my goal my thought
with this for this pattern would be to
take each layer out as a set and lay it
down I think what I'll do is I will
unbundle these I'm bundle it down at
this end as well so now I'm going to
proceed to number these strips
I'm gonna keep them in these bins and
one layer at a time I'll go through a
number them and so I've got the first
ABCD on that these are all going to be
layer 1 so 1 1 1 all right now slide
back the first layer and this will be a
+ 2
all the way or two I'm going through all
of this process just so you know I could
conceivably just pull them out of the
bins right now and put them in the order
I think they should be and I could
probably manage that and not screw up
but if I did screw up reconstituting the
board and getting it back in the correct
order would be a real hassle and so by
doing this now taking the time to just
individually mark each one of these at
least once so it can be situated back in
the stack if anything should happen you
know a trip and push everything out of
the way or just somehow screw up I have
a means to get it back to where it
started oops
I need to pay attention so I let them
know I'm numbering them oops and I need
to stick with the same number whenever
I'm doing this kinda process my brain
tends to get ahead of me and do its own
thing so now slide the next row back
every strip now has its own unique
identification so if I should mess up I
can at least get everything back to this
order if I have strip 2f I know it's in
stack F and the second layer in that
stack so if all goes pear-shaped I have
a way to get back to where I am right
now basically I want to make it look
like the boats made out of one wheeler a
bunch of really wide planks so hopefully
the strip's will just about disappear
you know this we can have a discussion
on whether that's the best way to go but
that's where I'm gonna go here and so my
plan is is to take this first layer and
flip it over and so we will have layer 1
and layer 2 will be book-matched oh so
I'll draw off this side of the stack the
first strip off of each bin and lay it
down building out this way then the next
layer I'll draw off this side of the
stack and lay it down in a book match
layer with the first one strip number
one lift it out of the bin let strip a
one it's going over here I flipped it
face-side down b1 going over here c1
d one just of note this is the one I
broke when I was pushing too hard on the
strips and so just that is strip D one
so it's it's the first layer and the
third fourth been over so it's pretty
close to an edge there the way I'm
laying it out right now
so we're up to e one again by having
these benches all at the same height and
nice and wide I'm able to pull a strip
out and slide it across all from this
end of the strip everything moves easily
doesn't get caught on anything so
working is a one-man shop I don't have
somebody else to help ten the other end
so this helps me get it all lined up and
so there is the first layer and now we
will take the next layer so starting
from this side and building out so again
this this is matched like that so now I
have one book match set these are mirror
image from each other and look pretty
sharp
so now layer three we're putting
facedown again so we're matching it this
way
obviously I'm gonna need some more room
here eventually now we're back to face
up I found if you're going to try and
push on a whole stack like this having
something to keep things down I'm going
sprawling and be a big time-saver I'm
only on four layers here but I'm
thinking just looking at this I've got a
width here of 37 inches 37 inches is
probably enough to cover the whole boat
let's take a look so like on the bottom
of the boat where we went from water
line to water line on the top body of
the boat I'm going to do the same thing
just water line to water line so I only
need enough to go from the water line on
one side to the water line on the other
side at the widest point
so take this form here we whip down
under the water line measure it around
and we're at 32 inches right there and
I've got 37 already 3
I've got enough strips already laid out
here
the rest are spare I want to take a look
at these see if they create a pattern I
like and try and imagine how it's going
to look on the boat so looking at these
strips that at this end we've got got
sort of pale colors with a few streaks
running through it and then we looked at
skiing down the length here at the bow
we've got sort of a V thing going on
there with a dark streak down the middle
and two light streaks running through
there so I need to think about how this
is going to look on the boat if I lay it
out just as it is right now having this
be the waterline or approximately the
waterline on one side and that be the
waterline on the other side I end up
with coming up to the side of the bow
if I make this the bow I have coming up
the side of the bow this dark streak
look pretty nice and then it would get
up part you know start to get up on on
the top deck and the the deck tapers
away you know it's narrower at the bow
obviously than theirs at the cockpit and
so I'd end up starting to cut back some
of these strips and I'd end up with very
little of this dark stuff and personally
I like the dark stuff best I think it's
the the most interesting wood in the
board is the dark stuff and so if I had
this I'd have sort of a dark streak
starting at the side of the boat and
running down to the waterline and then
most of the boat would actually be this
pale color there's some interesting
grain going in here but I don't think
that would be the most interesting
pattern or the the most aesthetically
pleasing pattern I think having these
dark streaks sort of start at the bow
and then taper away towards the stern on
either side of the boat I think that
could look quite cool so kind of
centering these dark streaks in the bow
that's kind of where I'm where my mind's
at right now on this and so that might
be taking all of this stack right here
so this whole layer and putting it on
the far side so then we have starting at
the waterline light then it builds dark
dark dark and we have this streak
running down the side of the boat I
think that would look sharp and on the
other side this would be near the
waterline on the other side and so the
light lightest color is on the top of
the bow and most again most of that
would get cut
way so with it would be making this a
center line here right in there and so
we'd be cutting away that and so we'd
have a meeting dark in the front and
then a light triangle coming back around
the cockpit I think that would look
really sharp so to that end I'm going to
take and pull this pile towards me and
move this one to the other side is that
going to work
I've got I don't know if it shows up in
the camera but this is my broken strip
and so that's potentially going to
bollocks that using that whole piece
because I would end up right in the
middle of the bow so this is a broken
strip right here that would end up right
in the middle of the bow on one side of
the boat I don't want to have to glue
that together and try and patch that in
make it look right but it's not a big
deal I've got a whole bunch of other
strips still over there in the pile I
can take this whole layer off put it
aside and use the next layer off the
pile so I'll end up taking this whole
stack here this is one whole layer and
we will just dump that into a bin here
so what remains is three layers and
we're up to layer four I'm just going to
slide this whole layer across like then
pull layer five off so layer four here
is face up and ABC across this way we
want to do layer five face down pulling
from the far edge of the stack
so trying to visualize how this will
appear on the boat we have the
centerline here
the datum water line is going to be over
here someplace not necessarily exactly
at this edge but somewhere up from that
edge a couple strips and so this will
run down the centerline and the site the
bow of the boat is much narrower
obviously than the middle of the boat
and so we won't need as many strips to
get all the way up to the centerline at
this end as we will in the middle that
makes sense the votes only like ten
inches high at the bow and very narrow
and so we only need about 1
get all the way up to the centerline at
the bow of the boat and so that's about
here this will be probably about where
the first strip gets up to the top of
the stem at the bow of the boat but at
the middle of the boat is 31 inches wide
so we're using all of this strip in here
all of these strips fully from water
line to water line up through the center
line so there's going to be a taper down
through here to this point so much of
this is just going to get cut off both
sides this strip right here will end up
being right next to the same strip over
on that side so the book match here will
be much more evident that it's right
next to each other because they will in
fact be right next to each other at the
stern of the boat the stern is very
narrow and very low it's only a couple
inches high at the stern and so up at
this end we're only going to go like
five strips up before we get to the back
deck and remember on the back deck I
have a whole nother stack of wood over
here that's going to be the back deck
all of this stuff here will be cut out
and not end up on this boat it's
perfectly good wood I can use it on some
other project it might end up a stir
sticks we'll see but
what I'm looking at is just this long V
coming back here on either side of the
boat the cockpit will probably be
somewhere right in here and so these
this V will come and hit right next to
the cockpit so let's look at that over
on the boat itself so again the widest
part of the boats right here it is 31
inches from water line to water line at
the bow of the boat the water line is
right down here so it's 18 inches and so
we only have 9 inches from the water
line up to the bow at that point if
we're running strips up here
they're running parallel parallel
parallel up here they start to V in at
the centerline and so they start getting
shorter and shorter we have the light
strips at the water line and then if we
have a whole triangle of dark coming
back here starting wide getting narrower
and narrower and narrower and as it
passes here this is where the cockpits
going to be it starts to fade away here
on the back deck we'll have a whole
different piece of wood so what I'm
visualizing this end up being is a dark
streak tapering away from the bow
towards the stern through the cockpit
and I think that would look awesome and
so I think we'll stick with this layout
of wood we'll get this stuff we're not
using bundled up put that aside you
never know we might have a need I'm
gonna call that a day I'm really pleased
with how the strips have turned out I
think I'll be able to get some really
nice patterns on the boat with this wood
one thing you may see from the last two
episodes this book matching is tricky
like I said it can be hard to wrap your
mind around all the options and remember
if one strip gets messed up it can throw
off the whole pattern and you may want
to start over with a whole new board I
haven't even tried to fit a strip on the
kayak yet the opportunities for making
mistakes are only just beginning
some of you may be asking is this worth
it the answer is probably no I don't do
it on all my boats I build and any
improvement
appearance is probably not justified by
the added effort you probably won't want
to get involved with matching like this
until you have a few boats under your
belt there's so many other fundamental
aspects of strip building that will have
much more direct influence on the
aesthetics in your boat that you should
probably leave book matching until you
get more comfortable with the basics but
I thought some people may be interested
to see what's involved there's a lot of
time spent just record-keeping in the
next episode we'll start putting strips
on the forms if you can't wait my
patreon supporters see each episode a
few days before the general public if
you're impatient please lend your
support via my patreon page I really
value your support if you want some
exciting reading I've written two books
on strip building which you can get at
the links provided below once again
thanks for watching and happy paddling