I'm starting a new strip built kayak build using nice Western red cedar for the hull and lighter inland red cedar for the bottom. I got some great boards - a 17' 2x10 and some 2x6s in various grades with nice color variations and grain patterns I hope to showcase. I'll cut them into blanks, then thin 3/16" strips, and decide on the layout to make the best use of the wood.
My goal is more real-time, vlog-style updates rather than highly edited episodes. I welcome questions and feedback throughout the process to make it more responsive to what you want to see. Supporting me on Patreon helps fund production. I also have new t-shirts available if you want to support the channel.
In the next videos, I'll start ripping the lumber into strips and begin building. I have enough wood for this boat with some leftover for another project later. The initial inertia of getting started is always the hardest part, but now I've bought materials and I think it will make a beautiful boat. I look forward to taking you along. Let me know if you have any other questions!
I am lucky to have a good source of western red cedar less than an hour from where I live. Liberty Cedar in Kingston, RI will usually let me pick through their stacks to find exactly the wood I want. They have a great selection. On this trip I was getting wood for this build as well as for classes later in the year.
over to Rhode Island to my wood supplier
Liberty Cedar in Kingston around what
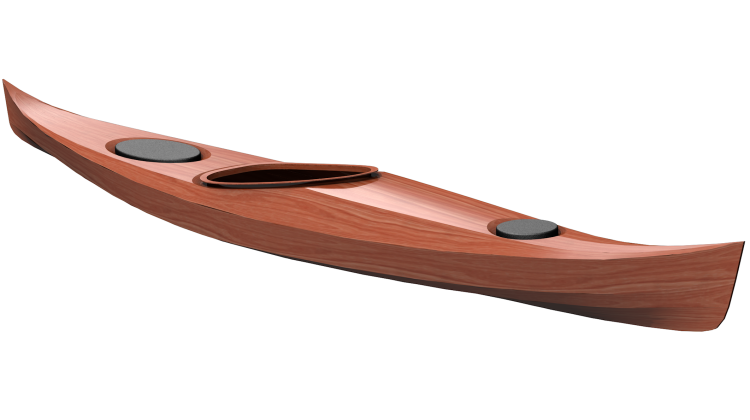
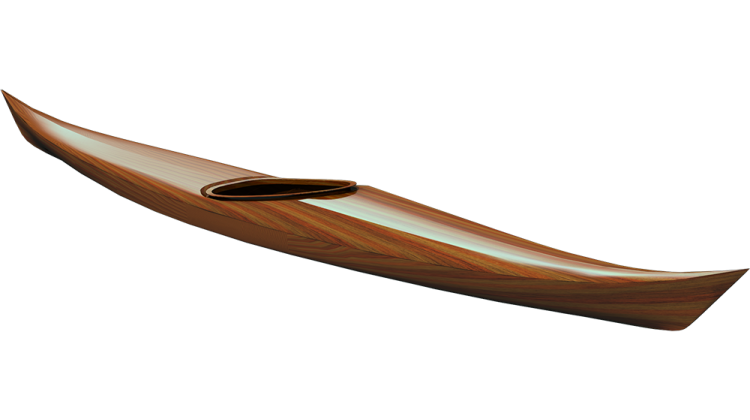
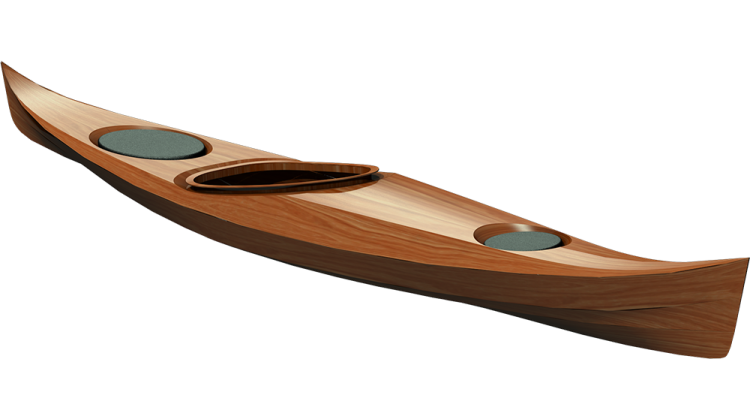
are you gonna be building as a micro
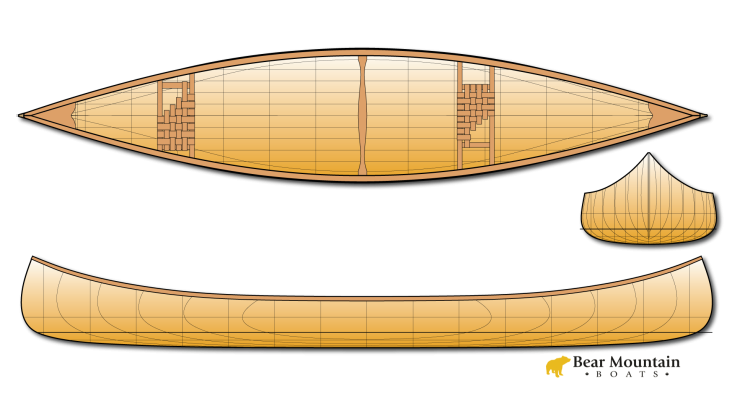
bootlegger sport so this is like the
same boat I just built skin-on frame
that is gonna be stripped though I'm
looking for some nice dark Western
red cedar
and a little bit of lighter colored
Western red cedar we're expecting some
snow tomorrow so I figured this is a
good time to
get out get to the lumberyard and back
and maybe I can work on the wood during
the snowstorm be looking for is nice
western red cedar good dark stuff
hopefully a little bit of character to
it either swirly grain sometimes I can
find nice things running through it that
would be for the top side of the bow and
I'd like some lighter colorful
a little less character and you little
good plan
just something will provide some
contrast
so the main body of the boat 17-foot to
buy ten of Western red cedar
it's all vertical grain and the boats 15
and a half feet long so I need at least
16 feet so 17 will be plenty next to
length and 2 by 10 should be more than
enough to cover the top side of the ball
that could probably build the whole boat
out of it if I wanted now it was a and
better and I get another a and better 10
footer Western red cedar 2 by 6 which I
was thinking of for the back deck book
match that out it's got some interesting
grain I think but just in case I don't
really like that I've got some two
pieces of seeing better 2 by 6 and
actually a the seeing better the primary
difference I found with that you know
sometimes it's got knots
other times it's just flat grain and you
know for me that's great I can just rip
strips off the edge especially on the
back deck is fairly flat I'll be able to
rip out two inch wide strips and just
lay them down and make the back deck go
quick and easy with some nice looking
stuff so I got a couple pieces of that
I'll rip them up see what looks nice but
I'm using for this project I'll have it
for later on then I got one piece of 1
by 12 16 foot what they call inland red
cedar I think it's basically a western
red cedar but again to my purposes it's
rough on one side which doesn't matter
but it is again flat grain so I can just
know
to thickness you know getting rid of the
rough side and then rip strips off the
side and just have a bunch of nice
vertical drain strips on that time so
I'm pretty pleased with myself yeah it's
like $500 worth the wood but it's more
than enough for one bow and I'll have
some left over build another boat out of
the leftovers at some point
when I load up my lumber you know piling
it on the roof rack of my Subaru and the
relative to the length of the board's
the crossbars of the roof rack of rarely
close together and if you're not careful
in how you load it up the full stack and
start to bounce up and down so what I do
when I'm loading up is I put the
shortest thickness pieces on the bottom
this sort of extends the footprint and
makes it so it's not quite as bouncy and
as as I put more boards on the pile to
longer thinner pieces go on top and then
I'll wrap the ends with a little bit of
tape or a stretch wrap to bundle the
long pieces together and just stiffen
them up that way by having people
contributing to the whole stiffness the
pencil play build I took all the big
yards I was building and then it's all
done they went through all of who they
take at like
forty hours and edit it down into the 20
or so episodes that resulted in the
final series and that process was very
labor intensive it took people basically
here to take that three months three or
four months worth of work and converted
into twenty ten to twenty minute videos
and I just can't afford to spend that
much time on the video so what my plan
is with this bill is to do a more blog
sound kind of like what you see right
here talking about what I'm doing as I'm
doing it and hopefully I'll be able to
break that video down quickly and get
stuff out to a little bit more real time
and so as I building you know I can get
your feedback into what you want to see
what you're interested in and you know
be a little bit more responsive to what
your questions and so as I'm going along
here
you know feel free to ask questions post
some comments and get your feedback to
me and what you want to see and you can
if you watch the whole petal play bill
there might be something you saw there
that want a little bit more detail on
something that I just skipped because I
either didn't give the video or
expediency of editing I just dropped so
I'd really like to get your feedback and
have this series people responsive with
your questions
[Music]
so here we have the the board that's
going to be the main body of the boat it
is a 2 by 8 and you see the grain is
going vertically you see these lines
right in there greens going vertically
so I want to get vertical grain strips
out of this so if I just rip strips off
the side obviously they're going to be
flat crane so instead I'll cut this into
blanks like that and then cut those into
strips just like that and so you can see
this board has some dark color and some
light streaks through it and I think it
will be pretty interesting look pretty
nice when it's done you get up here you
look at the top and you see some of
those streaks running through it so this
end has a little bit of light color in
it going to darker in that end is mostly
dark and well once we get it ripped up
into strips we'll try and figure out how
to make that look best on the boat
here's what I intend for the bottom of
the boat and this is the inland red
cedar it's all hard to see the grain on
this let's see if we can zoom in here
and so you see if this section of the
board in the middle rains coming in arcs
like this and you all that out to the
side and there we've got sort of
vertical grained and in this way and
likewise over here 45 running that way
so if I cut strips off my intention is
to cut strips off the edge of this board
so if I just cut them this way they'll
be you know in 45 there and then as you
as I get more towards the middle it'll
be more vertical grain and I probably
won't need to go all the way to the far
side here to get everything I need you
know I'm just doing the bottom of the
boat here if I'm ripping 316 strips off
of this and this is this material is a
nominal 1-inch board here
it's just a little bit over 3/4 and so
it's rough on this side smooth on that
side I'll take and skip playing this
side if that smooth the color of this
wood is it's very light colored as
compared to the top side boards you can
see a little bit of cathedral pattern
here due to the flat grain nature of the
plank
so grains pretty wide as we cut up into
here so again cutting this into thin
strips that won't matter will get nice
vertically grained strips it'll look
really nice and but we have some color
variation as we go across the board here
and so it'll you know it should end up
providing some visual interest and be
pretty nice I don't want quite as much
going on at the bottom as I do on the
top side so if it's a little muted
that's just fine I think it'll look nice
looking down at the top face of the
major body strips you can see it's good
streaks through it these variations in
color light streaks here dark with more
streaks through it and so when I cut
this into blanks like this I can either
just relay those blanks down in the
order they're cut off like this and sort
of reproduce the face of this board on
the side of the boat or I can take and
cut I'm cutting strips this way and I
can lay those down an order and make a
different looking pattern so that's
something we'll discuss after I cut
these boards up exactly how to lay these
down get a pattern that looks cool here
we have the 2 by 6 as I selected my goal
with these was to do the back deck
section a nice book match back there the
top two were the C and better grade so
if you look at the green on these
you see it runs kind of like that and on
this one this grain is kind of running
like that but it's very tight fine grain
here this is actually quite a nice board
grains running like that so with this
one but this one obviously I could rip
pieces off like that nice wide inch and
a half wide pieces and they'll be
vertically grained this one is sort of
running at a 45 and so cutting pieces
off there might not be the best and we
look down at this one again here the
grain is kind of running like that but
more importantly if we look at the side
of these this is a in better grade piece
so it's fairly wide grain here on the a
and better this being more vertically
grained and then here on the seeing
better this is very fine grain here on
that edge and we go up to the next top
one we've got a lot of color going on -
nice streaks and stuff and you know
ripping strips off of that get this make
a really nice book match on that but the
grain is so fine even though it's not
really edge grain here it's still very
fine grain and so I think that would
really look nice and be nice tight and
easy to work with with one of the seeing
better boards for the back deck it's got
these color variations in it there's you
know occasional little twist of a not
going on and you know the seeing better
is a lot less expensive than the a and
better but from my perspective this is
maybe a nicer board than my a and better
down at the bottom and so we'll see cut
into it a little bit look at it see what
we find
next seeing better board
not quite as interesting there's some
little bit of color variation through it
you can see again with the the wider
grain due to the more flat grain
orientation this board you can see the
grain lines here or wider but they're
nice and tight on that front face and
here's the a and better board and so
this you see the really tight grain on
it in here but we don't I don't need
that tight grain if I can rip off the
edge of the board ripping off the edge
here but maybe I don't maybe again I cut
this into blanks and I could use wider
blanks cut this into thirds of quarters
and then rip those into 3/16 and you
know get that nice grain pattern going
on you see there's some nice color
variation here and as we go down the
board
there's some interesting stuff going on
there so it's going to take a little
pondering looking at it and deciding
which it's going to look nicest on the
boat
it always takes me a while to get going
on a project you know just that initial
inertia to get started it's always hard
to overcome but I've done it now I've
gone and bought some wood I think it's
going to be some nice material and so
we'll end up ripping that up into strips
and I think that will probably be what
I'll be covering in the next episode but
you know if you have any questions feel
free to post them in the comments and oh
by the way new shirts here I've got some
t-shirts this is a sweater I only got
two sweatshirts but kayak just build it
so if you want a t-shirt there should be
a link down below and I you know be
happy to send you out some and I could
always use your support on patreon these
videos are a lot of work to get done I
always could use your support please hit
subscribe if you want to see the rest of
this series as it proceeds be sure to
post some questions or you know tell me
what you want to see as as I go along
with this project I think it's going to
be an interesting project and look
forward to taking you through it thanks
for watching and happy paddling