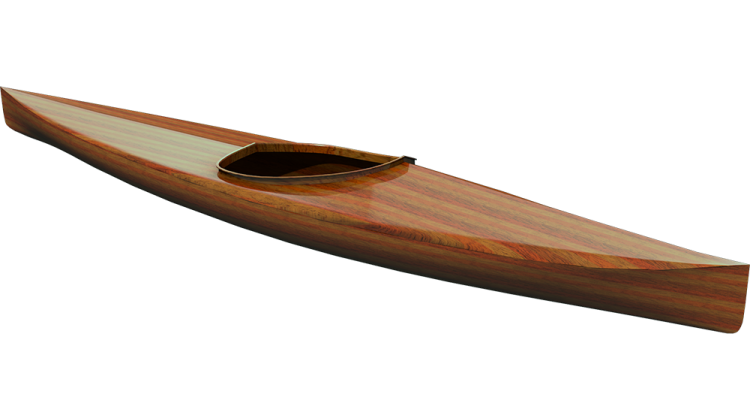
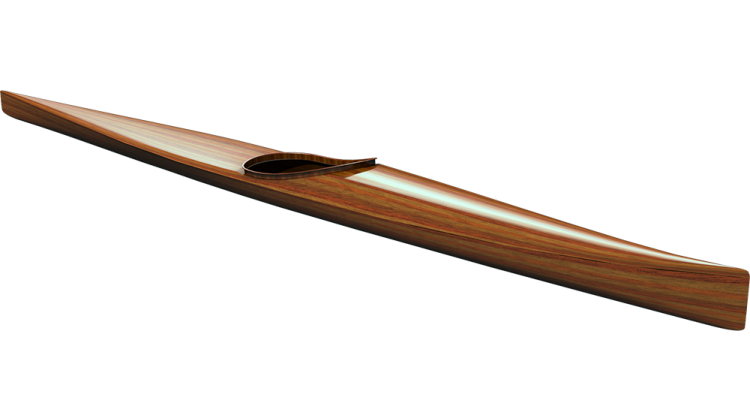
In this series, the Nick collaborates with Chesapeake Light Craft to supply a kit for the Petrel play SG design, a stitch and glue Petrel play made with marine plywood. This design is an alternative to the strip-built Petrel play from a previous series.
Staining the Panels with Alcohol-Based Stain
The host introduces Okoume marine plywood, praising its quality with clear veneers and no voids. To enhance the plywood's appearance, an alcohol-based stain (medium brown mahogany) is applied, providing a pop of color. After staining, a protective coat of epoxy is applied to safeguard the stained surface during subsequent building stages.
Staining Process and Tips
The staining process involves using alcohol-based stain with gloves and a wet rag. Emphasis is placed on avoiding multiple passes over the same area, as it thickens the stain. The hull sides and specific parts are stained on a cardboard work surface, and the host shares insights into the color impact of epoxy and fiberglass on the final result.
Post-Staining Protection with Epoxy
To prevent potential damage to the stained surface during the building process, a protective layer of epoxy is applied. The host discusses the epoxy mixing process, the importance of correct ratios, and the potential pitfalls of epoxy failure. A demonstration of epoxy application using rollers is provided.
Final Thoughts on Staining and Epoxy Application
The host addresses concerns about particulates and emphasizes the need for sanding before fiberglassing. The protective layer of epoxy provides imperfect but sufficient protection against potential blemishes. The episode concludes with reflections on the unboxing and preparation process, acknowledging the kit's complexity and the value of the video in guiding viewers through the kit components.
Welcome back to the Guillemot Kayaks Workshop! In this series, I'm working with Chesapeake Light Craft to supply a kit for my Petrel Play SG design. This is a Stitch and Glue Petrel Play. In a previous series, I built the strip-built Petrel Play; this is essentially the same design but built with plywood instead of cedar strips. You could build it either way, and Chesapeake Light Craft creates kits for both the Stitch and Glue and the strip-built versions. If you're ambitious, you could build the hull with Stitch and Glue and the deck with strip-built to make a hybrid. We don't have a kit set up for that, but it could be a cool way to build the boat.
In the last episode, we opened up the kit as it came directly from Chesapeake Light Craft, identified all the parts, found the manual, and started to lay out the parts for the build. In this episode, we'll start the actual process of building the boat. The first thing we're going to do is stain some of the panels. The Okoume marine plywood we use is really nice, but I find the color a little bit boring. So, to give it a little bit of pop, we're going to put some stain on it. This stain is a product you can get from Chesapeake Light Craft; it's an alcohol-based stain, compatible with epoxy. After staining, we'll put a coat of epoxy on to protect the stain while we do the rest of the building process.
Thanks for tuning in, and let's get down to staining. As you saw in the other boat, we stained the front pieces on the deck, deck sides, and hull sides. In this episode, we'll focus on staining the hull sides and cheater bits. We'll use a cardboard work surface for convenience. We'll use an alcohol-based stain called Solar Lux in medium brown mahogany. This stain is compatible with epoxy. We'll apply it with a wet rag, ensuring even coverage. The stain dries fairly quickly, and we'll discuss a process for evening it out later. It's a straightforward process, and we're excited to start the build.
And as you're doing it, just be cognizant that the bevel side is down. It's okay if you screw up and stain the wrong side, but why bother?
Alright, so we've done one coat of stain on here, and if we look at this, it's dry already. This is only five minutes after we've stained this. It's a little bit blotchy; this one's not too bad, but there are some dark spots and a light spot. To fix problems like that, take the same rag, wet it with denatured alcohol, and go over the whole thing. Denatured alcohol doesn't evaporate as fast as the alcohol in the stain, and it will even things out substantially.
Now, imagine the next few days of us working on this boat. We're going to be knocking parts around; what's it going to do to the stain? It's going to blemish it, mess things up. To protect these from getting messed up too much, we'll put a coat of epoxy over the whole stained surface. This way, it's buried under something hard and protective. It means we'll have to do a bit of sanding before glassing to take the gloss off any epoxy that was there. If we were to go with bare stained wood, it would get dinged up, so we want to get it under a protective layer of epoxy.
This is Okoume marine plywood; it's marine plywood with no voids in interior veneers. It has a waterproof glue, and Okoume allows large, clear veneers without knots. It's sustainably sourced plywood from Africa.
Now, let's mix the epoxy. We have a slow hardener and the resin. When mixed together, we call it mixed epoxy, never just resin. It's a 2:1 mix, two parts resin to one part hardener. Pay attention to the pumps; one pump of resin and one pump of hardener. Make sure to prime the pumps and be deliberate about pumping to ensure they come all the way back up. Don't make big batches, as the exothermic reaction can become a problem. Mix thoroughly for about a minute.
The most common way for epoxy to fail is either you get the ratios wrong, somehow messed up the pumping. If you hear the pump fart or burp or make a weird noise, pay attention because that might mean you didn't get a full pump. It'll happen as you get down to the bottom; the tube will start to suck up air. So with the mixing, if you're doing a minute, it's a minute of vigorous mixing, not a minute of really gentle mixing. Get it vigorously mixed; we want it mixed together. Scrape down the sides, get all that stuff that's on the sides down into the bottom. Tip the cup a little bit and get down into the corner. Always flow down into that corner where you're mixing and dig into those corners a bit. Get it thoroughly mixed, and when you think it's thoroughly mixed, give it another few minutes.
If epoxy doesn't cure, strip it off with acetone, lacquer thinner, or alcohol. If you've stained it, you've messed up your stain, and there's little you can do to match it. Mix down into the corners, scrape down the sides, and now, with the mixed epoxy, use a roller to apply it. Any type of sponge roller should be compatible. Roll it on evenly to get complete coverage, not too sloppy wet but completely covered. This is another chance to even out the stain; you can even mix stain directly into the epoxy for colored epoxy. Once coated, leave them be; don't stack them up. The epoxy isn't too smelly, and there's no need to worry about particulates at this point. Sand everything before fiberglassing. The purpose is to have epoxy between the stain and you, providing some protection.
And that's day one, the unboxing and getting stuff ready. It might be intimidating at first, considering the number of parts, but videos like these can be helpful for people to become familiar with the kit before opening the box. Finding the manual quickly during unboxing and referring to the pages showing the parts can be a guide. The added stain is optional for aesthetics. This episode covered the unboxing and staining; the next will focus on assembling the hull, with fiberglassing possibly in the future episodes. Thanks for watching, and see you in the next episode. If you want to see more, please subscribe and do all the YouTube stuff. Happy paddling!

