Transcript:
We are getting there! Hi, I'm Nick Schade at Guillemot Kayaks. This is the final episode of building the skin on frame microBootlegger Sport.
In this episode I'll paint the fabric, make and install a seat and add some decklines.
I decided on a two tone paint job. I thought it would look nice to have the topsides a cream color and the bottom a pale green. I want to make the transitions right at the waterline.
I'm using the main stringer as a reference as it should be parallel with the waterline. According to my calculations, if I make the transition between colors about 2-inches below the bottom of the main stringer, it should be about perfect.
Taping a pencil to a scrap piece of the main stringer creates a gauge that is just about 2-inches. Running the top of the gauge along the bottom edge of the main string I make a series of marks.
My plan was to run masking tape along the marks to define the bottom edge. But I tried everything and nothing would stick to the raw fabric.
I ended up just masking off the coaming area to keep paint off the wood and only on the cloth.
Without the masking tape at the waterline, I instead used my marks as a guide to brush paint along the bottom edge. I wanted to go a little beyond so I could overlap with the bottom color.
Once I had the edge defined, I used a roller to cover the long wide surfaces.
Up around the coaming I used a brush to work paint into the fabric and the stitches.
This 14-ounce cloth is fairly thick and has quite a bit of texture. While I am not trying to fill the weave or make a smooth surface, I do want the paint to soak deeply into the cloth.
This stuff absorbs a lot of paint. I bought a quart of each color of the best exterior latex the home center had and ended up using all of it to apply two coats over everything.
After the topside dried, I flipped the boat over. Now with the paint on the surface, masking tape did stick, so I re-marked the waterline and taped it off. The green tape stuck better, the blue gave me a wider tape line.
I kept coming back over the same area while the paint was wet. This gave the fabric a chance to soak up some paint. I don't think the paint, or anything truly bonds well to the polyester material, but after soaking into the weave the paint created a good mechanical bond with the cloth.
Again, Latex house paint isn't necessarily the most durable option. There are some two-part urethanes that are wicked solid, but Latex is very affordable, and easy to get in any colors to suite your taste, and they are probably tough enough for most uses, and should you scratch it up touch-ups are easy.
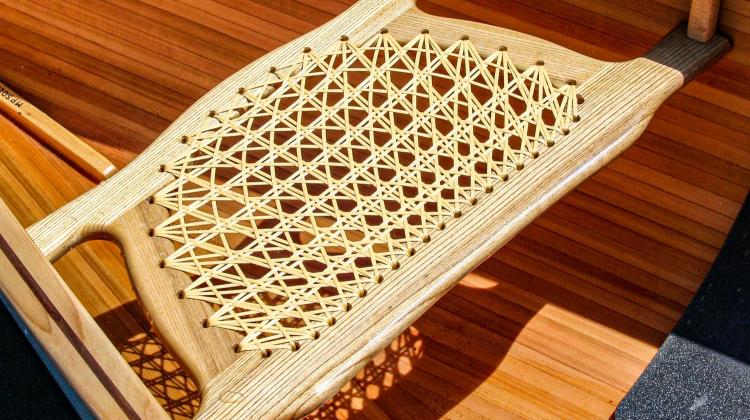
I modified my standard seat so I could adapt it to the skin on frame. The CNC machine chews through minicel foam like nobody's business. I start with a roughing pass using a 1/2-inch endmill and then come back over with a ball nose on the finishing pass. I made the step-over wide because its foam, It's not like I'm going to sanding it later.
After thinking about it for a while, I decided I wanted some slats under the seats. A pair of butt bumps sticking out of the bottom when you paddle isn't too big a deal, but who needs the bruises if you paddle over a log.
This lashing would have been easier to accomplish before installing the skin, and in the future I will likely incorporate some mortices in the frame to accept the tabs, but that is the whole reason for making a prototype, figuring out how to do it better next time.
The seat wedges tightly between the frames and stringers. I may glue it in eventually, but it seems fine like it is.
The backrest has elastic straps behind to help hold it up. I loop these elastics up and around the next frame back.
I decided to go with fairly minimal decklines. I measured out three spots 6-inches apart into the center of the main stringer. I used an awl to open up a hole in the fabric. A screw through a finish washer and a loop of webbing should make a reasonably secure attachment point for shock cord.
Notice that somewhere off camera I added some automotive vinyl striping tape along the waterline.
I had envisioned the forward straps on the backrest being bolted into the solid section of the side frames, unfortunately, I didn't put the solid part in the right place. Instead I just ran a loop of webbing up and around the next frame forward.
The shock cord is threaded through these loops, back and forth to either side. It requires a bunch of sliding and pulling to get enough cord through all the loops.
My standard system for linking the shock cord back together is a couple hog rings. These stainless steel bits of wire are crimped around the cord and then hidden under a length of heat shrink tubing.
With the heat shrink shrunk, the kayak is done. As of this point I have not yet put it in the water, but I will say that it was a fun project. I gave myself 3 weeks between the time I started designing it and finishing it up. I was able to do that easily, with plenty of time for other stuff.
A lot of people have been asking if I will be offering plans or kits. That is a goal, but this build was just a proof of concept. The largest task in offering plans and kits is not building the boat, but writing the instructions.
I need to test the design, modify it as needed, build another and document it with photos and more in-depth video, and then write a comprehensive manual. Writing takes longer than building. Unfortunately, I cannot estimate when I will have that project done. I'll post a notice here when its ready.
If you are interested, do let me know in the comments. Obviously, a lot of interest would be motivation for me to work faster. I think it's a great project, fun and easy, and a cool boat when you're done.
I'll be posting on-the-water video as soon as I can. Right now, my river is frozen, so it might be awhile.
In the next week or so, I should be starting on my next build. If you would like to follow the new project, subscribe, follow, turn on notifications, whatever, keep your eyes peeled on this channel.
If you have any questions about this build, please feel free to post a comment. I'll try to answer them all.
If you are watching on Facebook, check out my YouTube Channel, if you are watching on YouTube, checkout my Facebook page
If you find these videos interesting or helpful, I would appreciate your support via my Patreon page.
Until next time, thanks for watching and happy paddling.

