Episode 5 Transcript
Stripping the Bottom
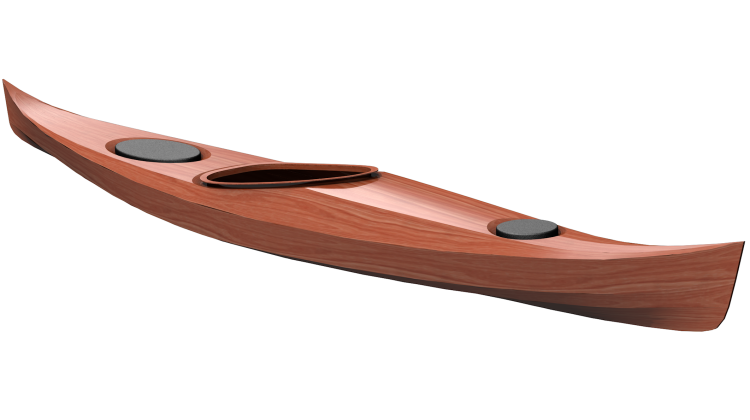
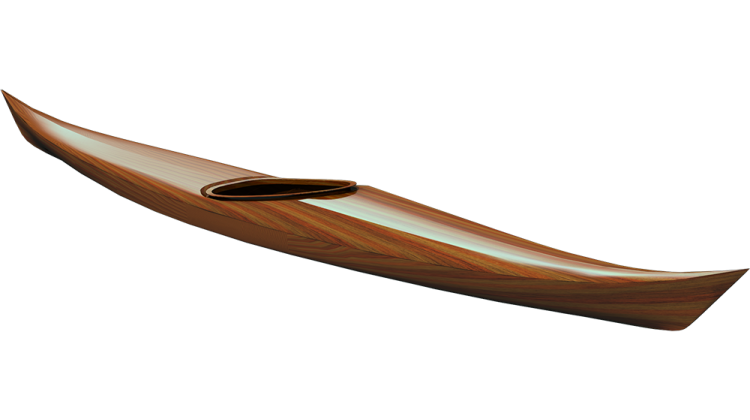
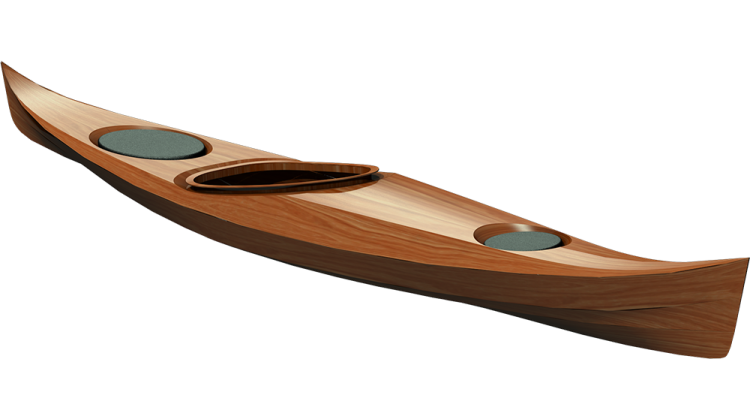
Hi, I’m Nick Schade at Guillemot Kayaks. Welcome to episode five of my series on building the strip-built kayak the Petrel Play. In the last episode we stripped up the side of the kayak, in this episode we will strip across the bottom.
I hope you enjoy.
Unfortunately, during the time I was stripping one half of the bottom of the boat, I had the GoPro pointed at the floor. So here is some time lapse of the floor. Just at the top of the frame you can see me diligently adding strips to one side of the bottom. It may be hard to make out, but I am just adding one strip after the other, being sure the strip is long enough that it overhangs the centerline at either end.
I stop when I have the whole side extending slightly beyond the centerline.
Like I did for the chine in Episode 4, I use my marking jig to transfer the centerline from the forms to the outside of the strips.
I then lay a strip down along these marks. I clamp the spline on the waste side so when I go to mark it with a pencil, the clamps aren’t in the way.
The spline is never straight initially, but by getting my eyeball down near the line, I can see the problem areas. Usually just loosening the clamp and letting the spline relax will straighten it right out.
I use a sharp pencil because fat lines are hard to follow.
I‘m cutting as close to the line as I can without touching it.
A side-rabbet plane works well to true up the centerline. I’m using a Stanley #79. I keep checking the edge. First to make it straight, then I concentrate on getting it on center.
Pare down the high spots, with longer and longer strokes.
When the centerline is straight and true, the real work of strip-building starts. I now need to fit the other side up against this straight edge.
You need start somewhere. I’m just making an eyeball guess a some kind of a bevel.
I try to lift the strip up in its installed orientation. The plane is held to match the flat surface the strip will fit against. This should be good approximation to start with.
Test fit and see where it touches. Visualize how the strip end meets the surface. And reproduce that with your plane.
Maintain that same orientation as you shave away the end of the strip.
I’m seeing a little gap between the strips where I need to adjust the bevel.
The strip twists from nearly flat to almost vertical in the space of a couple forms. A heat gun melts the lignin in the wood making it softer and more pliable.
As the wood gets hot, you will feel it relax slightly and accept the twist. The strip will stay twisted when it cools off so it will be easier to hold in place on the forms.
Once I have the end fitting well, I clamp the strip in place and dry-fit it all the way to the other end.
I mark across this new strip onto the existing strip to indicate where it should line up when the far end is installed. Now I can release the strip to work on it more easily.
By backing off a bit from this mark I give myself room for error as I work on fitting this end.
Again, by maintaining the relative orientation of the strip I’m working on, to the space it needs to fit, holding my plane to match that fitting surface will give a good first estimate at a tight fit.
From there I look to see where the strip hits and shave away that spot first.
When the bevel looks good it is time to refer to the marks made earlier and trim back the length.
If the marks line up at this end, I know it will fit at the other end.
At this part of the kayak the strips have a lot of twist. The heat gun trick helps pre-fit the wood so it is not such a strain to hold it in place.
It doesn’t take a lot of glue to make a strong kayak. We only need enough to hold it together until the epoxy and fiberglass are applied.
If I did everything right, aligning the length marks will assure a tight fit at both ends.
Once I have stripped past the knuckle of the stem I have some more solid reference points to guide the fitting process. I can mark where the new strip hits the keel line by sliding it to the point where it touches.
After sliding it back out to the right length I transfer that mark to the new strip and draw a taper from the mark to the end.
I just hack the excess off with a jack knife. It is handy, quick and efficient.
Once again, I resort to holding the strip in its orientation while hold the plane to match the vertical surface of the keel line. I don’t need dead perfect on the first try.
I’ll test fit before I’ve planed down to my pencil line. That line is just a reference, what matters is how it actually fits.
I inspect the taper and the bevel. If pointy toe hits first I know to concentrate first on that end, if there is a gap at the top I will adjust for that.
I hold the appearance of the fit in my mind as I place my plane against the wood. By reproducing that fit, but replacing the plane for the keel line I will shave away until the fit with the plane is tight. This should mean the fit with the keel line would also be tight.
There is still a fair amount of twist here, so the strip gets the heat treatment to pre-shape it.
When this end is all set, I dry fit it in place, and then mark the length at the other end.
Even though you have seen it a few times now, lets slowly go over this process of fitting strips again.
Mark the length of the taper.
Draw the taper guide line.
Whittle off the excess.
Plane the taper smooth.
Adjust the bevel if needed.
Here the toe or point is tight, but the heel is a bit loose. See how it is low compared to the other side.
So I shave back the toe just a little bit.
The heel or wide end of the taper is only down slightly. That is close enough.
I temporarily clamp this end in place.
And dry-fit the strip down the length to the other end.
Make a mark to indicate how the strip will fit.
Then remove the clamps so the it is easier to handle.
Mark the taper.
Note that the length marks are offset a bit to give me extra length to work with.
Just hack off most of the scrap.
Match the orientation of the pieces while you are planing.
Check your fit.
When the fit is good, work on the length.
Note the space between the marks.
The length is now perfect.
I can now glue and staple.
And repeat.
When I get to the point where I have space for less than 2 strips, I glue a couple strips together. These will form my closing strip.
I align one edge of this strip with the straight edge of the keel line, then reaching in from below I mark along opposite curved edge with a pencil.
The pencil didn’t fit all the way into the pointed ends of the space so I continue the lines using a straight edge.
This is one case where it is often easier to head over to the band saw to trim off the excess, but I can’t be bothered to walk that far.
I proceed with the fitting one end at a time. First I want to get the pointed end to the correct taper.
Notice that I am testing the fit with pencil marks up, instead of on the bottom where I originally traced them. This is intentional. It means that the straight edge of the strip I’m fitting will lay against the curved side of the space it is fitting into.
In other words all the strips on either side of the center line are bent in towards the keel and these closing strips will continue that pattern.
I work on the taper starting at the point and shaving my way back towards the widest section, gradually fitting it down as I proceed.
A pencil mark along the hull surface indicates how much needs to be shaved off.
When one end fits really nicely, I start working on the other. Like before, some pencil marks help indicate how much length is needed.
Like the first end, I start at tip, making sure it fits well before working down the length.
The fine taper may produce a flag end that doesn’t plane off easily. I have a solution.
Like before, I first work on getting the taper tight, then shave back the taper to adjust the length so it fits from end to end.
With a good fit, its ready for glue.
Masking tape makes an excellent clamp.
That wraps up Episode 5, In the next episode we will start stripping the deck.