Transcript
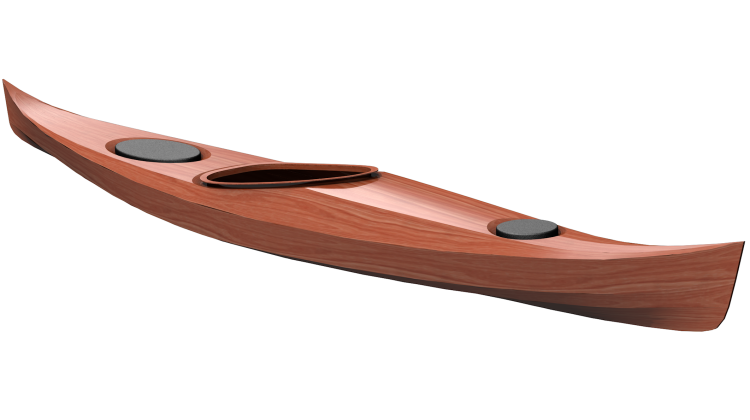
Hi, I’m Nick Schade, the designer, builder and owner of Guillemot Kayaks. Welcome to episode 8 of my series on making the Petrel Play strip built kayak.
In the last episode we scraped, sanded and faired the deck and hull of the kayak and in this episode we will cut, shape, fit and install the cockpit recess into the deck.
I hope you enjoy watching.
The recess is constructed out of plywood. Basically it is a little bit of Stitch and Glue in the middle of a strip-built project. I cut these parts out of 4-mm okoume plywood on my CNC machine, but they could be cut from aircraft birch plywood or veneer.
I decided to use a little puzzle joint to connect the recess riser to the sil.
A few dots of Cyanoacrylate glue is enough to spot weld the joints together.
A quick spritz of the CA glue accelerant makes it dry almost instantaneously.
I apply the glue to the bottom side so it will not show from the outside.
The top edge of the plywood should be lined up in a tight seam.
And secured in place with masking tape.
Little spot-weld dots of CA glue is enough to hold it until epoxying and fiberglassing a few days from now.
The tape can come off almost immediately.
To assure a tight fit into the deck along the visible edge of the recess, I am back-beveling the perimeter.
I drew up a pattern for the hole in the deck to accept the recess. This pattern is taped in place, using the forms as a location guide.
Those staple holes are proving more and more useful.
The inner edge of the template is traced on to the deck. In the last episode I did a rough sanding of the deck to make this part easier.
With the first side traced, I flip the pattern and line it up on the other side.
Now its time to cut out around the line. I don’t want to cut into the forms so I come in from either side. Then I join the cuts with a hand saw.
To assure a nice clean, sharp corner at the feature line I use my pull-saw.
Now comes the actual fitting. There are too many variables to have the paper pattern define a perfect fit right off. I need to work in on it.
I start by marking some basic references like the centerline of the recess.
The essential premise of the fitting process is looking to see where the recess touches the deck first, and then remove material from that part of the deck to make larger and larger tight sections until the whole recess fits snuggly into the hole.
The key to this process is patience. That, and finding the right tools.
I’m primarily using some little luthier’s planes with various bottom profiles and a Japanese float style rasp. I’ve also found that 40 grit sandpaper glued to sticks with different profiles are very useful. You want something that is precise, yet fast at removing material. Like the tools I’m using coarse sandpaper on a stiff strip is very accurate and fast enough to make noticeable progress with each stroke.
Sizing the hole is a constant cycle of testing the fit, shaving away tight spots and checking the fit again.
I don’t want to change the size of the recess piece, but it does need the bevel adjusted so the top edge is tight flush with deck.
As the fit at the front becomes more developed it is harder to check. Securing the recess piece in place with masking tape allows me to check the overall progress of the fit.
I mark the tight areas with a pencil so I remember where needs work.
With the front looking pretty good, I find I need to remove a lot of material at the back. I trace the back edge of the recess onto the deck.
I want to place an accent strip around the perimeter of the recess to highlight it a bit. I’m using the same thin strips of maple that I used on the other deck accents. This is glued on with carpenters glue.
Masking tape makes an excellent clamp for this thin strip.
At the front corner where the recess and front deck feature line intersect, I want a sharp angle in the accent.
I break off the strip a little long.
And then trim it to fit.
The color of the Okoume recess piece was not exacty what I wanted so I tinted it with alcohol based stain.
The tape comes off when the glue has set up.
I’m taping the recess back in dry, without any glue. I’ll spot weld it in with CA glue after its installed.
The CA glue will eventually get covered with an epoxy fillet. For now I just want to be sure the recess won’t pop loose while I’m doing other work.
I moved the cockpit area forms around a lot while I was fitting the recess. Now I want to be sure the shape is right to match the hull while I prepare other work. A little hot melt to hold the deck to the forms locks in the shape.
The deck is now fully assembled, it just needs a bit more sanding before its ready for fiberglass. The hull however, is already set for glassing. In the next episode we will drape the glass, wet it out with resin and apply a fill coat.
Until then, please post your questions to the comment area. If you are enjoying this series on boat building, please let me know by hitting like. To keep up to date on future episode please subscribe to my channel.
And just a reminder that plans and kits to build this kayak and other small boats are available through my website Guillemot-Kayaks.com.
Thank you for watching and Happy Paddling.
The Tools used:
- Japanese Iwasaki File
- Luthiers Planes
- CA Glue
- CA Glue Accelerant
- 3M Masking Tape for hard-to-stick surfaces