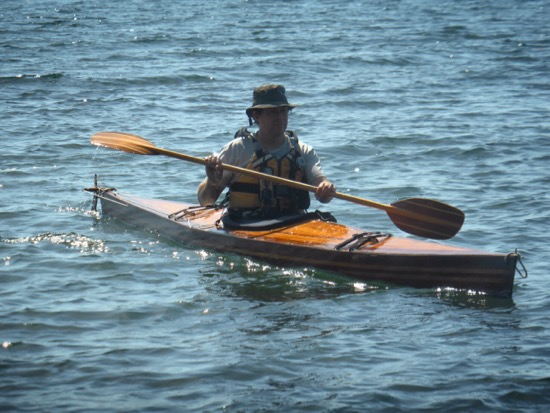
During my vacation a few weeks ago I took some time to get my first kayak out of the basement storage at my parents place in Maine and took it for a paddle. It was interesting to see that some of the things I still do, appeared on my first efforts.
In 1986 I had just graduated from college with a degree in Electrical Engineering. Unfortunately, that year, there was a sharp drop in engineering hiring and I graduated without a job lined up. Fortunately, I came up with a Plan B. I would build a kayak. A few years before, I had helped my brother Eric build a cedar strip canoe from Gil Gilpatricks Building a Strip Canoe, and I thought I could adapt the process to a kayak.
I had been paddling a used whitewater kayak I had picked up whlle in college. It was a fine boat, but after doing 20 mile ocean trip in it I learned some of its limitations. I liked whitewater, but I just didn't have a chance to do that much, I spent much more time on the ocean.
I had been reading about these things called "ocean kayaks" or "sea kayaks" in Small Boat Journal magazine. They sounded like just what I needed - a kayak designed to go out on the ocean. Being unemployed at the time, building my own kayak seemed like the logical way forward.
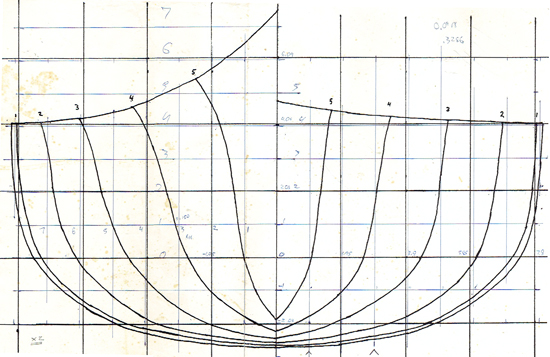 The problem was, I had never seen one in person. The best I could do is look at the pictures in and study what articles said about the things. Taking a large pad of paper my father brought home from the office (a pre-PowerPoint technology), I spread out on the dining room floor and started drawing. Lacking real drafting tools like french curves, I did most the work with a ruler. The final drawing required some scaling when I went to cut forms.
The result was the precursor to the Great Auk. It is 18 feet long and about 24 inches wide. I cut the forms out of some plywood my brother had kicking around in his basement. I wasn't sure how to deal with the deck, so I just started with hull forms. The deck forms ended up being just a few cross beams with one peak angle for the bow and another for the stern.
The local lumber yard, Miner and Alexander in New London, CT had clear pine and redwood in long lengths, with the redwood being the cheapest, so I one boards of each.
My brother had picked up a cheap craftsman benchtop table saw. It barely had enough power to cut the strips, but if we waited a few minutes before pressing the reset on the motor, we were able to mill the wood down to roughly 1/4" strips.

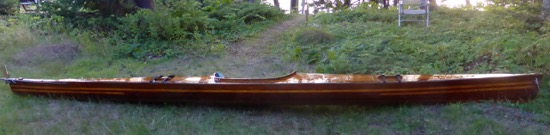
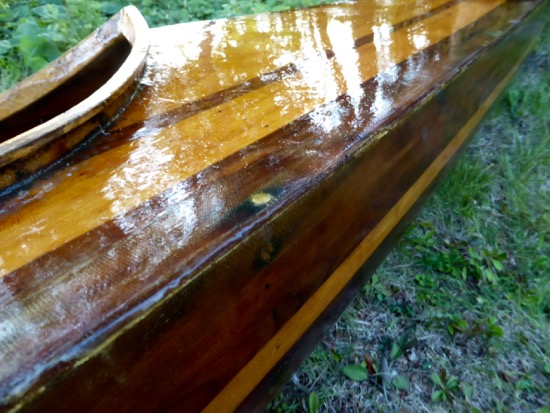
As I was stripping up the hull I thought some stripes would look cool, so I added a pine strip running full length, and then a couple short pine strips at either end to highlight the ends. I also figured it would look nice to have the bottom a contrasting color, so I did the sides of the hull in the redwood, made a transition with a pine strip followed by a redwood strip before changing to pine.

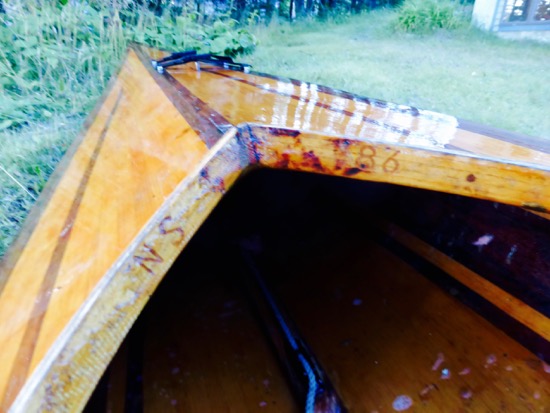
After settling on a simple "V" shaped deck, I needed a stripping pattern that fit the shape well. I started with a pair following the sheer and then put some redwood strips down either side of the centerline. I liked the look of the narrower strip down the center, but added a few more along the sheer. Eventually I switched to all pine finding that switching between following the centerline and the sheer line worked pretty well. but decided it could use another accent so I through another redwood strip into the mix.
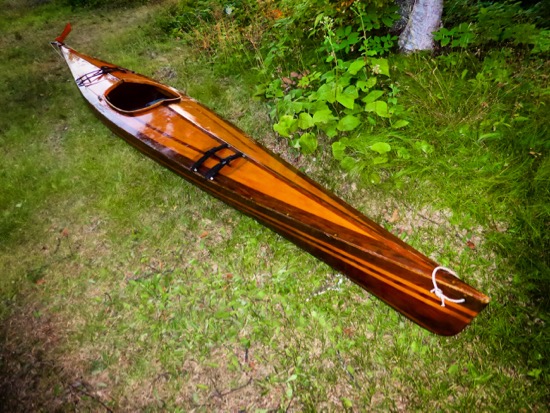
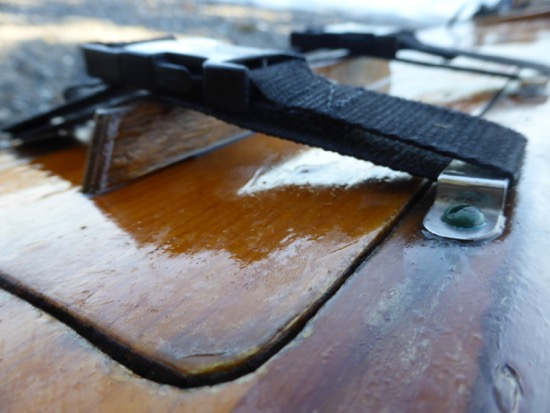
The Aquaterra Chinook had a bow hatch on one side of the deck. That made sense to me, so I incorporated that idea. I wasn't sure how to hold the hatches in place but found some straps with buckles at Highway Surplus in East Hartford, CT, made some stainless steel padeyes from some material Eric hand found at the local scrap yard and looped the straps through and across some mahogany bars to get some down pressure.
I used sheer clamps to secure the deck to the hull, using screws through the side of both the hull and deck to hold the wood in place.
The coaming fabricated from some bent ash, with the sprayskirt lip glued in place with Resorcinol. I don't remember steaming, but I probably did. I carved the date so I wouldn't forget.
I thought the kayak came out great. I launched into Little Naragansett Bay from the Barn Island boat ramp. I soon learned how easy it was to get a kayak in the water when all the big boats were waiting for the ramp to clear.
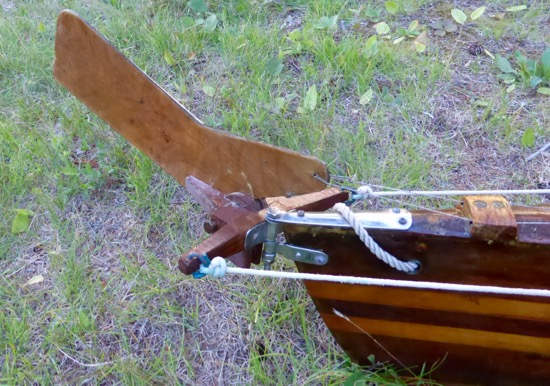
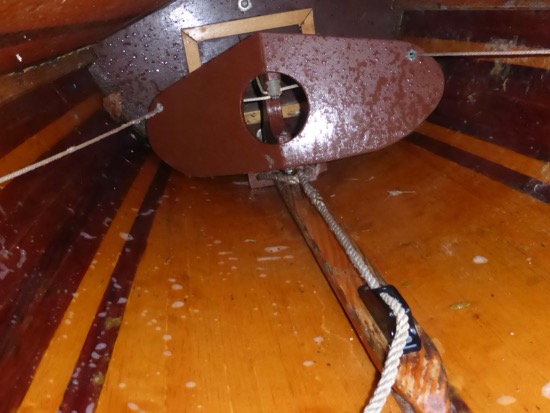
I had a little trouble turning the boat, so I fabricated a rudder for it and came up with a pivoting bulkhead idea for controlling it. The control was mounted on a T-Shaped rail with a rope through a jam cleat to hold it at the right place. Never having paddled another sea kayak, it seemed pretty successful.
By my current standards the finish is a bit rough, but it is 30 years old now and it is still sea worthy, so it was built well enough. The fiberglass and epoxy has protected the wood, I don't detect any rot. There is a bit of discoloration where the sheerclamp screw penetrate the epoxy barrier and let water into the wood. There are a couple cracks in the bottom where I originally mounted a molded fiberglass seat I had pulled off my whitewater boat.
I still use very similar stripping patterns. I like the dark sides and light bottom. While I tend to keep the deck dark now, I often alternate between following the centerline and the sheer line with strips and through a contrasting highlight strip in the mix part way into the final pattern.
The footbrace system I use on some of my newer kayaks is very similar to my first idea. When I don't just buy off-the-shelf footpegs, I make a "T" shaped rail with an angled bulkhead style foot brace.
I now avoid sheer clamps and screws to attach the deck. I prefer taping the inside seam with fiberglass as it is lighter, even if more difficult to install. I never returned to the half-hatch idea on the front deck, but it still has some merit for looking pretty clean. Straps to hold the hatch are still my default, but I try for a bit lower-profile bars for down-pressure.
Even with the rudder the design doesn't turn worth a damn. I addressed that when I created the Great Auk plans by making it shorter and increasing the rocker.


